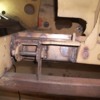
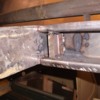
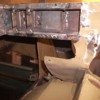
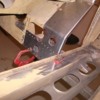
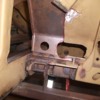
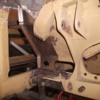
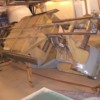
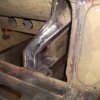
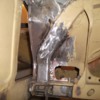
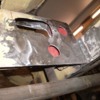
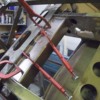
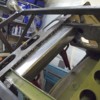
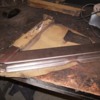
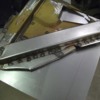
Mount finished and the car is back on the rotisserie
Kristian,
You are doing an amazing job. I must say, I hope you are patterning all of these parts because it almost looks like you'll be able to construct a Pantera unibody from scratch by the time you're done! Thanks for posting your progress. It is great to see everything in such detail, so well lit and photographed.
Mark
quote:you'll be able to construct a Pantera unibody from scratch
Ha, Ha! I think not
The only parts that were patterned are the outer rockers and inner b-pillars.
I'm actually almost done, now working on the last section of bodywork. I "just" need to finish the left front, re-mount the fenders and then the chassis is ready for the painter.
It's going to be the original Gr4 red - anyone know what color that was? Maybe the same orange-red that the ´71-72 production panteras recieved??
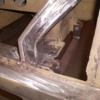
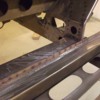
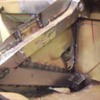
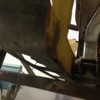
I decided to use the design of the early, early cars for the front box-structure reinforcement. This is one large bar, compared to the later smaller triangular pieces. This bar sits between the front a-arm mounts and also closes the box structure up somewhat, thus providing af stiffer and less flexphrone front subframe.
It's a true copy of the original design on #1267. I added several drains at the bottom. Here is the bar being fitted
It's a true copy of the original design on #1267. I added several drains at the bottom. Here is the bar being fitted
Attachments
Wow!
I love all your work. Your attention to detail is incredible. I'm curious,though, what do you do for a living? Are you a body man, engineer, mechanic, sheet metal worker?
I love all your work. Your attention to detail is incredible. I'm curious,though, what do you do for a living? Are you a body man, engineer, mechanic, sheet metal worker?
I have felt that front "box" would be subjected to the same abuse the rear member recieves from centerline floor jack lifting.
I don't know if it does given there are fewer reasons to lift the front end, but that is one area I would like reinforced during rebuild so it could be
I don't know if it does given there are fewer reasons to lift the front end, but that is one area I would like reinforced during rebuild so it could be
That's a great idea. I find the front easily gets as much lifting as the rear. The problem is, unlike the rear plate, it's much harder to get in there even with a super low floor jack.
In that area I removed my tie down tabs and set it up for removable eye bolts.


quote:Originally posted by Push1267:
OK, the decision has been made - it's going FIA racing !! The Cage is from Sassa in Italy and fully FIA certified.
was the roll cage expensive?
Is there any holes on the plate under the radiator that water can drain out through original?
I discovered a lot of "crap" on my car when I took it apart.
I'll make drain holes on mine. I begin with sheet metal work hopefully this weekend...
I discovered a lot of "crap" on my car when I took it apart.
I'll make drain holes on mine. I begin with sheet metal work hopefully this weekend...
Attachments
it is a lot of crap
Attachments
no wonder it rusts 
Attachments
Anders, the roll cage was 550 euro incl tax but excl shipping. Shipping was around 150 euro to denmark.
Most of us concerned about chassis rust drill 1/2" OD holes in the extreme bottom of both legs of the 'horse-shoe' stamping that supports the A-arms as well as 3 more in each main rear frame rail. Drilling the chin piece below the radiator is a good idea, but due to the shape of this piece and the 2 degree nose-down rake recommended, the hole placements needed is not at the back but about half-way forward in the curved area. Leaking OEM thermostats and hoses have ruined many of these parts (now reproduced by Johnny Woods in England).
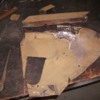
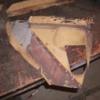
Removing the damaged support pieces.
These extra bars were actually added by Ford/detomaso after the first crash tests by ford - to protect against frontal impact and get the chassis to pass the impact tests. They are not present in the original design and fx #1267 does not have them. Thought about leaving them out for minor weight savings since they have no structural purpose in terms of chassis rigidity. In the end I left them there but did them in the thinnest sheet that I had.
Here I removed the damaged parts
Attachments
I enjoy watching your progress and approach. Nicely done - please keep sharing.
I was thinking holes in the box would look good, but be a lot of work...but I guess a "lot of work" is not a problem!
are they punched or cut?
are they punched or cut?
JFB, I'm not sure what box you mean, but yes, in the front, the factory Gr4s had holes stamped in the upper curved crossmember and the lower radiater support for fatique strength (and a little weight savings).
I thought about replicating this, however, since the structures are closed now, holes cannot be pressed/punched to create the edge thickening that is important for strength.
Drilling holes and then bending the hole edge may be possible using heat and a taper tool, maybe? Haven't figured out how.
I thought about replicating this, however, since the structures are closed now, holes cannot be pressed/punched to create the edge thickening that is important for strength.
Drilling holes and then bending the hole edge may be possible using heat and a taper tool, maybe? Haven't figured out how.
Add Reply
Sign In To Reply


