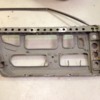
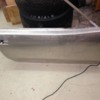
Fitting the fender. Fender has to come on and off many, many times to make sure everything aligns.
While you are doing that kind of metal work, here are some changes I found worth while.
1. Move the license plate frame up so the license plate fits:
http://www.rc-tech.net/pantera1/lp/lp.htm


2. I altered the decklid latch to use a standard latch found in every automotive hot rod vendor. With a regular pin there is no side to side movement of the deck lid:
http://www.rc-tech.net/pantera...latch/deck_latch.htm
3. I also welded over the rear button and actuated it with a bearclaw latch:

Put a cover over it to clean it up. It has since been painted:

1. Move the license plate frame up so the license plate fits:
http://www.rc-tech.net/pantera1/lp/lp.htm


2. I altered the decklid latch to use a standard latch found in every automotive hot rod vendor. With a regular pin there is no side to side movement of the deck lid:
http://www.rc-tech.net/pantera...latch/deck_latch.htm
3. I also welded over the rear button and actuated it with a bearclaw latch:

Put a cover over it to clean it up. It has since been painted:

Comp, I really like the mods you did to your car. Very inspiring.
However, for this car I'm trying to get as close as possible to the specs of the factory Gr4 cars, which means only certain chassis mods can be incorporated.
However, for this car I'm trying to get as close as possible to the specs of the factory Gr4 cars, which means only certain chassis mods can be incorporated.
I haven't posted on this thread for a while. That does however not mean that Work has stopped. I'll post the details later but here's the status of today.
The chassis is all together, everything aligned and set correctly. Almost all welds finished. Spend a lot of time hammer-fitting the fenders around the doors so they match the door skin as perfect as possible.
Next I'll pull the door skins from the doorframes and start work on fitting the aluminum door skins.
Attachments
As always Push.... lookin good. Glad to see one of us is still making progress.
Thanks Rob.
We need to see some progress-pics from over there in Michigan soon !!
We need to see some progress-pics from over there in Michigan soon !!
What a great thread! Thanks for all the detailed photos and info! Your work shows a fine eye for detail and great craftsmanship! Again Thanks for sharing with us that wish we had your talent! It definitely is inspiring.
OK, in the absence of progress on the chassis, I'll try and keep this thread alive with Pictures of a few parts I've aquired. Actually I got most of the leftovers from the Danish Team Witch Craft that developed and ran two panteras in the European GTC series from 2004 to 2008.
There's a lot of race stuff, including brakes, radiators, lightweight windshield, lots of ZF parts and special fibers parts.
Here are the brake calipers. They wen't through a lot of trouble (and Money) to get the permission from AP to reproduce a few sets of these AP Lockheed 8-piston Armadilo Calipers. They were homologated for the Pantera in '75 and are thus legal for use in FIA Historic competition. They are massive and according to the Team they gave them quite an advantage over the competition on brakes.
Attachments
They also designed their own radiator. This is a very tight fit in the chassis, actually I'll have to remove the headlight-bucket crossbar, to be able mount the radiator. The advantage is a much increased crosssection of the radiator core compared to fx the common Fluidyne. It's about 4 inches wider and 1-2 higher
Attachments
Those wheels and brakes are awesome....
Especially those wheels....
Rocky
Especially those wheels....
Rocky
Hey Man! I love those brake calipers. Got any more?
quote:Got any more?
Yes, I think so. But, be prepared to write a SERIOUS check !!
Chances are big Doug only wants more pictures of those calipers... 
quote:Originally posted by Kid:
Chances are big Doug only wants more pictures of those calipers...
Well as I said, I'm looking for something that does that job but fits the stock Campi wheels.
It is very difficult to beat the cost of the Wilwood's and there is an advantage to them in that you should be able to get parts for them for a bit longer.
I could use Kid's method of removing the excess metal that says Wilwood with a flat file then everyone would wonder.
Remember, I'm not bound by the "class rules" for vintage racing that you guys have there.
Those rules make it quite a bit more expensive to field a car when many of the original limited production parts of the time like the aluminum brake calipers need to be "reproduced".
Actually the Volvo R60 series brake calipers look like they are a good shot at adapting.
They're like Bud Light. "Taste good, less filling".
You can have his brakes, I'll "borrow" the wheels  Too bad I'll need to cut the car though....
Maybe I should wait to see what kind of engine goes in, and steal - uh...borrow - that instead :-)
Maybe I should wait to see what kind of engine goes in, and steal - uh...borrow - that instead :-)
quote:Originally posted by Push1267:
They are massive and according to the Team they gave them quite an advantage over the competition on brakes.
I believe that. The surface area of the brake pads is almost double that of the stock pads.
I was quoted $1900 for a front pair of the 18-4 aluminum "Girling" calipers but I doubt that they would fit the stock 8"x15" Campis.
The Aluminum Cobra/GT40/Mangusta calipers are available too but I don't see the point of spending that much money for single piston calipers.
Wilwood Ultralites are looking pretty good. 1/2 the price and fit the wheels. Like I said, "taste great, less filling".
These Allied's are sure pretty though. Too bad the brake dust is just going to eat them up alive?
Yes, I agree these calipers are primary for historic racing where you have to comply with regulations.
You can have several sets of Wilwoods for the price of one set of these Lockheeds !!
Below is another piece they developed - airintakes for the rear Windows. They bought the commen "ear-intakes" from the UIS vendors, and after deaming them "useless", they developed their own. They have two outlets, one for a closed airbox for the Webers, and the other for cooling of the fuel-tanks, one each side. I have the moulds for both intakes and airbox.
Attachments
quote:Maybe I should wait to see what kind of engine goes in, and steal - uh...borrow - that instead :-)
Well, I haven't gotten very far with the engine. Only thing I know for sure is that it has to be an iron head 351 C - and it will be dry sumped. FIA won't allow me to use alloy heads and block.
Just started looking into the placement of the motor - how far can I move it forward and how much can I lower it.
Too bad for me, good for you 
Won't be the engine I will steal, as I have my mind set of a an alloy block and heads :-)
Need to rob a bank first though...lol Might need a fast car for that - can I borrow yours when it is finished? ;-)
Won't be the engine I will steal, as I have my mind set of a an alloy block and heads :-)
Need to rob a bank first though...lol Might need a fast car for that - can I borrow yours when it is finished? ;-)
Hey Push... those ducts are some cool pieces.
Would it also be feasible then to use one of the duct tubes to run to the rear brakes..?? Do both sides have the dual tubes?
Would it also be feasible then to use one of the duct tubes to run to the rear brakes..?? Do both sides have the dual tubes?
Rob, both scoops have two ducts. I suppose one of the ducts could be used for cooling of the brakes, but I'm not sure airflow is effective enough along the sidescoops.
I do have seperate scoops they designed that sits underneath the car and direct air to the rear brakes. Same principle as the original Gr4 cars, but different design.
I've started on my aluminum doorskin project - just like the Gr4 cars had. Started on the driver side door by pulling the steel doorskin of a perfectly fine and rustfree door !! :-).
Attachments
The door skin need to be shaped to fit the doorframe, so don't attempt to mount these skins without access to a crimp/streatcher Tool. I did quite a bit of Work on the skin to make sure it would fit in the door opening and follow the contours of the fenders.
Here crimping the rear face of the skin.
Here crimping the rear face of the skin.
Attachments
Add Reply
Sign In To Reply


