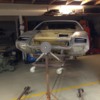
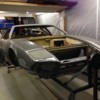
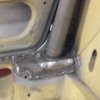
Gaps align nicely.
Tomorrow moving on to the other side !!
1Rocketship (Guest)
Did you clear coat the door to prevent/inhibit rust?
The door appears to be stainless steel!...Mark
The door appears to be stainless steel!...Mark
MAn, that is impressive!. You motivate me to want to tackle that!
Super work.
I usually don't want to comment on a thread if I can't add value, but your work really looks first class.
I love to see the craftsmanship in metal that we (often) see on this board.
Rocky
I usually don't want to comment on a thread if I can't add value, but your work really looks first class.
I love to see the craftsmanship in metal that we (often) see on this board.
Rocky
Push...as per usual....all I can say is "nicely done"!
Things are a little slow on the forum, so here are a few progress pictures of my gr4 project.
I decided to add a upper rigidity-bar and hope that it will comply with FIA rules. I've already added some smaller stiffening plates in the rear part of the chassis (see earlier in the thread), but this bar, in my view, is the most important bolt-on addition you can add to the chassis, basically preventing the shock towers from flexing under load and hard braking. In combination with the roll cage this should stiffen the rear up considerebly.
This is a piece from Hall.
Attachments
quote:Originally posted by Push1267:
Also added a few reinforcement plates to the rear mounts
Assembling my suspension parts again, I found out many of the mounts had different widths. Even worse, there was quite a variation in width of the new bushings I bought....duh. Had to have the grinder running overtime
as always Push.... lookin great!
quote:as always Push.... lookin great!
Thanks for the heads up. Things are going very slow at the moment.
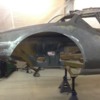
I did the flare mock-up some time ago. Here are the fitting of the rear flares with the suspension and wheels on.
There's beén some discussion over the quality of the fiber (and steel) flares. These are from Byars, and are very nice. They fit right on with almost no modification.
I did the flare mock-up some time ago. Here are the fitting of the rear flares with the suspension and wheels on.
There's beén some discussion over the quality of the fiber (and steel) flares. These are from Byars, and are very nice. They fit right on with almost no modification.
Attachments
High there, dont know if this is relevent, but on my car , a Gt 5 clone there are I think double the amount of holes, greets
Urbain
Urbain
Urbain. I know that different amount of rivits are used on different cars.
I'm simply adhering to what the factory did on the Gr4 cars, which was 15 rivits in the rear and 13 in the front (i.e.; above the line on the side of the car) with a spacing of 92 mm.
I'm simply adhering to what the factory did on the Gr4 cars, which was 15 rivits in the rear and 13 in the front (i.e.; above the line on the side of the car) with a spacing of 92 mm.
Congratulations! There are a number of flared-fender clones running around the world in which the original fenders are still inside, making the whole flare system of dubious worth. FWIW, I had the same awful feeling when I cut our '72's front trunk for a dropped battery....
Are you going to roll the cut edge to form a bit of a lip to stiffen things up?
Larry, that was my plan to begin with, but after cutting of the lips the fender hasn't lost much stiffness.
With the flares in place with the Clecos only, the fender is still stiffer than it was before cutting (the fiber flare are very stiff in it self), so I think I'll leave it alone.
I looked at the factory cars, and they were the same - no rolling of the edges.
With the flares in place with the Clecos only, the fender is still stiffer than it was before cutting (the fiber flare are very stiff in it self), so I think I'll leave it alone.
I looked at the factory cars, and they were the same - no rolling of the edges.
The flares was fitted with the Wheels on to make sure the Wheel was centered in the lip.
For some reason, the rear wheels are centered a Little towards ¨the rear from the factory. To correct this the Gr4 flare was squized i little and moved rearward (about an inch) where it meets the rocker panel.
For some reason, the rear wheels are centered a Little towards ¨the rear from the factory. To correct this the Gr4 flare was squized i little and moved rearward (about an inch) where it meets the rocker panel.
Attachments
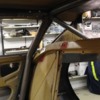
Also made progress on the Cage. Almost fully installed. It's from Sassa in Italy and fully FIA certified. It fits right in, but requires fabrication of attachment plates (such that it can be bolted in) and cutting and welding of the rear bars and the side bars.
Here it is installed.
Here it is installed.
Attachments
In typical fasion I tried getting as close to what the factory did to the original Gr4 cars - including how they did the attachment plates on the inner rockers. These are copies of the plates found in Les Grays factory Gr4 (thanks Ed Mendez for posting pictures of Les' car on facebook)
Sorry for the lousy quality - will take a better Picture NeXT time I'm in the workshop
Sorry for the lousy quality - will take a better Picture NeXT time I'm in the workshop
Attachments
Add Reply
Sign In To Reply


