Hi All.

I would like to start a thread about swapping to a new generation Ford 5.0

There seems to be a lot of discussion about it on this web site but not a lot of technical info shared. Soooo I would like to start openly sharing what I have found and ask others if they could also share their info.

I AM POSTING INFORMATION AS I DISCOVER IT. PLEASE TAKE IT WITH A GRAIN OF SALT. I HAVE NOT FINISHED THE INSTALL YET AND SOME INFO MAY NOT PLAY OUT AS I GET DEEPER INTO THE SWAP.

ENJOY! Thumbs Up!


Thanks To All.
Evan

Last edited by George P
Original Post

Replies sorted oldest to newest

Bought a bare block to start a mock up.

The new block is a full 3 in. shorter than the 351C block. The dimensions on the PDF file shows that the engine length to the end of the crank pulley is also a full 3 in shorter.
This is ignoring the A/C I have no idea how the A/C fits into a mustang.

The new block shares the pattern of some bell-housing bolts.
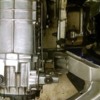
Here I have it bolted up just for kicks.
quote:
Originally posted by agustaboy:
Bought a bare block to start a mock up.

The new block is a full 3 in. shorter than the 351C block. The dimensions on the PDF file shows that the engine length to the end of the crank pulley is also a full 3 in shorter.
This is ignoring the A/C I have no idea how the A/C fits into a mustang.

The new block shares the pattern of some bell-housing bolts.
Here I have it bolted up just for kicks.

Attachments

Images (1)
  • photo
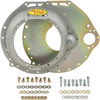
Bell Housing.

talked to Steve @ Panteras By Wilkinson

He sells Bell housings. Stock Modified Aluminum bell housings.

So moving forward again.
UPDATE. ALTHOUGH USING A STOCK BELLHOUSING (WITH MODIFICATION) IS AN OPTION I'VE DECIDED TO GO BACK TO MY INITIAL PLAN TO USE THE QUICK TIME / LAKEWOOD HOUSING. MOUNTING OF THE STARTER IS MUCH LESS TROUBLE THAT WAY.
Last edited by agustaboy
Sorry Evan. I must have got the last adapter bellhousing. Be aware that fully dressed the coyote is longer where the least clearance is available which is the phaser section of the heads. The rear of the heads is also flush with the bellhousing mounting face. This creates heavy interference both the inner fenders and the upper firewall. That being said, if you trim the inner fenders enough to mate the engine to the trans with it in the stock location there is tons of room between the balancer and the firewall. It would be tough to trim the inner fenders that far as you would be cutting directly into the control arm support brace. I would rather shift the whole works forward and just modify the firewall and axle openings.
quote:
Originally posted by PanteraTurbo:
if you trim the inner fenders enough to mate the engine to the trans with it in the stock location there is tons of room between the balancer and the firewall. It would be tough to trim the inner fenders that far as you would be cutting directly into the control arm support brace. I would rather shift the whole works forward and just modify the firewall and axle openings.

Attachments

Images (1)
  • sheet_metal_001
I do not remember Steve Wilkinson ever telling me that he had done a coyote swap. I believe I read on the POCA forum recently that Pantera Performance in Colorado was doing them. Doesn't hurt to ask Steve though. I am sure he could do the work. He has done a few modular motor swaps with a couple 5.4 swaps currently in progress at his shop. Those required "some" engine bay modifications for fitment. Smiler
Yes, Steve is over in Italy for the next three weeks getting a bunch of cool original parts for all kinds of DeTomasos. I thought he told me he has already sent two 40 foot containers state side from his last italian adventure earlier this summer, and now I'm sure he's on the hunt for anything else that he can sell that is NOS DeTomaso. Anyone requiring something cool should give him a ring, when he comes back to the States.

Mark
quote:
Originally posted by Bosswrench:
Agustaboy, if you can, weigh the assembly as it sits. I have weights for the modulars but not the Coyote. I expect around 525 lbs without a flywheel.


I will as soon as I get a bit more organized.

I plan on putting a Boss 302 intake on it and flipping it 180 Degrees. I can use the stock throttle body and save a few $$
Agustaboy - careful with that intake and packaging. I did some dimensional checks when I was considering this engine package.

I looked at a tall boss intake, but is was a rapid prototype as it was not released yet and it was packaged in the back of a different car at the time. I took some dimensions as best I could to transfer them to the Pantera.

I came up with the throttle body being about 7 inches behind the decklid. However, I don't think my measurement were 100% accurate. You guys also talked about moving the block forward a couple of inches too so that would help.

Take some measurements before buying that intake.
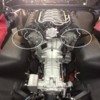
Well My initial test fit suggests there is a chance that setting the engine/Transaxle in it's
neutral position ( 0in offset ) is a possibility. I used a bubble level on the motor to set it plumb. Used the intake flange on the heads as my reference point and then checked that against the bottom of the block where the oil pan would bolt up.

Attachments

Images (1)
  • IMG_0470
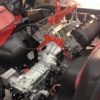
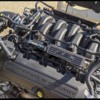
Here's a pic of the motor with a 3 deg. nose down attitude. The heads are close to touching but still with a hair of clearance 1/16 inch?

3 deg. is way more than you would want but I think neutral to 1.5 deg and you would still have adequate clearance to the inner fenders.

BY THE WAY I have No oil pan on this block so that has yet to be figured in.

Attachments

Images (1)
  • IMG_0474
Good point that I can't answer. Big, wide, tall engine that's heavy for its stock displacement! I would do whatever it takes to get that thing down as far as the frame would accept. Swap-shops cut and build box-reliefs into the back edge of Pantera inner rear fender wells for head clearance, and saw off unused lugs etc from heads where they interfere. This is needed especially for post-'80s Panteras because their square-edge inner fender panels seem a little larger than the smooth stamped ones used in '71-76 Panteras. I know of one GT5-S that needed boxes done for a pro 4.6 mod-motor conversion 15 years ago. Most of the extra tire/wheel width in wide-body cars is outboard so there is some room to do this. Changing plugs is easier than on a 351-C!
The real fit issues, (I.M.O.) are at the front at the firewall. If you want to start exploring this then you can learn a lot with just the block and the front cover.

I've cut the firewall so that it's symmetrical.
Extends as far on the drivers side as the passengers side. I have not changed the passenger side just the drivers.

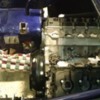
In this picture the engine is nose down about 1 Degree. I think I can avoid notching the top of the firewall if I set it at 1.5 Deg Down. It will be very close so....not holding my breath.

Attachments

Images (1)
  • IMG_0480
Last edited by agustaboy
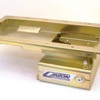
You could have them make a pan to fit the chassis. That one there is a mustang style. Those tanks will not fit between the frame rails.
All it entails is mating the Pantera 10qt pan to the Coyotte flange. Why dont you call them? They may have already done one for a customer?
Its going to be cheaper than cutting up that pan, making it fit, then sending it out to be coated?

Having used both the Canton and the Aviaid pans, my observation is that the finished product of the Canton is noticeably better on the Canton. It is also less expensive.

Given the choice between the two. I would take the Canton. There is no difference in the engineering designs of the pans.

The Armondo is the most expensive now. Higher cost of living on the border in Texas I guess? More ammo needed? Have to ask Perry about that? Big Grin
Last edited by panteradoug
The Coyote can be dry sumped but would require modification/removal of the stock oil pump.The remote filter adapters would work nicely for inlet feed. I plan to swap the dry sump system off of my old motor onto the Coyote. I am debating cnc machining a dry sump pan to suit my needs. The pan is very tight to the frame rails and may not allow typical side exit sump pickups. As far as I know Dan never finished his swap. I know he was selling parts from it. Not sure exactly what happened.
Flipping the intake 180 deg.

Thus far this is looking pretty easy to do.

There are a couple of minor modifications to do.

There are 2 tabs at the back of the manifold. They are just points to zip tie the wiring harness to. Clip them off. Also there are 2 alignment dowels molded into the bottom of the intake. Clip them off and trim flush. I also found it necessary to take a disk grinder to an area that was contacting the 90 deg. water neck. just a 1/32 trim. There should still be ample plastic wall thickness.

Attachments

Images (1)
  • IMG_0513
Urethane-insulated motor mounts in a Pantera are a bad idea. The heat coming off the headers will melt the urethane normally used, especially on the left side. Hall used to sell them and I've helped chisel a couple of mounts apart after open track events. The left side is particularly troublesome because the left mount needs to be taken apart in order to remove it from around the shift shaft. But when the urethane melts and flows like pudding around all the parts, the mount-halves cannot be easily separated. So you're left chiseling and hacking melted-and-resolidified urethane off while its under the header and behind the shift rod. No oxyacetylene torch was available or I'd have used it! I suggest synthetic rubber mount insulators. Urethane might work for Mustangs with different around-engine air flows but not Panteras. It does work on ZF mounts since the heat is far less there.
quote:
Originally posted by Bosswrench:
Urethane-insulated motor mounts in a Pantera are a bad idea. The heat coming off the headers will melt the urethane normally used, especially on the left side. Hall used to sell them and I've helped chisel a couple of mounts apart after open track events. The left side is particularly troublesome because the left mount needs to be taken apart in order to remove it from around the shift shaft. But when the urethane melts and flows like pudding around all the parts, the mount-halves cannot be easily separated. So you're left chiseling and hacking melted-and-resolidified urethane off while its under the header and behind the shift rod. No oxyacetylene torch was available or I'd have used it! I suggest synthetic rubber mount insulators. Urethane might work for Mustangs with different around-engine air flows but not Panteras. It does work on ZF mounts since the heat is far less there.


Do 180 headers where the tubes immediately curve up and away from the mounts. Big Grin
quote:
Originally posted by Bosswrench:
Urethane-insulated motor mounts in a Pantera are a bad idea. The heat coming off the headers will melt the urethane normally used, especially on the left side. Hall used to sell them and I've helped chisel a couple of mounts apart after open track events. The left side is particularly troublesome because the left mount needs to be taken apart in order to remove it from around the shift shaft. But when the urethane melts and flows like pudding around all the parts, the mount-halves cannot be easily separated. So you're left chiseling and hacking melted-and-resolidified urethane off while its under the header and behind the shift rod. No oxyacetylene torch was available or I'd have used it! I suggest synthetic rubber mount insulators. Urethane might work for Mustangs with different around-engine air flows but not Panteras. It does work on ZF mounts since the heat is far less there.


Ah good to know thanks.

Going to use a cable shifter to simplify fit issues.

180 headers are a plan for next year but I've got an "almost off the shelf" header that I'm looking at. I'll post it if it works.
I will wrap them and work in some sort of heat shield for the mounts.
quote:
I'm thinking of using some square tubing and welding it in like this paper mock up I have here.

Good, creative thinking.

I do however think it may require some serious revamping (or new fabrication) of the wheel house brace bar which appears to have its effectiveness (in anchoring the suspension and shock mounts) diminished by your modification.

Do you have something already in mind to keep the suspension anchor points well located, or am I not reading your photos correctly?

How much of the wheelhouse (inner fenders) are you intending to remove?

Confused
quote:
Originally posted by desert_detomaso:
quote:
I'm thinking of using some square tubing and welding it in like this paper mock up I have here.

Good, creative thinking.

I do however think it may require some serious revamping (or new fabrication) of the wheel house brace bar which appears to have its effectiveness (in anchoring the suspension and shock mounts) diminished by your modification.

Do you have something already in mind to keep the suspension anchor points well located, or am I not reading your photos correctly?

How much of the wheelhouse (inner fenders) are you intending to remove?

Confused


It may be possible to use the engine as the mount for the suspension. Formula 1 and Indy cars have done this successfully.
agustaboy, depending on how much interference you are expecting to the inner fender housing there are a couple simple tricks to move the engine and transaxle forward to consider that may be preferable to cutting into the chassis structure.

If you only need approximately 3/4" you can bend the tranny mounts into an "S" shape. This is typically done to move the transaxle aft, but I don't see why it couldn't be used to move it forward. If you need more than that you may need to fab new trans mounts. Ford Big Block swaps typically move the transaxle ~3" from neutral; I have not heard of problems with this amount of misalignment, but I would expect increased U-joint friction and stress with increasing misalignment.

You may also be able to move just the engine forward by putting a spacer between the bellhousing and engine. I have seen approximately 1" (?) thick adapters used with engine swaps. I am also using a QuickTime bellhousing and found it preferable to use a hydraulic throwout bearing rather than fabricating the clutch actuator slave mount.

For clearance up front I fabricated an alternator/AC mount and used an aftermarket pulley to suck these accessories as close as possible to the engine. I also used an electric water pump, mounted behind the radiator. I added 1/4" thick wooden strips (and longer bolts) to space-out the firewall access door.

Every Ford Big Block conversion that I have seen cuts into the wheel house structure, like you are planning. By using a few tricks I was able to keep the structure unmodified and fit the much longer/larger Big Block with the transaxle in the "stock" location.

Thank you for posting your project. It is fun to see your work and problem-solving.

Matt
Thanks Scott. Got the cable shiftier. WOW looks great Leather covered too!!!!! Going to need some of your CV Shafts soon as well.

NOTE To Everyone. If you are going to do a Coyote swap, making modifications to the stock shifting mechanism is probably a must. I want to set my engine as low in the chassis as I can so I decided getting one of these cable shifers from Scott @ sacc restorations was the solution for me.

Attachments

Images (1)
  • IMG_0661
quote:
Originally posted by PanteraTurbo:
When I originally put it in I had to drop it into the bay till the engine was sitting above the fender wells on a rolling cart. I then disconnected the hoist and rolled the engine forward into position. Then I lifted the car up on the vehicle hoist. I didnt have the bellhousing at the time.


Having a bare block and heads to work with has really made it easy to this point.
Trans bolted to bellhousing and block, no fly wheel, no clutch and no engine internals.

Ive had the motor/Trans in and out of the car about 6 times now. Solo! Putting the fully dressed motor in was a real work out. Phew!!! Embarrassed
quote:
Originally posted by agustaboy:
quote:
Originally posted by PanteraTurbo:
When I originally put it in I had to drop it into the bay till the engine was sitting above the fender wells on a rolling cart. I then disconnected the hoist and rolled the engine forward into position. Then I lifted the car up on the vehicle hoist. I didnt have the bellhousing at the time.


Having a bare block and heads to work with has really made it easy to this point.
Trans bolted to bellhousing and block, no fly wheel, no clutch and no engine internals.

Ive had the motor/Trans in and out of the car about 6 times now. Solo! Putting the fully dressed motor in was a real work out. Phew!!! Embarrassed


Now you are the expert. Now we will come to you for help. "Show me again how it goes is please?" Big Grin
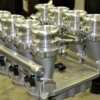
You might want to talk to Autotrend EFI in NorCal (http://www.autotrendefi.com/). They're installing, setting-up and dyno tuning that exact manifold right now, on a Coyote, in a Cobra. Autotrend is an EFI set-up and tuning shop that specializes in IR intakes and custom EFI wiring harnesses.

What are you using for an ECU? The Holley Dominator seems to be the current "state-of-the-art" for V8 IR applications.
Guys,

I am probably going the Dominator route as my buddy has years of experience with it and I am not going 5.0L.

However, just last night I read an article of a standalone ECU for the Coyote by AEM. This is in the May 2015 issue of Muscle Mustangs and Fast Fords page 49 and goes on for 7 pages.

Seems capable being able to control the Ti-VCT, DBW TB, 200 Mhz processor, data logging at 1 KHz, think they said traction control, etc.

It uses the controls pack wiring harness for the interface.

No idea of cost, but it might be something interesting to consider.
The AEM is a good choice. It has a great feature set and with its plug and play capability it is easy. I took the training course at AEM and can say the software is not the most user friendly. You really need to find someone familiar with the software. It is aso only plug and play for the crate motor harness setup although they plan to launch one later to cover other configurations. Keep in mind that with all of these ECU's you need to prepare to spend a little extra for the little things like ignitors, relays and other incedentals.
Something else to keep in mind is that with traction control you will need a non-driven wheel speed as well as a driven wheel speed. The driven wheel speed is as easy as installing an electronic sender onto the trans. The non-driven will require a reluctor and pickup to be installed on one of the front hubs. Not entirely difficult but will take some engineering.
Blaine,

Holley uses a Davis Technologies module for Traction Control. It works differently than conventional traction control systems that compare non-driven wheel speed vs. driven wheel speed. The Holley (Davis) T.C. system only monitors engine RPM. It's a self learning system that figures out the rate of RPM increase in a traction vs. a no traction situation. According to Holley, the system is really only suited to drag racing applications as opposed to street and/or road racing applications.
quote:
Originally posted by PanteraDoug:
Obscene! Filthy!


I like to think of it as.

"Naughty but Nice."
Embarrassed

BTW

I decided to pump up the motor and have it Red line at 8,000 RPM so I bought a brand new crate motor with all the Bad Ass Forged internals "Boss" valve train etc.
M-6007-A50NA
If anyone is looking for a low mileage Mustang motor I will be selling my 20K mi. engine soon.

http://fordperformanceracingpa...p?PartKeyField=13113
quote:
Originally posted by agustaboy:
OK Off to the engine tuner for a dyno run.


Well I guess this thing is really getting some attention.
At the tuners next week. Reps from Borla and Holley will be present. Apparently this thing has the 1st and newest engine management system from Holley. fingers crossed they have it all sorted out and correct.
Evan, "glitches"? Interface issues? It sounds to me like you need help from someone who has specific expertise with I.R. intakes. Even better, someone who also knows Holley EFI systems. If your problem doesn't get resolved quickly and to your satisfaction, call Holley directly and ask to be referred to one of their dealers who specializes in Ford V-8's and I.R. intakes. I'd be nervous that Borla referred you to MMR because they buy lots of Borla stuff; not because MMR knows Holley EFI and I.R. intake systems better than anyone else.
quote:
Originally posted by David_Nunn:
Evan, "glitches"? Interface issues? It sounds to me like you need help from someone who has specific expertise with I.R. intakes. Even better, someone who also knows Holley EFI systems. If your problem doesn't get resolved quickly and to your satisfaction, call Holley directly and ask to be referred to one of their dealers who specializes in Ford V-8's and I.R. intakes. I'd be nervous that Borla referred you to MMR because they buy lots of Borla stuff; not because MMR knows Holley EFI and I.R. intake systems better than anyone else.


The engine is just down the street from Holley and Borla.
The people working through the issues are reps from Holley and Borla. This system is the newest fuel management system from holley. It will be debuted this year at SEMA
I have serial #0000001
I hate being the guinea pig.
Confused
OK FINALLY SOME MOVEMENT ON THIS AGAIN.

TALKED WITH PANTERAS BY WILLKINSON AND HE DIRECTED ME TO CENTERFORCE FOR A CLUTCH/PRESSURE PLATE AND FLYWHEEL COMBINATION.
HE ALSO VERIFIED THAT IF YOU MOVE THE TRANS FROM THE STOCK POSITION (1.5in REARWARD) THAT CHANGING TO 911
CV SHAFTS IS A GOOD IDEA SO I HAVE A SET ON ORDER FROM SCOTT AT SACC RESTORATIONS.

THE CLUTCH PRESSURE PLATE AND FLYWHEEL ARE COMING FROM SUMITT.
CENTERFORCE PT#
Flywheel part# 700205
Pressure plate, disc part# DF800075

THESE STATE THAT THEY ARE FOR A 4.6 BUT WILL ALSO BOLT UP TO THE 5.0 COYOTE.
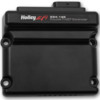
For people doing Coyote engine swaps; I see Holley now offers variable cam timing controllers:

"Holley EFI Coyote Twin Independent Variable Cam Timing Control unlocks the full power potential of high-revving 2011-14 Ford Coyote engines. Ideal for both crate engines and/or used Coyotes with locked cams, they're compatible with both Holley HP and Dominator EFI. They feature integrated stock cam position tables that eliminate tuning guesswork and deliver optimal driveability and maximum power right out of the box. At 3,700 RPM, they unleash more than 90 additional foot-pounds of torque. The main harnesses are terminated with ford TPS and IAC connectors that make it easy to convert from a drive-by-wire throttle body to a manual throttle body, and four built-in diagnostic LEDs make troubleshooting a snap if there's a cam- or crank-sensor failure.

Holley EFI Plug and Play Coyote Ti-VCT Control Module main harnesses include a power tap connector and grounds for adding additional sensors or actuators and CAN bus communication for the Holley EFI ECU for high speed data transfer and diagnostics. Also available are a plug-and-play main harness for 2011-14 Coyote engines with stock cam shafts and stock coils (part number 558-110) and a plug-and-play main harness for stock cams and Holley EFI coils (part number 558-122). If an external map sensor is required, use the available 2-bar MAP sensor (part number 538-13) ."

Attachments

Images (1)
  • Holley

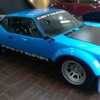
A friend and fellow Pantera owner who builds and races Panteras has installed several Coyote engines in Panteras. Fantastic fit, seemingly easy conversion if you know how. Maybe you know him, if not, name is Ron McCall out of Maryland. possibly he can provide additional advice to anyone that's interested, or build one for you. Try rfmaccall@comcast.net. The image is of the car he races. 200 mph car.

Attachments

Images (1)
  • ron McCall car

I'm curious to hear how the Voodoo motor feels in the Pantera. I know it will sound incredible! You may want to look into adapting the Shelby GT350's "Voodoo" engine mounts. I understand they are quite a bit different than the Mustang's engine mounts, as they need to contain the vibration that's inherent in the Voodoo motor. 

Add Reply

Post
×
×
×
×
Link copied to your clipboard.
×