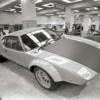
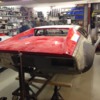
Those flares seem to fit extremely well. Where did they come from?
Your work looks amazing!! Really appreciate you keeping us up to date on your work. What a great journey.
A funny story about the fender flares on group4 cars. My red car was a Hall Super Pantera with all steel flares. I had wanted one of the big air dams for the front, so ordered one from Bob Byars. When it came in Les Gray and I were looking at it and there was no way it would fit my car or flares. We put it up to his car and the same thing. We then took one of his front air dam from his group4 race car and Put it up to my car and it fit perfectly. We were wondering what was going on. So we looked at a couple of other Panteras that had put on the group4 flares and it fit their car great. We couldn't figure out what the difference was. Then at a car show right after that we had about 3 or 4 group4 cars there and Les looks over at my car and then theirs and realizes that they had their flares on backwards. Next time you are at an event with a lot of group4 panteras take a look.
A funny story about the fender flares on group4 cars. My red car was a Hall Super Pantera with all steel flares. I had wanted one of the big air dams for the front, so ordered one from Bob Byars. When it came in Les Gray and I were looking at it and there was no way it would fit my car or flares. We put it up to his car and the same thing. We then took one of his front air dam from his group4 race car and Put it up to my car and it fit perfectly. We were wondering what was going on. So we looked at a couple of other Panteras that had put on the group4 flares and it fit their car great. We couldn't figure out what the difference was. Then at a car show right after that we had about 3 or 4 group4 cars there and Les looks over at my car and then theirs and realizes that they had their flares on backwards. Next time you are at an event with a lot of group4 panteras take a look.
I built an air dam out of aluminum to fit. It was not as hard as I expected it to be.
http://www.rc-tech.net/pantera1/airdam/ad.htm
http://www.rc-tech.net/pantera1/airdam/ad.htm
You presume that everyone is sane, would go to a Pantera vendor or at least copy a Pantera flare.
There are a number of Pantera owners I have come across that do not qualify on not even one of those accounts?
I've heard of using VW flares on these things.
Do not tell these people they are cutting their nose off to spite their face. They will go out and do it just because they can.
There are a number of Pantera owners I have come across that do not qualify on not even one of those accounts?
I've heard of using VW flares on these things.
Do not tell these people they are cutting their nose off to spite their face. They will go out and do it just because they can.
Comp2, great build on that aluminum air dam. I do not have half the talent.
Push1267, the air dam was from Bob Byars and I delivered it back to him personally along with my car because Don and Bob were putting new seats in my car and a few other things, but the fiberglass air dam was inches away from connecting to my flares and they saw it. And another interesting fact, Les gray, Bob Byars, and Don Byars all worked at Hall Pantera and helped build my car. Back then it was being built for Oliver Ring who is LLoyds partner in the ZF business and makes most of the gears and parts that LLoyd sells.
Push1267, the air dam was from Bob Byars and I delivered it back to him personally along with my car because Don and Bob were putting new seats in my car and a few other things, but the fiberglass air dam was inches away from connecting to my flares and they saw it. And another interesting fact, Les gray, Bob Byars, and Don Byars all worked at Hall Pantera and helped build my car. Back then it was being built for Oliver Ring who is LLoyds partner in the ZF business and makes most of the gears and parts that LLoyd sells.
I think you are right, if some one bought the fiberglass group4 kit I do not think they could get the flares on the backwards. What I think happened was that when they made the mold they made them backwards. On the factory group4 the flares are wider in the front and narrower behind the wheel. But when you look at the car it is narrower in front and gets wider in back. So at some point someone thought the flares should go that way. By the way this was 8 years ago and may have been fixed back then. I really do not know.
BTW I love all the metal work you have done. The cars is amazing.
BTW I love all the metal work you have done. The cars is amazing.
On the front flares wouldn't that simply mean that the left side is on the right and right on the left?
Yes for the most part
quote:Originally posted by Rapid:
Comp2, great build on that aluminum air dam. I do not have half the talent.
I didn't think I did either.
quote:I didn't think I did either.
You guys kill me - in a good way.
All these threads are an inspiration to Pantera owners everywhere. You guys are showing us the "state of the art", the "art of the possible".
It's great to see the good work that is showcased here. All these threads encourage people like me to stretch a little bit, and see what WE can do.
Keep up the great work, and keep posting pictures. That's what this site is all about.
Rocky -
That is a really a great look. But so far yours is a killer - especially with those fantastic wheels! Excellent work. Can't wait to see more pics.
Yup, those are installed correctly.
Just a small update on the Progress on the Gr4 car. Dragged the body outside the other day to mediablast the chassis seams in preparation for seam welding.
Then spend a few nights seam welding the most stressed areas of the chassis - maybe 50-60 % of the seams all together
Then spend a few nights seam welding the most stressed areas of the chassis - maybe 50-60 % of the seams all together
Attachments
To replicate the original Gr4 cars I also decided to fit a flat decklid instead of the original ridged lid.
IMO the flat deck also gives the car a cleaner look.
Actually had to fit 2 decks, one in steel and one in fiberglass such that I 'll have the option to use the lighter fiber deck when the rules permits.
Here's a shot of the steel deck
IMO the flat deck also gives the car a cleaner look.
Actually had to fit 2 decks, one in steel and one in fiberglass such that I 'll have the option to use the lighter fiber deck when the rules permits.
Here's a shot of the steel deck
Attachments
hey Push,
Haven't checked in for a while... Just went through 4 pages of your progress... Fantastic. Cutting the fenders had to be torture! Measure 21 times, move them a mm, measure another 12 times...stare at it for 20 minutes. Cut it in 3.5 minutes. Go vomit. Anyway..it looks Those steam rollers out back look awesome.
Keep up the great work man. Really fantastic.
Haven't checked in for a while... Just went through 4 pages of your progress... Fantastic. Cutting the fenders had to be torture! Measure 21 times, move them a mm, measure another 12 times...stare at it for 20 minutes. Cut it in 3.5 minutes. Go vomit. Anyway..it looks
Keep up the great work man. Really fantastic.
Yes, these things take time (atleast for me). It may have taken weeks from when I first decided to cut the fenders until I actually did the cutting. Thinking, measuring, thinking .....
Meanwhile, I'm slowly continuing my efforts to replicate as many of the factory Gr4 mods.
Here I started doing the panel strengthening of the inner rockers by flaring holes. Studied a lot of Pictures of original Gr4 cars, and interestingly, the holes placement and size seem to vary a little from car to car. Apparently this was done by hand at the factory - I ended up somewhere in between.
Attachments
Amazing attention to detail! Thanks for posting the incredible pictures! How do your window scoops/air ducts fit with the roll cage rear bars?
Ron
Ron
How much weight do you think the "lightening holes" save?
A while back I talked to Jerry ap PIM. The area you put lightening holes in the chassis below the door is an area he routinely adds a plate od steel to. A friend of his was killed in a crash and he said the lower panel there was the failure point.
Can you provide a photo of the failure point?
quote:The area you put lightening holes in the chassis below the door
Yes, I would like to see the failure point as well.
The holes are actually NOT for lightening (although that is a nice sideeffect) - once the holes have been flared/swaged they stiffen the plate up considerable, that was the reason the factory did it, and the reason I did it too (and for looks ofcourse).
The weak point of the chassis is the lower B-post area. I would assume this would be the area Jerry is referring too. This area is often (almost always) rusty on Panteras that has seen real world driving and rust in this area will weaken the chassis considerable.
I reinforced this area (if you go waaaay back in this thread you can see how) AND the roll cage will support this part of the chassis somewhat more. In addition I seamwelded the seams between the inner and center rocker a long the entire length.
BUT, by no Means a pantera is a safe car :-(.
quote:How much weight do you think the "lightening holes" save?
Less than a kilo (!!!!) but, as mentioned, the holes primary function is not lightening.
quote:Amazing attention to detail! Thanks for posting the incredible pictures! How do your window scoops/air ducts fit with the roll cage rear bars?
Thanks Ron. I could say the same of your Work. The scoop ducts (there are two in each side) fit right around the rear tower bar. I did weld in the bar such that it would just clear both ducts.
I have some friends that help out in high school robotics clubs that compete regionally and nationally. The have weight limits. They learned quickly you just can't drill enough holes to substantially reduce weight. Looks cool though. ;-)
quote:Originally posted by Push1267:quote:The area you put lightening holes in the chassis below the door
Yes, I would like to see the failure point as well.
The holes are actually NOT for lightening (although that is a nice sideeffect) - once the holes have been flared/swaged they stiffen the plate up considerable, that was the reason the factory did it, and the reason I did it too (and for looks ofcourse).
The weak point of the chassis is the lower B-post area. I would assume this would be the area Jerry is referring too. This area is often (almost always) rusty on Panteras that has seen real world driving and rust in this area will weaken the chassis considerable.
I my car I reinforced this area (if you go waaaay back in this thread you can see how) AND the roll cage will support this part of the chassis somewhat more. In addition I seamwelded the seams between the inner and center rocker a long the entire length.
BUT, by no Means a pantera is a safe car :-(.
When Hall was building the "T-top" car and trying to stiffen the chassis enough to make the roof panels not squeak, he inserted at first a roll cage tube, then a lightened extrusion through the rocker panels on each side.
They bolted to the inner fender wells and the bottom of the roll bar.
Working on the last details before the chassis is send out for paint.
Here's an example of how one project creates another one.
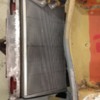
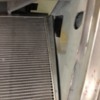
I got two of these specially build race radiators, designed specifically for the Pantera by Aquila Racecars. They have a much larger radiator crosssection than other radiators available on the market. Therefore is's a very tight fit.
Here's an example of how one project creates another one.
I got two of these specially build race radiators, designed specifically for the Pantera by Aquila Racecars. They have a much larger radiator crosssection than other radiators available on the market. Therefore is's a very tight fit.
Attachments
This tight!
This create two issues
1) If I wan't to keep the headlight buckets, I will have to make the headlight bucket raising bar removable as the radiator won't go in-and-out of the chassis with the bar in place.
and
2) I can't use the electrical raising mechanism (which I didn't intend to in the first place)
The easy solution would be to junk the entire bucket raising mechanism and replace it with fixed headlights under a plexiglass cover. However, the factory cars retained the buckets, Thus in keeping with the relica/tribute theme of the build, I have to take a direction where I keep the buckets.
Attachments
One solution is to make a bar that can be separated in the middle with the bucket brackets bolted to the bar in the housing opening. This way the bar can be removed and the radiator installed/removed.
I made the bar in aluminum, saving a couple of pounds too
I made the bar in aluminum, saving a couple of pounds too
Attachments
Maybe rise the lamps whit a BMW 8 series or Pontiac Fiero system
The 69-70-71 Opel GT had a cable operated manual system.
There's a GT5 in Norway that uses the Miata 2-motor system (similar to a 914 Porsche), and a recent one in the POCA magazine that uses a street-rod linear actuator. This setup raises both lights simultaneously using a bar & lever.
Thanks for all the suggestions. However, as this car is going to see use mostly as a racecar I think I'll look for a more simple solution - and light weight. After all, it's very rare that the headlights are used.
Probably, I'll just remove the electric motor and keep the bracket with the gear such that I can raise the buckets manually. I'll need to trim the bracket to clear the radiator, but the gear should be possible to retain. I have a couple of complete spare gear/motor assemplies that I can play with.
Probably, I'll just remove the electric motor and keep the bracket with the gear such that I can raise the buckets manually. I'll need to trim the bracket to clear the radiator, but the gear should be possible to retain. I have a couple of complete spare gear/motor assemplies that I can play with.
Single-headlight Mangustas used a lever on the floor with (I think) a bowden cable system.
Hi Kristian, I have used these ones with success on various projects. Beauty is they are light, strong and has internal electrical limit Switches at both fully extended and retracted. So that it can be operated with a standard reversing 2 position toggle Switch.
http://www.ebay.de/itm/Linear-...t0l93SGClVhHQX0Zd4Xg
They come with various length and power and would be suitable to fit below one of the Buckets for a totally concealed installation.
best
Jan
http://www.ebay.de/itm/Linear-...t0l93SGClVhHQX0Zd4Xg
They come with various length and power and would be suitable to fit below one of the Buckets for a totally concealed installation.
best
Jan
Attachments
That should Work. Thanks for the tip, Jan. Looks very easy to adapt and the lightest version is only 700 grams - great.
See you soon
See you soon
I see that they are "Rated to IP64, suitable for washing and most outdoor use" so that's good. Seems like at least one adjustable limit switch would be needed as adjusting both the down and up positions with mechanical geometry might be quite difficult.
Add Reply
Sign In To Reply


