I know this subject has been beaten to death in the past, but lots of us still have gear engagement problems.
I have a standard 3 finger McLeod clutch, pantera spinner, new slave and master from Roland Jaekel, new release bearing and new flywheel bronze bush
but only with the clutch fingers touching the release bearing without free play can I engage
first relatively easily.
I read today that the clutch pedal should be half an inch higher than the brake pedal. mine is not its level with the brake.

I must be doing something wrong? I also hear that a longer throw slave cyl is sometimes required. I also hear that it isn't required.

I hear that therapy may help a very confused old Git, Pantera refurber. Help welcome.
Original Post

Replies sorted oldest to newest

I am just a “student” and have yet to have any real experience with this clutch , but looking forward to it.

From what I have gathered from my “engineering” point of view;

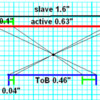
The OEM master cylinder is a 0.75” diameter with a 1.125” stroke. Thus about 0.5 cubic inches of fluid transfer

The OEM slave cylinder is a 1” diameter with a 1.625” stroke. With the 0.5ci from the MC going full stroke, the slave active stroke is only 0.63”.

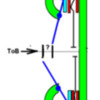
The slave to ToB lever ratio is such that the total TOB travel is 0.46”. thus the clutch compression mercal spring, plus the initial over travel to touch fingers (0.06") and the over travel to ensure disengaged (0.04")must be less than that stroke

Attachments

Images (1)
  • clutch
Peter, there are constant-contact throwout bearings that are designed to have long life with the throwout bearing adjusted to always touch the clutch release fingers. The real problem is, the Pantera clutch mechanism was designed with barely-adequate clearances in the whole system when brand-new. Wear, tiny leaks, non-stock parts or even using soft flex-hoses that expand under pressure may cause clutch-drag.

FYI, the clutch pedal position is adjustable by slightly varying the master cylinder rod length up under the dash. This is NOT a fun job!
Posted previously:
quote:
FWIW, here’s a summary of how to adjust the clutch on the Pantera. Being used to automatic transmissions for decades, it was a new and complicated world that opened up to me when I bought a Pantera with a hydraulic clutch and especially how to adjust it. Having bought all the literature I soon found inconsistencies. I’ve read many sources including the Instruction Manual, the TSB, PanteraPlace and others. And they were quite different. I think now I finally understand how to do it, and if it can help others, below is the short simple (?) method I’ve used

First, the basics have to be right: A good master, slave, pipe and line. And a proper Pantera clutch, not just a Mustang clutch. Some recommends a long-throw slave, and that will make getting the right adjustment easier. But it’ll also increase clutch pedal effort, something you don’t want (except if you want to discourage the wife from driving Wink). And the fluid has to be free of air.

1. Master: pedal should be adjusted so at rest it’s between 0-½” closer to the driver than the brake pedal. Then test with a friend that with the pedal fully pressed down, there should be at least ½” gap to the firewall/carpet
2. Clutch axle arm: the almost vertical arm from the ZF to the slave rod end. Imagine a straight line from the clutch axle on the ZF up to where the clevis pin is. That line should be 90 degrees towards the slave. Ideally it should be 90 degrees when the clutch pedal is half pressed down. Any other angle will result in that the slave rod movement translates into less movement of the clutch axle. Maybe you should move it a notch? Also check that there’s free movement, when the clutch pedal is fully depressed, does the arm or the bolt/nut perhaps rub on the ZF? And get a proper size clevis pin, previous owner had just used a bolt that was 0.3mm less in diameter
3. Slave return bolt: Temporarily remove the spring. Use your hands or a tool to move the clutch axle arm rearwards, and feel for when it hits the resistance of the clutch. Should be easy to feel. While holding the arm in that position, turn the screw so that it almost touches the bracket, leaving a 2mm gap. This will ensure that a. there’s no wear on the clutch release bearing when the pedal is not pressed down, and b. that you get as much movement of the clutch as possible. Reinstall the spring
4. Slave rod: Some suggest that the rod is used to position the resting position of the clutch axle arm and that the return bolt should be thrown away. And some say this is not good, because the slave should not bottom out. I think the best is to use the return bolt as described in 3., and then adjust for almost maximum slave piston travel on the rod. Almost, so with no bottoming out. With the system at rest, take out the clevis pin and by hand press the slave rod all the way up in the slave. And then release 1mm. Do the holes now align so the clevis can be put back in? If not, adjust the length of the slave rod, so that they do

With all this done, you should have a clutch that neither slips nor grinds teeth. And of course you must press the clutch pedal all the way down every time. Happy shifting!
quote:
Originally posted by Bosswrench:
Peter, there are constant-contact throwout bearings that are designed to have long life with the throwout bearing adjusted to always touch the clutch release fingers. The real problem is, the Pantera clutch mechanism was designed with barely-adequate clearances in the whole system when brand-new. Wear, tiny leaks, non-stock parts or even using soft flex-hoses that expand under pressure may cause clutch-drag.

FYI, the clutch pedal position is adjustable by slightly varying the master cylinder rod length up under the dash. This is NOT a fun job!


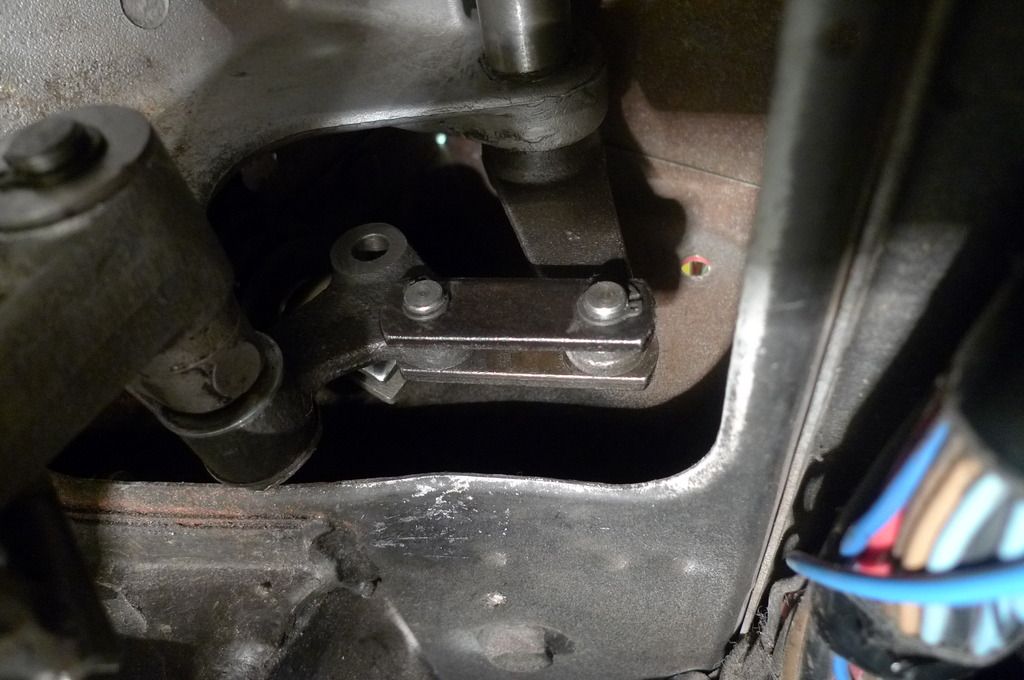
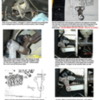
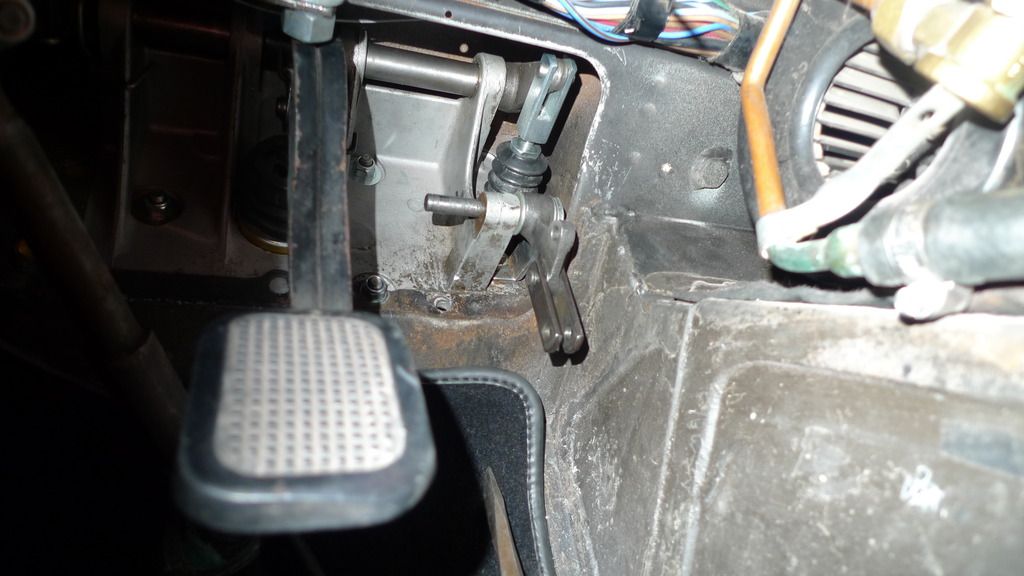
Please look at the pic, I have removed the master cyl rod but it is mechanically impossible to adjust the rod to make the pedal any higher.

It is retained by the linkage, also with a bit too much adjustment the pedal can then attempt to PULL the rod instead of pushing it DOOOOOM sday is here.
To disengage the throw out bearing at rest adjust the trunnion shaft on the slave, if their is no pressure on the arm coming out of the trans and the throw out is still touching,is it making the clutch slip? If you drive a few hundred miles and still doesn't disengage at rest,the only thing I can think of is you have a mismatched disc. is it a Mcleod disc? I also want to let you know, I had trouble engaging 1st gear on my newly rebuilt ZF, I changed out the really expensive Lucas oil for the cheap O'reilly oil and the trans shifted much better and no issue with 1st.
Chris, I made the mistake of having my clutch disc relined, Knowing nothing about Pantera clutch systems the, I just assumed it would be OK. There were all sorts of problems and I removed the ZF and the "New" plate.
The plate I had fitted was so much different than an old but not worn Plate that had been used in a friends Pantera and I fitted it, things were much better in that I could get a gear again but still no play at the finger ends.
so no I don't have a McLeod plate
Goodroc, I have no wear in the shift linkage and gear selection was NEVER a problem before I removed the engine and fitted new clutch parts.

I do appreciate your comments though, I have to beat this thing.
BTW after looking at your Photo I would say that you should not have a problem to adjust that Clutch Pedal further up/back. At least 3-5mm on the Push Rod on the Master would be my guess. Give it a try!

And concerning the shift Linkage it might very well be slightly out of adjustment. Just how well does the Gear engage if you remove the shift Gate?

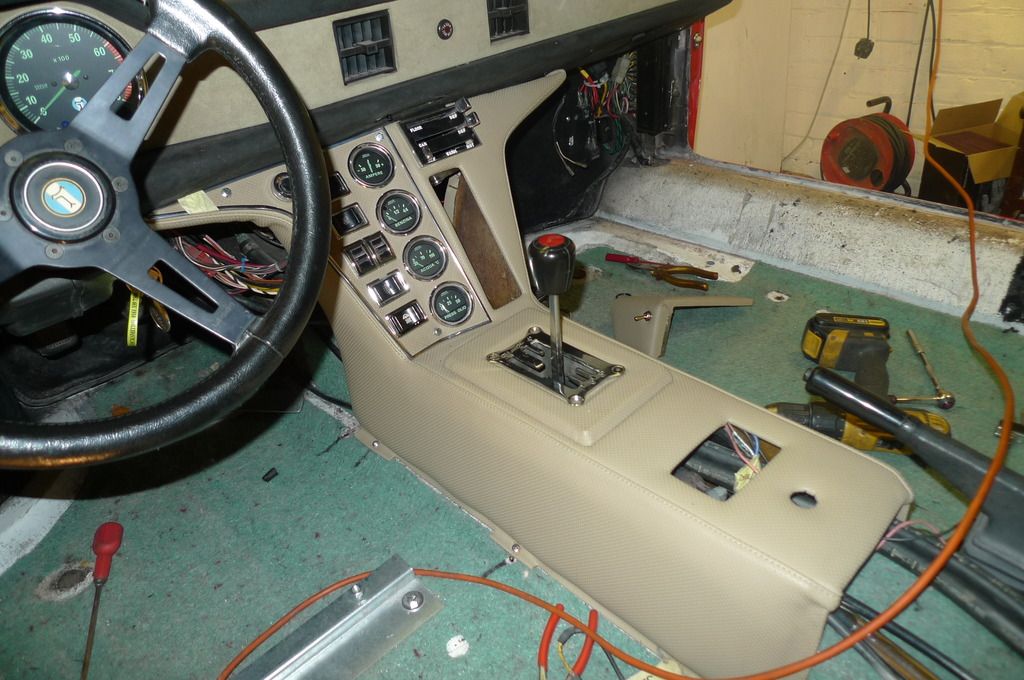
Looks nice with new Interior Trim ;-)
The ONLY sure way to determine 100% release of the clutch disc is to use feeler gauges and measure the clearance.

I can't remember exactly at this moment the differences in the requirements but the three finger requires less clearance than the diaphragm does.

I think it is .035" for the three finger and .045 for the diaphragm.

That's all that matters. Leave the clutch pedal alone. It winds up where it winds up.

The only significance to that is that at somewhere less than full travel you have full release.

Also consider that these nice thick plush floor mats have a very significant thickness to them and reduce the amount of travel your pedal has to release the clutch fully. All this issue could simply be that.

As BW says, everything is so freakin' tight with adjustment on the Pantera for clearance, a simple change like the disc thickness or a change to a disc with more Marcel can change everything.

The original Pantera disc had the Marcel removed to add clutch travel to make it work.

If there was an original mistake in the calculation for the necessary clutch travel then it was likely for Marcel.

It is also possible that the calculation was taken from the GT40 as a race car and it had no Marcel in the disc.

As far as how to adjust the Pantera clutch, block the pedal to the floor, then adjust the slave to give you the clearance with the feeler gauge installed.

The observation port in the bell is put there so you can do this procedure. In fact it is probably the only way to be sure the release clearance is right.

As BW also said, a ceramic throw out bearing is a great idea so that if it happens to be that you are riding a hair on the fingers because that's all the travel you can get, you won't eat up the face of the throwout bearing.

The tips of the fingers are already hardened for this.

You actually need to be really careful with the Centerforce that uses a diaphragm disc because those fingers are not sufficiently hardened to resist wear.

...and not to be argumentative Chris, that isn't my intent but I seem to remember the full new disc thickness as right around 3/8" or .375 to .380 with the micrometer WITH a full Marcel disc.

I don't have an "original" clutch disc here to measure but it would make sense to me that without Marcel it might be right what you said at around .280"?

In my young and wild days as opposed to my old and cranky ones, I seem to remember putting calipers on "worn out discs" and they were at around .320 to.325" left, so bottom line, there isn't a lot of material between full and empty on a disc.

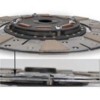
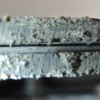
For those who don't know. The wavy line that runs through the center of the disc (arrow pointing to it) is the Marcel spring. It helps push the clutch apart when releasing and was eliminated in the original factory installed disc to gain room for the clutch assembly height.

I don't think that I am having psychotic episodes right now, for one thing no naked waitresses are wiggling their 'goods' and trying to seduce me...but that may not be the determining factor...I don't know...I forgot? Razzer

Attachments

Images (1)
  • clutch_marcel
Hello David,

I have tried to find if this was correct in an earlier thread, and have sent pics to a couple of folk who I thought would have known but without a reply.

So I thank you very much indeed for pointing this mistake out, I took out the gearbox today, god it was cold out there, and found an anomaly with part of the clutch which I am going to fix.

But I will change the quadrant to face the correct way round.

Last question, for now.Is the clutch effort reduction system worth keeping, is the effort much reduced?
Thank you again.
quote:
Originally posted by PanteraDoug:
The ONLY sure way to determine 100% release of the clutch disc is to use feeler gauges and measure the clearance....I think it is .035" for the three finger and .045 for the diaphragm.
....
As BW says, everything is so freakin' tight with adjustment on the Pantera for clearance, a simple change like the disc thickness or a change to a disc with more Marcel can change everything....The original Pantera disc had the Marcel removed to add clutch travel to make it work.
....
and not to be argumentative Chris, that isn't my intent but I seem to remember the full new disc thickness as right around 3/8" or .375 to .380 with the micrometer WITH a full Marcel disc.

I don't have an "original" clutch disc here to measure but it would make sense to me that without Marcel it might be right what you said at around .280"?
...
For those who don't know. The wavy line that runs through the center of the disc (arrow pointing to it) is the Marcel spring. It helps push the clutch apart when releasing and was eliminated in the original factory installed disc to gain room for the clutch assembly height.
...


I would not think it is the "thickness" of the clutch that matters that, but the amount the marcel compresses when squeezed by the pressure plate. this small amount of compression becomes greater at the Tob due to the lever ratio of the fingers. thus that is the value I think the clutch maker should tell you.

as for wanting to have 0.040" clearance when fully disengaged, the lever ratio of the fingers will make the needed ToB travel even more. that is another value I think the clutch maker should provide.

I think I have seen a ratio of 6:1 being a norm, so out of the 0.46" ToB stroke available, subtract 0.240" ( 6 X 0.04) for full desingaged and the desired 0.1" intial travel of the slave when first depressing with would be 0.06" at the ToB, that only leaves 0.16" to decompress 0.025" worth of marcel

Attachments

Images (1)
  • clutch_marcel_r1
Step 1: have a friend absolutely mat the clutch pedal from inside the car. Moving the floor mat from under the pedal may be necessary to get ANY clearance from Step 2.
Step 2: insert a flat-shim feeler gauge between the flywheel and clutch disc through the ventilation/inspection hole in the bellhousing.
Step 3- read the max thickness of gauge that can be easily inserted without force.

Note that doing this check will un-compress any marcel. I will be surprised if anyone finds as much as 0.040" of clearance by doing this. That also means that each side of the free-floating clutch disc only gets 1/2 of whatever clearance you find. So- best results of 0.040" actually gives only 0.020" between the flywheel & clutch disc, and another 0.020" between the disc and clutch surface. That much clearance is marginally OK but any less causes drag on one or the other spinning surfaces, which wears the ZF synchronizers and eventually causes grinding when going into gears. Less clearance means more clutch-drag and wear.

Note also that doing the above clearance check means nothing if you do NOT fully mat the clutch pedal with each shift, in your everyday driving. Most people including me do not, and synchro drag is the results of getting in a hurry with your shifts. Synchro replacement costs will eventually cause severe wallet-pain to most owners.
Keep the faith. I got .050" clearance, so it can be done.

Also the flywheel that you use figures in to this also. You can pick up probably .010" by resurfacing it. Even a new one.

The Marcel was reduced for this reason, i.e., minimum required clearances. They picked up maybe, .030" by doing so.


Everyone with a Pantera NEEDS a Pantera SPECIFIC clutch assembly. Modify a Mustang unit at your own risk?

It is specific to a Pantera. It is minimally a generic unit. How much were new syncros? $600 or was that $900 each?
Last edited by panteradoug
Depends on who actually does the work. If you order the parts after pulling your ZF and do a tear-down to determine what wore out- the synchro assembly, the gear cone which requires full replacement of that gear and maybe the mating gear as well, or all of the above, and your assessment is correct & you reassemble it yourself correctly, is one price.

Or crate the 155-lb gearbox as befits a $6000 assembly and ship it to an overhaul facility, synchro R&R done this way can run several thousands of dollars and several months down-time.

Also realize that all new ZF parts including gaskets only come from RBT Transmissions and everyone pays full retail for them. Overhauls therefore all have the same parts costs so any variation comes from cheaper labor rates or cannibalized used parts recycled into your gearbox. Nothing wrong with that except used parts obviously won't last as long as new ones.... Some gasket dimensions are critical, too.

Last bill I saw (a dozen years ago) including shipping to RBT, tear-down, inspection and reassembly with a few new gaskets and only an inexpensive thrust washer replaced- no synchro required due to a mis-diagnosed noise- then return shipping, was for $1100. Took a month.
quote:
Originally posted by Bosswrench:
Depends on who actually does the work. If you order the parts after pulling your ZF and do a tear-down to determine what wore out- the synchro assembly, the gear cone which requires full replacement of that gear and maybe the mating gear as well, or all of the above, and your assessment is correct & you reassemble it yourself correctly, is one price.

Or crate the 155-lb gearbox as befits a $6000 assembly and ship it to an overhaul facility, synchro R&R done this way can run several thousands of dollars and several months down-time.

Also realize that all new ZF parts including gaskets only come from RBT Transmissions and everyone pays full retail for them. Overhauls therefore all have the same parts costs so any variation comes from cheaper labor rates or cannibalized used parts recycled into your gearbox. Nothing wrong with that except used parts obviously won't last as long as new ones.... Some gasket dimensions are critical, too.

Last bill I saw (a dozen years ago) including shipping to RBT, tear-down, inspection and reassembly with a few new gaskets and only an inexpensive thrust washer replaced- no synchro required due to a mis-diagnosed noise- then return shipping, was for $1100. Took a month.


What I was alluding too is simply it is better to put the correct clutch in the car now rather then have to rebuild the ZF soon after putting in the wrong one.

It seems to me to be a simple equation.

This just seems to me to be one of those areas in the car where some go to "Bonzo the Chevy clutch guy because 'obviously' the original engineering was wrong because the Italians wouldn't stop with drinking Bolla and spilling it all over the blue prints?"

That simply isn't true. It is well engineered for 1970 limitations. It needed more development to improve it.

Conspiracy theories have their place, but not here with this car.


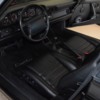
This pic of a Turbo shows how the mats should be cut to keep them away from the pedals. There is no possibility of the pedals bottoming out on the floor mat here.

If you did the pedal box modification of moving the mounting plate forward, then the pedals wind up closer to the floor at full travel than stock.

Check your mats.

Attachments

Images (1)
  • 92_911_Turbo_interior
Last edited by panteradoug
Well
I have received my new clutch spinner plate from The USA (McLeod)
so now have
both New McLeod pressure and spinner plates
new master and slave, quality stuff too from Roland Jaekel
New crank bearing
New release bearing
and not a gear can now be selected with the engine running.

over 3 months of buggering about with a sodding clutch system, unbelievable

adjustment of slave rod to longest possible to 0.5mm free play makes no difference.

bled with vacuum system no play in pedal.

if I stop the engine and select first gear as soon as I begin to release the pedal we are off and running.

I never thought a clutch system could be so problematical
Peter, last summer just on the way to join my fellow Pantera drivers in France I had Clutch issues. The Bolt that links the pedal to the master snapped and I had to repair it really fast, na never mind long story. My point is that I had really a lot of trouble bleeding the air out after the reapair and could not figure out why. Until it struck me the cars was pointing nose down in my driveway (maybe 10° slope) and after I put a Jack under the front and lifted it the air got out. I use a vacuum device to bleed btw.

A small air pocket was trapped in the master cylinder causing the trouble.
I think I have been making some of the problems with my clutch myself without the help of others.

Not knowing a great deal about the Marque, I tackled the clutch just as I would have with a TR2, E type or any other classic car that over the years I have been fortunate to own.

A clutch is simple, or so I thought and an effort reduction kit I also knew nothing about.

in short I have never put the adjustments recommended with the Effort reduction kit, and just tried to set the clutch up like any other bloke would.

I have spent a while today reading up on the ins and outs, found that I have measured the Master cyl rod in the wrong way to start with.

At least I have the quadrant around the right way, so I shall now set it up as per the settings in the books.

Master 2.91"
slave 3.07"
and hope for a decent space between flywheel and disc.

I must thank all those far more knowledgeable than myself for their efforts to help this numbskull, but hopefully we are on the way to getting it working properly.

Best wishes and a happy xmas to you all.

and the days are getting longer again too Pete
quote:
Originally posted by JFB #05177:
I GUESS your quadrant looks like this now.


the angle between links b & c would be the critical in the setting of the master cylinder rod. if b & C are near in a line, the pedal will lock up, you want the shallow angle about as shown. More angle and you start loosing MC stroke (and thus slave stroke)


No it doesn't, it was like this before you told me to turn it around, this is just so confusing see page 1 for your pic showing the incorrect fitment, and your comments.
Please accept my sincerest apology in adding to the confusion.

My experience so far has only been “keyboard and monitor” and I assumed the photo I found and used to determine the motion of this linkage was correct. I was not aware of the Mike Drew article (posted earlier by David Nunn).

After studying the MDrew article, I went to the barn and looked at my linkage that has been rusting for 30+ years. As to which way is correct, I don’t KNOW. My modeling equations of the “possibly wrong” orientation did provide realistic results. Unfortunately the progression of dementia is such I doubt I will be able to model the “possible right” orientation and make a comparison so I would actually know for sure.

Again I apologize

Attachments

Images (1)
  • effort_reduct_compare_small
There is no need for apologies at all, I am very grateful for help. There isn't a definitive write up for Idiots like me.

Thank you for your latest picture, the slightly rusted one, My bracket is now that way around.

so with this latest info I will begin to put it all back together, fingers crossed, I have to be on the homeward run now!!! best Pete.

PS just noticed the split pins, what a grand idea.
quote:
Originally posted by Peter Fenlon:
There is no need for apologies at all, I am very grateful for help. There isn't a definitive write up for Idiots like me.

Thank you for your latest picture, the slightly rusted one, My bracket is now that way around.

so with this latest info I will begin to put it all back together, fingers crossed, I have to be on the homeward run now!!! best Pete.

PS just noticed the split pins, what a grand idea.


In reply to my own post.

NO luck, with the arm now in the right position
I cannot get more than 12/13mm movement of the slave cyl piston.
I am to try and go back to a direct no effort reduction system and see what transpires.


I have no leaks.
pedal pressure is continual with the new slave and master cyl.

I have an armoured flex line so no bulging.

I see there are different spinner and pressure plates depending on the ZF gearbox fitted,

sadly I didn't know and just asked the vendor for a clutch spinner and disc and the McLeod stuff came through.

I also noted that one poster said the height of the clutch pedal should be 1/2" higher than the brake pedal, I found this impossible to adjust when the effort reduction kit is fitted.
I know this will be more difficult to measure, but your pedal travel should be stroking the master cylinder ~29mm to get the ~16mm at the slave.

your 13mm at the slave implies only ~23mm at the MC.

Is your MC the original ~19mm BORE? with the slave bore of ~25mm? vendors do sell a long stroke slave which has a smaller bore. (smaller bore gives MORE stroke from the same MC)

If the 12mm slave stroke is all you can get, then you might consider changing the length of the lever arm to the ToB?
quote:
Originally posted by goodroc:
Peter, please tell me which procedure you use to bleed the air out of the system?

Even a tiny air bubble trapped in the system will hinder travel of the slave.


I have tried using a vacuum system, using my compressor.

Also the good lady in the car pumping, and myself at the slave cyl nipple/zerk.with tube in half filled bottle.

2 questions for those who have working clutches.

1 how long is the travel on your slave please when pressing the pedal fully down, in mm if possible

2 is there a factory figure for the travel?
Peter I understand your frustration. Partly caused by your own "I just assumed" approach Smiler

There could be more than one reason for your troubles. Please tell me if/how you continued after fellow Pantera owners gave you their feedback? i.e.
1. Did you measure with a feeler gauge how much play between the clutch plate and flywheel when the clutch pedal is fully down?
2. Did you extend the fork bolt on the master to full? (its where the angle between b and c is a few degrees less than 180°) That will raise the pedal towards you (when not pressed) so it sits higher than the brake pedal and give maximum/full stroke on the master.
3. Did you remove the shift gate when troubleshooting to avoid misalignment being a factor.
4. Absolutely all air must be bled out.
5. Seems like you have managed to put the right parts together but also check the direction of the clutch plate. Only one side can be facing the flywheel! (should be marked)

I am sorry if this all sound so basic but I am just trying to brain storm...... I never had any of those problems. I bought a new McLeod Kit and removed the bell housing from the ZF to be able to carefully check/measure and adjust for required play between pressure plate (multi fingers) and throw out bearing. I rebuild the master and bought a new slave. All done on the same occasion.
1, there is no room for a feeler gauge between the plate and flywheel.
2 the geometry of the effort reduction system prevents this, I have yet to go none effort reduction by fitting the correct rod, which I assume (!!) will allow the pedal to be above the brake pedal.
3 alignment is not a problem, gate removal isn't needed
4 again all air is out, pedal is solid
5 plate is in correctly.

What is the travel of your slave piston?

I do appreciate assistance, I think all other posters are absolutely fed up with this problem that they have either solved or not met.

thank you for your continued help.

best Peter.
Peter you should not have to remove the effort reduction kit? What I mean by extending the rod is to install everything but NOT tighten the counter nut on the rod. Then with your fingers or a needle plier turn the rod to its maximum extension just prior to b and c being in a straight line (linkage becomes over-centered).

That should bring your pedal up and increase the possible travel/distance on the master.

I cant check my slave travel tonight but i will try to do it tomorrow and let you know.
Lets just stop for a minute and make a reality check. There must be something fundamentally wrong with one or some of those parts you put together. There must be a mis-match somewhere! Did you get the Clutch parts as a kit or did you combine them from various vendors etc? It is not rocket scientism so there must be something that is not right somewhere like the throw out bearing being unsuitable for the pressure plate or what do I know.....

The fact that you tell me you cant get a feeler gauge between clutch and flywheel when the clutch is activated is weird. What if you disconnect the slave completely and slide a piece of pipe or a large socket with an extender over the arm to activate the clutch this way? just to eliminate the clutch/pressure plate/throw out bearing being the trouble.

If you provide some photos of your slave and linkage as well as the clutch parts etc. perhaps its possible to spot the issues?
quote:
Originally posted by goodroc:..
The fact that you tell me you cant get a feeler gauge between clutch and flywheel when the clutch is activated is weird. What if you disconnect the slave completely and slide a piece of pipe or a large socket with an extender over the arm to activate the clutch this way?...


And while using the cheater to stroke the clutch if you could measure the travel needed to "just touch" to when "feelers go"
Poor Peter, getting so many answers going in all directions. Wink

Let's start with the root cause here, and then when solved, there may be other problems. Problem #1 here is lack of slave movement, not the clutch itself (could be a problem also)

12-13 mm at the slave is not enough, that has to be sorted first. The effort reduction kit (which I would throw away immediately but which works for some) doesn't help, because it of course presses less fluid for the same amount of pedal stroke. So even if all works perfectly, the room for error on adjusting the clutch is less.
The obvious thing is that if you have the right master and slave and no bubbles and all adjusted right, you have more than 12-13 mm movement at slave. Do you have an OEM master, or something cheap or fancy? I recommend a master from Roland in Germany, he has the orig size ones built in Italy, a little more expensive, works perfectly.

"Is your MC the original ~19mm BORE? with the slave bore of ~25mm? vendors do sell a long stroke slave which has a smaller bore. (smaller bore gives MORE stroke from the same MC)". But please, don't keep your effort reduction kit and invest in a long throw slave, because then you defeated the purpose of the effort reduction kit. You can't cheat physics, less effort at the pedal means less movement of the slave. Pure physics.

Here's what I would do. I would spend some money on this. Why? Because not having proper clutch disengagement can quickly ruin your ZF synchros, and then we're talking $$$. I would buy new OEM master and slave [Apologies Peter, re-reading the entire thread, I see now that you have a good master and slave from Roland], (OEM, no effort reduction kit and no long throw slave), bleed until I got proper slave travel. Only when that is succesful would I move to check the clutch. If at that point you can't adjust the clutch properly (see how in my 4 step instruction posted earlier in this thread), then you may need a new clutch. But fix the slave throw issue first.

(After searching a bit on this forum I found that a standard slave should have 5/8"=16mm and a long throw should have 3/4"=19mm. This will of course vary, but it confirms that your 12-13 mm is not as it should be)
Last edited by noquarter
quote:
Originally posted by No Quarter:....
(After searching a bit on this forum I found that a standard slave should have 5/8"=16mm and a long throw should have 3/4"=19mm. This will of course vary, but it confirms that your 12-13 mm is not as it should be)


Be sure that information was NOT something I posted, but from another source
The adjustment really is simple. You put a block on the clutch pedal holding it to max travel, then you turn the adjustment screw on the slave cylinder until you get the clearance specified between the disc and plate.

There was some discussion in the past of a slave cylinder that looked like the Pantera version but was from another application. I don't remember the specifics on that at the moment...and there is the stainless part from Pantera's East that has a different bore.

After adjusting for the clearance needed, when you release the clutch pedal, IF you don't get full lock up, replace the slave cylinder.

This is not rocket science.


I've never been to England so if I came and did this for you I'm very likely to just get distracted by all the typical tourist traps.
FWIW, I have OEM master and slave, I have adjusted as per the 4 steps I posted early in this thread, and I have just measured luring the wife to go with me in the cold garage to press the pedal. The slave moves 17mm.
Until you have 16-17mm, you don't have to look at the clutch.

Effort reduction kits, I don't see the need, and they do reduce slave travel. Has anybody here in this forum ever had a Pantera with a proper Pantera clutch, and felt that they needed to reduce the effort. I don't think my clutch pedal is hard, and can drive it for hours in traffic with no issue, and I'm no bodybuilder at all (no comments please). And the math is simple, if the effort reduction kit results in requiring X% less effort, the slave will move X% less. It's that simple. If it wasn't you could build a perpetual motion machine...
quote:
Originally posted by No Quarter:
FWIW, I have OEM master and slave ... The slave moves 17mm.

Effort reduction kits, I don't see the need, and they do reduce slave travel... And the math is simple, if the effort reduction kit results in requiring X% less effort, the slave will move X% less. It's that simple....


Thanks for measuring and posting your slave stroke.

as for the effort reduction, the way it provides "advantage" is to reduce the slave stroke versus pedal when fully depressed. to make up for the loss of slave stroke you mention, the initial applying the clutch in fact moves the slave MORE for the first 30mm or so of pedal, before it begins the LESS slave stroke advantage.

as I have state earlier, if that b/c angle is too shallow, the toggle will "lockup" or worse, flip and go backwards. If the angle is made to great, you lose the "fast take up" and now the pedal travel will not stroke the slave its full travel because not bottoming out the MC

Attachments

Images (1)
  • clutch_pedal_effort_reduction_linkage_r3
Re-reading the thread, some talk about not having too thick carpet etc. The pedal should not even touch the carpet, it should bottom out against the master cylinder internal stop, not the carpet and not the bracket the pedal is supported in (and not any parts of the effort reduction kit if so equipped). There should be at least ½" between pedal and carpet when the pedal hits the internal stop in the master cylinder
Thanks to all for your input, I didn't want lads to have "words" or bandy their handbags.

I am as you can imagine extremely cheesed of with the situation, and apologies for prolonging the agony.

Today I removed the ERKit and fitted the rod that came with the new master from Roland Jaeckel.

With this I adjusted the pedal to be about half an inch higher than the brake pedal, bled the system, and measured slave cylinder movement at 13mm (again).

But after the good lady had returned to the kitchen I did note that the first one and a half inches of pedal travel are a little soft before becoming solid.

Tomorrow I shall jack up the front a little and bleed again. then check if 16mm is possible using a long tube over the actuating arm.

By the way the pedal when fully depressed is not near the carpet.

Episode 149 commences tomorrow evening UK time.
quote:
Originally posted by Peter Fenlon:
Thanks to all for your input, I didn't want lads to have "words" or bandy their handbags.

Episode 149 commences tomorrow evening UK time.


Do you mean like this?

https://www.youtube.com/watch?v=ce2jEDfPwG8

Personally I hate it when my panty hose rides up. It pulls on my pubies? Big Grin

These girls got in some good shots too.

https://www.youtube.com/watch?v=DqQQjH2Tctg

Bitches.
Peter, are you near any of our Pantera friends in the UK?
Roger Brotton's shop can surely help you: I'm sure you'll get it right in the end, despite our help, but Roger has seen and done it all, and can maybe save you some time/iterations, either by advising you, or by having your car in his garage?

Better than getting depressed...
quote:
Originally posted by No Quarter:
Peter, are you near any of our Pantera friends in the UK?
Roger Brotton's shop can surely help you: I'm sure you'll get it right in the end, despite our help, but Roger has seen and done it all, and can maybe save you some time/iterations, either by advising you, or by having your car in his garage?


Better than getting depressed...


I would not want to send the car to Mr Brottons shop when I can do the same as he can.

Being able to pay for mechanical work is out of the question when it is a hydraulic problem,. and I wouldn't think I could afford to pay for such services.

Today I have put a pry bar on the clutch actuating arm and when giving it the old heave ho the clutch releases fine enough to get a ten though feeler between the flywheel and plate.

I have after all my other problems a bleed problem. and I will sort it especially with the help of more experienced owners, NEVER NEVER give up, one day our Billy!!!!!!
Good news at last.

after bleeding the system again then screwing the slave cyl rod to the rear of the slave cylinder.

I now get a 10 thou feeler in between the flywheel and clutch driven plate, with 13mm of slave cyl travel!!!

I can easily select gears again with ease.

I don't think I have any clearance between the TOB and the clutch arms, and have asked now for a longer throw slave from Roland Jaekel.

I hope this solves the problem.

The archangel Gabriel flew low over the house last night, when I get the new slave I hope she can land for a cup of tea.!!
Doug, your avatar reflects my feelings today.

JFB your right there isn't a recognised distance but there are so many anomalies with this awful system that it isn't surprising.

Mikael
I disconnected the ERKit, and in truth the measurements I am taking aren't exactly precise, but the slave travel appeared identical.

But your right I don't care I just want a working clutch.

All Posters, thank you for your assistance its what the club is all about, so a happy new year to you all.


Goodroc pics for you
the ERKit now dangling and disconnected and the ordinary rod fitted.
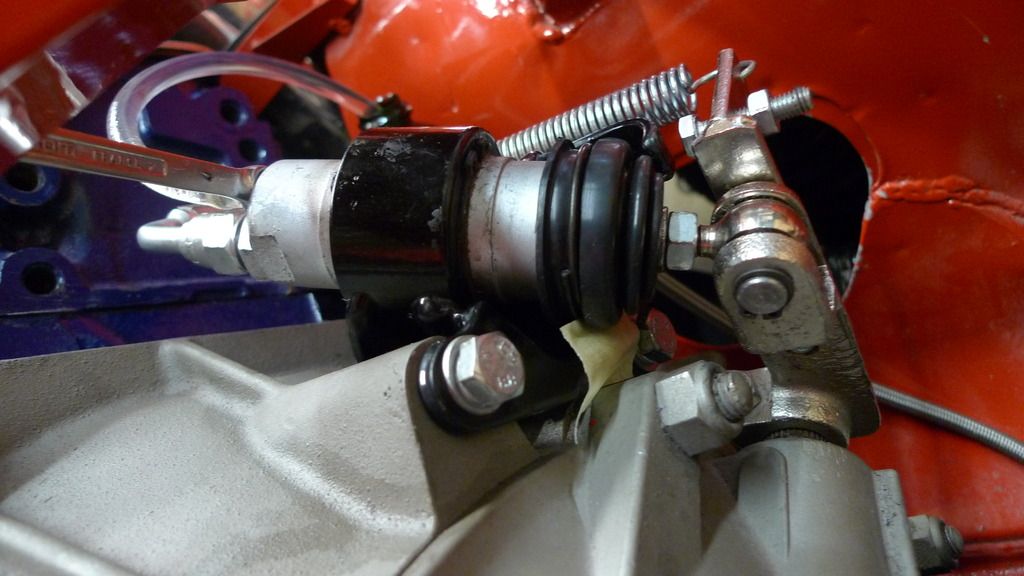
The slave cyl, after bleeding I (by hand) screwed the piston fully rearwards into the cylinder, but could still rotate the pin holding the slave rod to the actuating arm, so very little pressure would be on the release bearing.

When I get a new longer throw slave more room will be available for adjustment.
It Does seem that AIR was my problem or one of them, but I must say I like your motorcycle.
best wishes to all for the new year too regards Pete.
Hi Peter

Sorry to go on, and I know you'll soon have a new slave, but two concerns based on your slave picture:
1. The stop bolt is not in use, it should be
2. The ring thingy is shown to be a little to the right versus the clevis pin, indicating the clevis pin is not big enough to fill the ring, creating a gap

Sorry to repeat myself, but please run through the 4 steps I posted early in this thread, it deals with both.
Peter you probably also need to rotate the slave about 90° in the bracket so that the bleeding point is the highest point!

Even if you feel that some of the things mentioned are not important, they are! It is precission engineering and the whole clutch is already marginal from the beginning with 100% original and correct parts. So NO shortcuts.....
quote:
Originally posted by goodroc:
Peter you probably also need to rotate the slave about 90° in the bracket so that the bleeding point is the highest point!

Even if you feel that some of the things mentioned are not important, they are! It is precission engineering and the whole clutch is already marginal from the beginning with 100% original and correct parts. So NO shortcuts.....


Goodroc I can assure you the bleed nipple IS at 12 o'clock the highest point available.
quote:
Originally posted by Peter Fenlon:
your number 2 point I do not understand?


I summerized Mikeal's instructons
quote:

1. Master:
. a. (W/O ERK) pedal should be adjusted so at rest it’s between 0-½” closer to the driver than the brake pedal.
. b. with the pedal fully pressed down, there should be at least ½” gap to the firewall/carpet
2. Clutch axle arm:
. a. should be 90 degrees when the clutch pedal is half pressed down.
. b. check that there’s free movement, the arm or the bolt/nut doesnot rub on the ZF
. c. proper size clevis pin
3. Slave return bolt:
. a. Temporarily remove the spring.
. b. move the clutch axle arm rearwards, and feel for when it hits the resistance of the clutch.
. c. While holding the arm in that position, turn the screw so that it almost touches the bracket, leaving a 2mm gap.
. d. Reinstall the spring
4. Slave rod:
. a. take out the clevis pin and by hand press the slave rod all the way up in the slave.
. b. then release 1mm.
. c. adjust the length of the slave rod so the clevis can be put back in


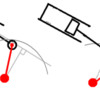
his point #2 is about setting the arm 90 degress to the slave's bore

Attachments

Images (1)
  • slave_lever
quote:
I summerized Mikeal's instructons
quote:

1. Master:
. a. (W/O ERK) pedal should be adjusted so at rest it’s between 0-½” closer to the driver than the brake pedal.
. b. with the pedal fully pressed down, there should be at least ½” gap to the firewall/carpet
2. Clutch axle arm:
. a. should be 90 degrees when the clutch pedal is half pressed down.
. b. check that there’s free movement, the arm or the bolt/nut doesnot rub on the ZF
. c. proper size clevis pin
3. Slave return bolt:
. a. Temporarily remove the spring.
. b. move the clutch axle arm rearwards, and feel for when it hits the resistance of the clutch.
. c. While holding the arm in that position, turn the screw so that it almost touches the bracket, leaving a 2mm gap.
. d. Reinstall the spring
4. Slave rod:
. a. take out the clevis pin and by hand press the slave rod all the way up in the slave.
. b. then release 1mm.
. c. adjust the length of the slave rod so the clevis can be put back in

Beautiful JFB! Guess being a writer I put too many words in between the important info...
Peter,

Do you have a stock master cylinder or aftermarket?

I believe that your clutch actuating arm may be one spline off, it looks as though it should be one more toward the rear. You have taken up all the slave rod adjustment to it's shortest, which should not be the case.

If you remove the helper return spring how much play do you have? If that is more than a couple mm then the first portion of your slave travel is purely taking up slack until the throw out engages on the clutch diaphragm. All you want is for it not to ride on the diaphragm, which is what the stop screw sets.

Happy New Year,
Julian
Hello Juliian,

the actuating arm is at the rearmost position.
there is no adjustment left on the rod to enable another spline to be reached,

I have standard master and slave from Roland in Germany. I have no free play if I remove the spring, but can rotate the pin holding the slave rod to the actuating arm, so not a lot of pressure is on the bearing.

I have now ordered a new longer throw slave which gives another 3mm of movement, this I feel will solve the problem allowing a smooth none graunching gear change and will allow space between the fingers and bearing too.
HNY to you too
quote:
Originally posted by Peter Fenlon:
the actuating arm is at the rearmost position, there is no adjustment left on the rod to enable another spline to be reached


Hi Peter,

I don't understand that statement, the clutch arm is infinitely adjustable on the splines (within the bounds of the ZF casing) as it has a through bolt and the shaft is machined in it's full circumference. The actuating rod looks to be at it's shortest with no threads showing after the locknut, so could be lengthened?

Julian
quote:
Originally posted by Joules:
quote:
Originally posted by Peter Fenlon:
the actuating arm is at the rearmost position, there is no adjustment left on the rod to enable another spline to be reached


Hi Peter,

I don't understand that statement, the clutch arm is infinitely adjustable on the splines (within the bounds of the ZF casing) as it has a through bolt and the shaft is machined in it's full circumference. The actuating rod looks to be at it's shortest with no threads showing after the locknut, so could be lengthened?

Julian


Hello Joules,
I meant that I could not reach another spline
in the forward direction (toward the slave cyl)
in lots of pics I see only about 4 threads in front of the slave cyl locknut. Bringing the lever arm rearwards would be easy, but the length of the rod is then much longer.

The lever arm is now I think in the correct place, i.e. just forward of "Centre" so the arc of travel is at its most economic, and no movement is lost.

I wish I could post some pics but am having "Bucket" problems.
Peter,

I still believe you may need to be one spline further back (away from the slave) and the rod lengthened, but let's approach it more scientifically, how long is your clutch slave rod? The TSB is fairly precise in that it should be 3.07 to 3.09"

What I have also encountered is the ridged barrel on the rod where the rubber boot sits is slightly larger than the slave bore and can bind up against the slave if the slave piston retracts all the way back impacting clutch operation. This could also be why you currently cannot dial in any free play.

Julian

Attachments

Images (1)
  • 569106731_P1010001a
As you all can probably guess I am thoroughly cheesed off and all the suggestions however well meant, will not give me half a millimetre between the clutch and flywheel and another half millimetre between the release bearing and the 3 clutch fingers.

My new longer throw slave is due on friday, so I shall fit that and go from there.

As yet no one has mentioned the reason why a longer throw slave IS available, and if the stock system is so easy to utilise why do so many dealers stock the LTSlave cyl????

I have had all spline options tried out with the actuating arm.
tried several bleeding methods vacuum etc etc.
pedal box out twice, changing the Effort reduction kit geometry.

changed back to standard master rod, dropping the ER Kit altogether.

Taken the gearbox out twice, fitted the correct parts eventually.

It was my fault I had the old spinner relined
I had no idea that it was a special item.

Fingers crossed , but thanks to all those who have contributed, best Peter.
I have empathy in your delemia, as in what has changed

I understand your actual slave stroke is not what is calculated based upon info I gathered from the internet. and the couple of members that were gracious enough to share their stroke makes it even more confussing

while waiting for the LT slave, have you attempted to measure the arm travel that will be needed to provide ToB clearance to plate clearance.

I could envision that different clutches would require increased arm strokes and thus the reason for the LT slave.

I am also waiting impatentaly for your resolution
quote:
Originally posted by Peter Fenlon:
As you all can probably guess I am thoroughly cheesed off and all the suggestions however well meant, will not give me half a millimetre between the clutch and flywheel and another half millimetre between the release bearing and the 3 clutch fingers.

My new longer throw slave is due on friday, so I shall fit that and go from there.

As yet no one has mentioned the reason why a longer throw slave IS available, and if the stock system is so easy to utilise why do so many dealers stock the LTSlave cyl????

I have had all spline options tried out with the actuating arm.
tried several bleeding methods vacuum etc etc.
pedal box out twice, changing the Effort reduction kit geometry.

changed back to standard master rod, dropping the ER Kit altogether.

Taken the gearbox out twice, fitted the correct parts eventually.

It was my fault I had the old spinner relined
I had no idea that it was a special item.

Fingers crossed , but thanks to all those who have contributed, best Peter.


The shop manual does not refer to a clearance necessary between the disc and the pressure plate.

I think that only the "long throw" slave can solve this now.

The total assembly height of the your new clutch as an assembly is greater than the original.

In all fairness, the original clutch was "finagled" (messed around with) to get it to work.


The Dual Friction I have in my car does give me the clearances that I need.

If I remember correctly though, Hall told me to use a "long throw" slave with it. That is probably what is in the car now.

It is only a 10-1/2" disc which I would prefer to be 11" but life is just compromise after compromise and you need to pick your battles. One can't fight every one. There are just too many to deal with?

The 10-1/2 has a different engagement feel than the 11. It actually feels like it has less travel of the pedal, but it is probably just that it hooks up a little differently.

I feel the difference in my clutch foot.


Hang in there. Remember there are a lot of folks who can hit really hard, some call that fate. The champion, aka, just a survivor these days, is the one that can take the beating while others fail, shrivel up and cease to exist.
quote:
Originally posted by Peter Fenlon:
will not give me half a millimetre between the clutch and flywheel


What are you talking about here Peter?


And the other half a millimeter between Throwout bearing and your "3 fingers" is not enough! You need to take the ZF off and modify your Throwout bearing so it allows more spacing. I dont remember if you told us wether its the type with the various spacer rings? The spacing can ONLY be measured by separating the bellhousing from the ZF and bolt it onto the Engine. I posted some sketches a while ago, perhaps you have them. You CAN NOT rely by feeling on the arm alone if there is space between throwout bearing and your 3 fingers BECAUSE even if you push your throwout bearing full aft the arm can be rocked a little back and forth since the forks that slides the throwout bearing forward has some play. That is the play that can fool you and that is the REASON the measurements MUST be done with the bellhouse OFF the ZF and ONTO the engine.

btw did I mention NO SHORTCUTS?

Secondly the displacement on the MASTER and SLAVE are in direct relation. Displacement = Radius of bore squared and multiplied by π and multiplied by the stroke. I.e. if they have same bore they have same stroke! PROVIDED there is:

a) no damage/internal leak and/or the fluid supply to the master is not starved (can happen i.e. if wrong parts are used when rebuild and piston does not retract/return fully to open for reservoir fluid access to bore)
b) no air trapped somewhere. It can be really tricky to get all the air out. I mention this again because it is very likely.

So if your strokes does not match based on a quick calculation of the displacement there is something wrong like a or b above. It is really not rocket scientism but no room for shortcuts.

I am not reading this out of a book Peter, this is from working with these things and latest when I changed engine last year with different flywheel etc. I went thru the whole procedure again with removing the bellhouse and measuring for sufficient play between throwout bearing and clutch (multi fingers) It is unfortunately an essential and absolutely required procedure. Guess you can put it together with standard OE parts and be LUCKY there is enough space. But there is no guarantee for that.

Please let me know if I am confusing you and if my explanation is not making any sense?

Jan
Hello Goodroc,
in my time working as a service rep, for mobile Crane companies I have been to 50 countries in Europe Africa the mid East and Far east.

The reason I went there was only because I had experience of the product that other engineers in those countries didn't have.

I have to admit that your post doesn't really help, your experiences are OK for you of course but not in my case.

I will NOT remove my ZF for a third time been there and done that.

but thank you for your input.
Peter I dont have a crystal ball. But my estimate is you will end up removing it anyway rather sooner than later. If there is insufficient play between the components it will only get worse when everything gets to operating temp and also as your clutch plate wears the 3 fingers will come towards the throwout bearing and reduce the play until it eventually reduces to zero and the throwout bearing wear will then speed up.

quote:
Originally posted by Peter Fenlon:
will not give me half a millimetre between the clutch and flywheel

what were you talking about there?

And have you considered my other points concerning MASTER and SLAVE cylinder regarding starvation and air etc?

really only trying to help.
I found this (can't believe I didn't remember Frowner )

quote:
Originally posted by Peter Fenlon:
posted October 22, 2016 11:12 AM in "Throw out bearing touching clutch"

...info from McCloud...needs 12.7mm of travel from the time the bearing touches the fingers to full release.
You should get about 1.524mm gap between the pressure plate and disc at the time of full release.
..and you have a gap between the bearing face and the fingers of 2.54 to 6.35 when the pedal is in the home position..


so this implies you need (12.7 + 2.54 =)15.3mm at the ToB, this would mean you need (15.3 X 1.4 =) 21mm at the slave.

having the ToB just not touching when the pedal is in the home position would require (12.7 X 1.4 =) 18mm at the slave.
1.524mm is 60 thou and that sounds about right, I have always worked on a minimum 40 thou required.

This is one of those times I wish I was back in the UK, I'd hop in my car and go round and help fix it. I feel somewhat helpless from a such a distance.

Julian
quote:
the word in American is Geronimo


Congrats, Peter!

Shouldn't you be yelling in Italian!


(Actually, "Geronimo" is what we yell when we start an unbelieveable adventure, like jumping out of a plane.... "Wahoo" is a good one for the extatic conclusion. Wahoo is also the famous mascot for the near-world-champion American Baseball Team, the Cleveland Indians...)

Attachments

Images (1)
  • Wahoo
Peter,

Although you don't want to hear this, I agree with Doug, 20 thou cold isn't enough and there is still something amiss with your clutch system.

Maybe if you mash the pedal to the floor on every shift you'll find gears without grinding, but I'm pretty sure you need to get back in there and it might mean removing the ZF again.

Julian
I'm lucky, as I have not had as much trouble as Peter with either of my clutches (a stock 3 Finger, and a Centeforce diaphragm), but isn't there some amount of "wear" and "settling in" that will occur when a brand new clutch is installed?

Marcels compress, minor high spots are burnished off, and the disk compresses due to the thermal and friction environment?


Just hoping for the best.....

Rocky

Add Reply

Post
×
×
×
×
Link copied to your clipboard.
×