Instead of a stud, how about a carriage bolt. They make them in Grade 8. I thought about this but I would still need the standoff from IPSCO. As you said, there's more than one way to skin a cat.
You can't really worry about how a mechanic down the road deals with it. That's being nice but if you try to improve everything to make it easier on the next guy, your car will be a forever project. You do it to make it easier on yourself or find out how others did it. We love to share here. It's a learning experience for all of us. If you're worried about dropping and loosing a nut or bolt, stick a shop rag under your work to catch it.
Re: Flushing Evaporator. I use two ~ 4ft long rubber hoses that I press on over the inlet and outlet of the evaporator. The length is so as that the opposite end of the hose extends out the the passenger door. I pour lacquer thinner in one end while having the other hose dumping into a pail. Using your air compressor, apply a small amount of pressure to the hose that you filled with some lacquer thinner and it will flow through the coils and evacuate quite nicely. I perform the task several times until the effluent is clear. It works very well and is very satisfying as you will see the initial dump to be quite discolored.
OK!
Since that rear evap connector is a real bugger to get at.....can I introduce the cleaner (bought a can of the "stuff"...) thru the hose back at the compressor and drain out the fitting with the expansion valve on it??? (into a bucket)
Along with that....is the expansion valve open at rest or closed (at room temp)????
Trying to cut down on wrenching in places that are not made for wrenches!
Steve
Steve,
We normally use an air pressure syphon can filled with solvent and reverse flush from the low pressure compressor hose all the way through the system and out the high pressure, so you should be good doing it any points between. And yes the less points you break the seal on the flare fittings the better.
You'll have to replace the dryer, but they are pretty inexpensive.
Julian,
THanks!!! Great info!
Have new drier...so all good!
Need to make one new hose from Comp back to Cond.
Not a big deal.
Cheers!
Steve
THanks!!! Great info!
Have new drier...so all good!
Need to make one new hose from Comp back to Cond.
Not a big deal.
Cheers!
Steve
OK, dug my welder out for some simultaneous metal melting projects...two of which are here!
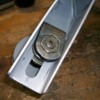
My self captivated nut solution for the idler pulley and stanchion. Now one wrench service from the front to loosen the stanchion.
One or two....for replacing the pulley....depending on how tight the stanchion is!
Second job...next post.
My self captivated nut solution for the idler pulley and stanchion. Now one wrench service from the front to loosen the stanchion.
One or two....for replacing the pulley....depending on how tight the stanchion is!
Second job...next post.
Attachments
I was told that this fix was in a POCA tech tip from way back! One wrench alternator bolt!
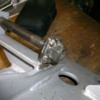
Welded on a "flanged lock nut" to the rear of the alternator pivot bracket. Pardon my globby welding.....all three projects netted perhaps at most, 1.5 linear inches of welding.....barely got warmed up....after being VERY rusty...!
Now to add a little bit of paint and job is done. Onwards!!!
Steve
Welded on a "flanged lock nut" to the rear of the alternator pivot bracket. Pardon my globby welding.....all three projects netted perhaps at most, 1.5 linear inches of welding.....barely got warmed up....after being VERY rusty...!
Now to add a little bit of paint and job is done. Onwards!!!
Steve
Attachments
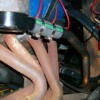
One more project also underway...coolant pipes, or modification of same "to fit" properly.
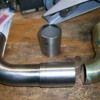
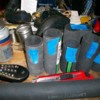
"S" tube from under car pipe to water pump has me miffed.....SO, I cut it in half and took it and some scrap thick wall stainless pipe down to TechShop in SJ where I used their lathe to take about .010" out of the ID of the thick wall pipe.
In this first trial, I have extended the length of the pipe by 1.5". A pipe from another vendor was about 1.375" longer and appears to work better, but I can go short easy....longer is messier!
Once I get the length dialed in, to keep the pipe off of the parking brake linkage and the connections to pump inlet and tubing outlet as straight as possible, then I will take this out to have it TIG'd back together. My TIG skills stink....or are basically non-existant at this time..... Not enuf time behind the wand!
(Ignore piece on RH side in pic...that is a scrap piece that sorta looks like what is still sticking in a hose at the water pump....too lazy to pull it out! Piece in the top middle is a "spare"....which I can modify to play with length)
I also had one of my 180 degree Robert Shaw thermostats modified by Marlin, and it looks fantastic! Much better than stock. Great job!
Someone mentioned that I could get all wrapped up in making the car better for the next guy.....I'm concerned that the next guy may be me!!!!

 BTDT!!!!
Steve
"S" tube from under car pipe to water pump has me miffed.....SO, I cut it in half and took it and some scrap thick wall stainless pipe down to TechShop in SJ where I used their lathe to take about .010" out of the ID of the thick wall pipe.
In this first trial, I have extended the length of the pipe by 1.5". A pipe from another vendor was about 1.375" longer and appears to work better, but I can go short easy....longer is messier!
Once I get the length dialed in, to keep the pipe off of the parking brake linkage and the connections to pump inlet and tubing outlet as straight as possible, then I will take this out to have it TIG'd back together. My TIG skills stink....or are basically non-existant at this time..... Not enuf time behind the wand!
(Ignore piece on RH side in pic...that is a scrap piece that sorta looks like what is still sticking in a hose at the water pump....too lazy to pull it out! Piece in the top middle is a "spare"....which I can modify to play with length)
I also had one of my 180 degree Robert Shaw thermostats modified by Marlin, and it looks fantastic! Much better than stock. Great job!
Someone mentioned that I could get all wrapped up in making the car better for the next guy.....I'm concerned that the next guy may be me!!!!
Steve
Attachments
Good day in the garage!
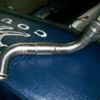
Got my three part tube TIG'd up down the street and it's going to work very nicely!
Re-mounted radiator....paused....removed fans and swapped them L to R where they should have been.....duh! Makes wiring work more neatly!
Started test fitting tubes and hose junctions!!! I can see light at the end of this tunnel....no...wait....just my drop light shining in between suspension parts....!
I hope to get down to having 3-4-or 5-6" long junction pieces. Can't double clamp many of them due to close radius's....so will make sure that I have at least 1" of hose past the hose retainer bump and one good clamp.
Found one original piece of Green Stripe that was starting to crack. I guess to be about 7-10 years old! If I can document all of the junction lengths, in 10 years or so, I will gladly replace them at that time...providing I have a danged lift by then!!!! Garage floor is good for back support, but killer on the abs!!!
Attachments
Progress!
Installed the above pipe, and all the rest of the "coupler" hoses and pipes that I could. Still waiting for a different T-stat pipe...should be here tonite.....
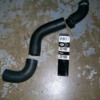
Bought a new hose to cut a piece from to connect my lower hose to the lower pressure tank fitting. Picture shows cut up....used the middle section.
Attachments
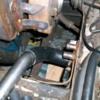
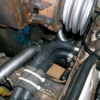
Upper end of the pressure tank lower pipe.
Note: I had to flip the two hose clamps around so that the nuts faced downwards on the outside of the hose, so that I could access it while the overflow tank is installed!!! Found this out when I installed the overflow tank!
Note: I had to flip the two hose clamps around so that the nuts faced downwards on the outside of the hose, so that I could access it while the overflow tank is installed!!! Found this out when I installed the overflow tank!
Attachments
Next was the heater hoses! These were the previously mentioned Dayco hoses with pre-formed 90's on the ends! Made it MUCH easier to deal with. Trying to get straight hoses on there would have been near impossible to get the bends to fit without collapsing.
NB: Order more hoses before Dayco discontinues the buggers!
The reinforced area with the two tie wraps and the layer of (1-3/8"!!!) hose is to protect the underside of the heater hoses from the frame seam which is "sorta" beat down and smoothed....at the factory..... This is to reassure myself that I won't need one of the new hoses I order any time soon!!!
Attachments
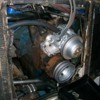
Once I had the hoses in at the under floor pipes, I had to test fit the main compressor/alternator bracket and clearance.
I pushed the heater hoses back out of the way, ran them up and around the opening, reststrained them very lightly to the coil etc bracket and ran them to the block and the water pump.
Mounted up the pulleys (finally!).....
I pushed the heater hoses back out of the way, ran them up and around the opening, reststrained them very lightly to the coil etc bracket and ran them to the block and the water pump.
Mounted up the pulleys (finally!).....
Attachments
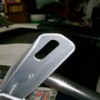
When test fitting the alternator bracket, I decided to modify the lower mount for the idler pulley a little bit. The lower edge was pushing on the heater hose closest to the firewall, so I marked and cut the thing off...cleaned up edges and painted.
Now there is about 1/8" before the hoses touch! No appreciable decrease in bracket capabilities!
Steve
Now there is about 1/8" before the hoses touch! No appreciable decrease in bracket capabilities!
Steve
Attachments
To come.....mounting the AC pump....and first blood!!!
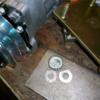
Update: Picture shows washers that I made to take up space on pump ears to the adapting bracket. Had about .018" of clearance and I wasn't sure that I wanted to distort the mounting ears that much....so made up these washers out of some beer caps I found! .012" thick.....so only .006" to "squish" things!!!
Caution....when playing with very thin sheet metal pieces that you just cut out....mind your fingers!
Then the AC belt was still too big.....UGH! Using IPSCO adapter. New one should show up today! (11/10) Ordered belt size 11AV865....not many that are smaller!!
Steve
Attachments
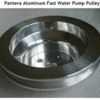
At this point Steve, I highly recommend adding one of SACC's fast water pump pulleys.........
http://www.saccrestorations.ne...t-water-pump-pulley/
http://www.saccrestorations.ne...t-water-pump-pulley/
Attachments
quote:Originally posted by Mangusta:
90 degree end (lower) of the pressure tank bottom pipe.
This is where the 90 degree pipe is supposed to be fitted. Did you use it somewhere else?
PanTTera...
I see that it offers an 11% increase in pump speed...... I found one of the larger aluminum crank pulleys in the stuff that came with the car....but not messing with belts at this time....already can't find what fits right for the AC! Couldn't find the larger alt pulley that I wanted....and had to custom machine the stock one I did find! Trying to stay out of rabbit holes.......!
This pump has two more impeller vanes than normal....about a 20-30% increase in pumping power.....

Less weight?
LIV1S: The small 90 degree pipe is on back order..... The "other" 90 degree pipe is the T-stat pipe...more like an 88 degree pipe (which it should!)....and it just showed up at my door about 2 hours ago!
Gonna forgo test fitting it tonite....will wait until tomorrow!!!
Ciao!
Steve
I see that it offers an 11% increase in pump speed...... I found one of the larger aluminum crank pulleys in the stuff that came with the car....but not messing with belts at this time....already can't find what fits right for the AC! Couldn't find the larger alt pulley that I wanted....and had to custom machine the stock one I did find! Trying to stay out of rabbit holes.......!
This pump has two more impeller vanes than normal....about a 20-30% increase in pumping power.....
Less weight?
LIV1S: The small 90 degree pipe is on back order..... The "other" 90 degree pipe is the T-stat pipe...more like an 88 degree pipe (which it should!)....and it just showed up at my door about 2 hours ago!
Gonna forgo test fitting it tonite....will wait until tomorrow!!!
Ciao!
Steve
Two new muffler tailpipe hangers mounted up today!
Had two new AC lines fab'd up and installed them!
Need to find a shop that can crimp a new connection on my pump Suction line "in the car"......otherwise will find myself tearing the rest of the car apart to get the one connection off of the danged evaporator....


Gonna go mount my new T-stat pipe from Wilkinson! It fits! WAY too shiny however.....for this car!!!!
This pipe has proper bend to bring it around more parallel with valve cover...to fit better to the pressure tank! Finally!
Ciao!
Steve
Had two new AC lines fab'd up and installed them!
Need to find a shop that can crimp a new connection on my pump Suction line "in the car"......otherwise will find myself tearing the rest of the car apart to get the one connection off of the danged evaporator....
Gonna go mount my new T-stat pipe from Wilkinson! It fits! WAY too shiny however.....for this car!!!!
This pipe has proper bend to bring it around more parallel with valve cover...to fit better to the pressure tank! Finally!
Ciao!
Steve
Attachments
thanks for sharing....
did you get the restrictor plate to go with the thermostat.
did you get the restrictor plate to go with the thermostat.
...already had it in place! Thanks!
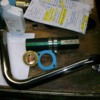
Just picked up some pieces to make a nice heater hose filter too! Hose shop had a bunch of brass and some sexy stainless filters with a gasket rated up to 212F, which should be plenty for the heater circuit. Figured after all of this turmoil with my plugged tubes/hoses, it's the least I should do!
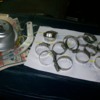
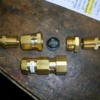
Top components in pic are from local hose shop.
Lower piece is filter from online hardware company. To make this work in car, still need pieces from top line of parts! Need left and right hose fittings, and second piece from right.
Buying lower piece, which has a long cone fine filter in it, AND the three other pieces, pretty much doubles the cost of just doing it with the hardware pieces. Sure the screen filter is a little more coarse, but it will keep the intended large bits from getting into the heater core!
Don't touch that dial!
Steve
Attachments
OK, it's been almost a month since I posted last!!! Have been a very busy beaver......
First most....Thank-you to all of you that offered advice and encouragement along the way!!!!
Report card:
-New stainless tubing bits and rubber splices are installed.
-New water pump
-Heater hoses run and filter installed and restrained. Water valve cleaned out...core flushed.
-Wiring is all sorted out and retained safely!
-New AC pump is in. Needs to get one line a new fitting on the end......to be continued!
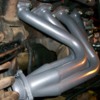
-Headers and exhaust pipes are now ceramic coated and installed! (Should have done this right away when I started!) One pipe contacts axle at full suspension rise...but it did that before...
-New battery is installed.....
-Wiring tested with amp meter before connecting battery....found out that my e-flasher switch is still bad!!! Imagine that....I didn't work on it yet.....! Sure looked funky on the digital volt meter! Jammed a hammered out piece of tie wrap in the switch....OK fixed. Now no current draw!!!!
-Installed new motor mount rubber biscuits....to try and lift engine just a tad to increase header clearance on LH side to engine chassis stand-off. I think you'd need a set of feeler gauges to see if it did much....!!! But it did...just a lot of work with headers in place! Should have done this while headers were getting coated!!! Duh!
-Dorked up left rear deck hinge area by trying to replace deck shocks with new. New ones had more pressure than the same old rear ones....and the sheet metal where the hinge attaches started giving away! Evidence of prior repair..and rust..... Fix is gonna be ugly....just have to accept that some repaint will be likely!!!! Ugh! Will work on this once car is back down on terra-firma!!!
Vacuumed up the excess baking soda in the front boot carpeting from the battery explosion. Came out fairly well all considering! Used a tooth brush to gently persuade the stuff out....
Got the hose out and filled up the cooling system...vented the radiator a couple of times.....T-stat has a vent hole drilled in it....so system self bled while I dorked with some stuff.....
Connected the battery, put the floor jack under the rear right upright to keep the axle from spinning on the exhaust pipe....topped off the water one more time, and ready to try starting!
Pumped the carb....turned key...more pumping...more key....more pumping.....more key...did I fry something????..then a slight hint of ignition!!! ....more pumping....more key and she lives!!!!!
Needed to "run in" the ceramic coating in two stages. 5 minutes...cool down....then 10 minutes.....cool down. Done.
Pipes are getting hot that need to get hot....no deep percolating heard in engine....temp up at 190 (180 t-stat)....but water looks like baby poo!!! Everything in system is new except block....so this is coming from engine.....
Turned the idle up just a tad....
Proceeded to put wheels back on car with new 3/4" lug nuts. The 13/16" ones were too tight for my comfort..socket to wheel clearance is the issue.
Set the car back down with wood blocks under wheels...for now. Still have RH fender shield off....in case I need to get in there....but seems good.
Tomorrow: warm it up a tad and dump water from system. Cold outside.....need warm parts to work on....! Refill....run some more....see how it looks!!!! Dump again if necessary...... Eventually will dump and refill with some coolant.....
Need to put new seal on engine cover and then can seal that up, perhaps even put firewall cover back in place! What a concept!!!
Will Erica's name be changed to Susan soon? Stay tuned!!!
Again, thanks for the help with all!
Ciao!
Steve
First most....Thank-you to all of you that offered advice and encouragement along the way!!!!
Report card:
-New stainless tubing bits and rubber splices are installed.
-New water pump
-Heater hoses run and filter installed and restrained. Water valve cleaned out...core flushed.
-Wiring is all sorted out and retained safely!
-New AC pump is in. Needs to get one line a new fitting on the end......to be continued!
-Headers and exhaust pipes are now ceramic coated and installed! (Should have done this right away when I started!) One pipe contacts axle at full suspension rise...but it did that before...
-New battery is installed.....
-Wiring tested with amp meter before connecting battery....found out that my e-flasher switch is still bad!!! Imagine that....I didn't work on it yet.....! Sure looked funky on the digital volt meter! Jammed a hammered out piece of tie wrap in the switch....OK fixed. Now no current draw!!!!
-Installed new motor mount rubber biscuits....to try and lift engine just a tad to increase header clearance on LH side to engine chassis stand-off. I think you'd need a set of feeler gauges to see if it did much....!!! But it did...just a lot of work with headers in place! Should have done this while headers were getting coated!!! Duh!
-Dorked up left rear deck hinge area by trying to replace deck shocks with new. New ones had more pressure than the same old rear ones....and the sheet metal where the hinge attaches started giving away! Evidence of prior repair..and rust..... Fix is gonna be ugly....just have to accept that some repaint will be likely!!!! Ugh! Will work on this once car is back down on terra-firma!!!
Vacuumed up the excess baking soda in the front boot carpeting from the battery explosion. Came out fairly well all considering! Used a tooth brush to gently persuade the stuff out....
Got the hose out and filled up the cooling system...vented the radiator a couple of times.....T-stat has a vent hole drilled in it....so system self bled while I dorked with some stuff.....
Connected the battery, put the floor jack under the rear right upright to keep the axle from spinning on the exhaust pipe....topped off the water one more time, and ready to try starting!
Pumped the carb....turned key...more pumping...more key....more pumping.....more key...did I fry something????..then a slight hint of ignition!!! ....more pumping....more key and she lives!!!!!
Needed to "run in" the ceramic coating in two stages. 5 minutes...cool down....then 10 minutes.....cool down. Done.
Pipes are getting hot that need to get hot....no deep percolating heard in engine....temp up at 190 (180 t-stat)....but water looks like baby poo!!! Everything in system is new except block....so this is coming from engine.....
Turned the idle up just a tad....
Proceeded to put wheels back on car with new 3/4" lug nuts. The 13/16" ones were too tight for my comfort..socket to wheel clearance is the issue.
Set the car back down with wood blocks under wheels...for now. Still have RH fender shield off....in case I need to get in there....but seems good.
Tomorrow: warm it up a tad and dump water from system. Cold outside.....need warm parts to work on....!
Need to put new seal on engine cover and then can seal that up, perhaps even put firewall cover back in place! What a concept!!!
Will Erica's name be changed to Susan soon? Stay tuned!!!
Again, thanks for the help with all!
Ciao!
Steve
Attachments
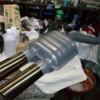
Coated exhaust and muffler. Polishing chrome tips out was a bit of a bugger. Polish on, polish off.....more polish on and on and on!
If you are going to buy new headers and exhaust, get them with the ceramic coating already on them! You will pay more but be a happier camper from the get go!!! Once that cheap ass back paint burns off.....you gots nuttin'! My $.03.....
Steve
If you are going to buy new headers and exhaust, get them with the ceramic coating already on them! You will pay more but be a happier camper from the get go!!! Once that cheap ass back paint burns off.....you gots nuttin'! My $.03.....
Steve
Attachments
Steve,
With repeated normal heating and cooling cycles of the coolant, sediment will accumulate in the bottom of the overflow tank. Periodic cleaning / flushing of this sediment should be a maintenance item.
Cleaning can be done by removing the small overflow hose from the top of the swirl tank and extending it into a bucket. Add water (via a garden hose) and continue until discharged water runs clear.
Or, remove the overflow tank from the car and clean.
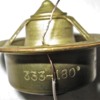
I believe that the 330 series T'stat has an air bleed vent in it already. I know that the 333 series did. See pic below.
John
quote:...but water looks like baby poo!!!
With repeated normal heating and cooling cycles of the coolant, sediment will accumulate in the bottom of the overflow tank. Periodic cleaning / flushing of this sediment should be a maintenance item.
Cleaning can be done by removing the small overflow hose from the top of the swirl tank and extending it into a bucket. Add water (via a garden hose) and continue until discharged water runs clear.
Or, remove the overflow tank from the car and clean.
quote:..T-stat has a vent hole drilled in it...
I believe that the 330 series T'stat has an air bleed vent in it already. I know that the 333 series did. See pic below.
John
Attachments
John,
I guess that makes me the "maintenance man"!!!
I thought that hole in my Robert Shaw T-stat was (previous) owner modified!!!! It looked sorta DIY vs a production thing..... OK then! Good to know that others are benefiting from this mod without even knowing perhaps!
Well, I gotta say that it works!!!! I filled the coolant system in about 5 minutes....bled it out a couple of times via the front vent on the radiator....fired it up and added very little water after that!!!! PLUS I had the front of the car ever so slightly higher than the (edit!) rear of the car, which is totally backwards from recommended procedure (of course there weren't vented t-stats when that was written!!!!) and all seemed well!
After running the header break in procedure of 5 minutes/cool/10 minutes/cool, the pressure tank was down about an inch give or take an inch.....and water was circulating well!
I cleaned the tanks out when I was doing all the pipes and hoses.....so all good there.
What I think I will do, is warm it up just a bit, then dump via the large tubes up front.....
Hmmmm do I take a shower now, then another iron oxide bath...and another shower?????
Cheers!
Steve
Steve,
You is da (maintenance) man !!!
Given your description of the coolant's "color", you most likely have fine sediment in the engine block that will slowly "reveal" itself over time, and finally settle in the bottom of the overflow tank.
Question: If you have "...the front of the car ever so slightly higher than the front of the car...", how does that work?? LOL
LOL
John
You is da (maintenance) man !!!
Given your description of the coolant's "color", you most likely have fine sediment in the engine block that will slowly "reveal" itself over time, and finally settle in the bottom of the overflow tank.
Question: If you have "...the front of the car ever so slightly higher than the front of the car...", how does that work??
John
Ooops! You are right, that was most difficult!!!!
....edit needed!!!!
Steve
....edit needed!!!!
Steve
Steve, if you must, pulling the whole dashboard out to access the AC evaporator takes only an hour or so (4 screws, tach & glove box removal). Reinstalling takes a day or so.... I've had ours out twice. There's a How-To article in the POCA Archives.
If you're gonna use r-134a freon, you should R & R the evaporator valve under the dash near the glove box (accessible). The OEM valve is calibrated for R-12 so freon flow is less, and usually has a small cone-screen inside the 'to' line leg of the valve, that is plugged solid with rubber flakes & mung but is cleanable once hooked out. Most guys leave it out to increase r-134a flow a bit more. New valves don't come with the screen.
You should also R&R the dryer can in back regardless of which freon you select, as age & flow reduces the dessicant pellets to an awful looking black sludge. And finally, many owners add a compressor overpressure safety shut-off switch. Ours blew an A/C line outside of Bakersfield that oiled down the inside of the windshield at 90 mph & sounded like a rifle shot....
Jack,
Not looking to R&R evap at this time....just need to get one hose end replaced (hopefully in car!!) and THEN I can suck down system and see if I need to R&R evap....!
Using R12.
Did the Valve screen thing.....posted elsewhere....???? Found some chips and dust...
New dryer is waiting for new connector....not installing it until system is "closed" again!
Pressure switch: Have port....no switch at the moment.
Cheers!
Steve
SANITY CHECK REQUIRED! Am I bassackwards here?
OK warming up car to dump water.....
Hot water is entering lower port in radiator....
Shouldn't this be entering the upper port...gets cooled....drops.....exits colder to water pump via lower tube????
What did I mess up or miss or nothing?
Steve
OK warming up car to dump water.....
Hot water is entering lower port in radiator....
Shouldn't this be entering the upper port...gets cooled....drops.....exits colder to water pump via lower tube????
What did I mess up or miss or nothing?
Steve
Steve,
You have the piping correct. The Pantera is not the same as other cars...in at the bottom, out at the top.
John
You have the piping correct. The Pantera is not the same as other cars...in at the bottom, out at the top.
John
Whew! ....was beginning to thing I had lost MORE brain cells.....!
Grazi!!!!!
Steve
Grazi!!!!!
Steve
quote:Originally posted by Mangusta:
Jack,
Not looking to R&R evap at this time....just need to get one hose end replaced (hopefully in car!!) and THEN I can suck down system and see if I need to R&R evap....!
Using R12.
Did the Valve screen thing.....posted elsewhere....???? Found some chips and dust...
New dryer is waiting for new connector....not installing it until system is "closed" again!
Pressure switch: Have port....no switch at the moment.
Cheers!
Steve
Hey Steve,
If you still don't have a/c hoses made, I can bring my crimping tool to the Super Bowl party in January(?) and we can make them then. You just need your hoses cut to length and the ends you need crimped on. The tool doesn't get used otherwise. I'm still on the fence about converting mine or staying with R12. I have two cans of R12 on my shelf just in case.
Bayani
Update time.....lots going on....
Thanks to Bayani, the remaining AC line has a new "tubo" (O-ring) type connector on it and is connected up.
Futszed around with loose connections on drier unit...left them loose..duh! One slow leak on new hose going to condenser. Eventually got vacuum to hold overnite!
Charged system only to find out that the expansion valve isn't working right!
NOTE: System will take about 3-1/2 to 4lbs of R12. No where is this stated in any Ford documentation for the Pantera, NOR in any TSB's.
Ordered two new ones, should be here tomorrow. Why two? They are so steenking cheap....$12 or so....
Moral of this story? If your AC system hasn't been used in 20 years or so, REPLACE ALL THE CHEAP PARTS WHILE IT IS APART!!! What are the cheap parts? Drier unit and expansion valve are main two cheapo items. If your system has O-rings you may consider doing all of them also.
Next on list, is the "easy" hoses....which is 1)hose from pump to rear of car, connection at top of condenser, and 2) the other is the short hose from drier to condenser lower connection.
Next job is dumping water one final time out of cooling system and refilling with antifreeze mixture.
If I can keep the engine cool and the passengers cool, I can put a bow on this job!
Then on to pesky decklid hinge.....gack!!!
OH, and double check relays for fans....seems like TSB's say that both fans should be on by operating temps.....but I have only one at about 190ish (idling while charging AC.) Not sure when this car is set up to have second fan come on. Will rig up some jumpers to test relays.....and mirrors so I can work upside down...!!!!
Ciao!
Steve
Erica is still being Erica.....true to her namesake.......
I now have joined the ranks of the "just wanted to change the expansion valve.....and CRACKED THE DAMNED EVAP TUBE" crowd!!!! AAAAHHHGGGG!!!!
Will it ever end....so close, but no Emmy!!!
The above statement sez it all.....working to get that danged connector loose on the evap valve and trying to get a 1" wrench on that fitting was the demise.... I was carefully wiggling to get some wrench in place and the tube moved a bit....a bit toooo easily!
I thought, OK, hopefully I just bent the tube a bit....it's supposed to be thin material.... Well it is thin material and as I didn't want to believe.....the tube cracked..... Vacuum and pressure testing revealed the bad news.
No where in any documentation that I read, did it mention that that little round end piece on the AC housing came off! (It has the flapper in it to divert air....cable operated from the dash.) Would maybe have helped me....but too late now.....in the notes!!!!
I have been doing this ENTIRE job bass ackwards..... Instead of starting with the heater stuff, I should have jumped right to the EVAP and AC stuff...... that way, I wouldn't have had to waste so much time with the heater core clean out etc, in the event that this unit got busted....
Lesson learned is a repeat.... "replace all the cheap stuff while you are in there"! Drier is a given, Expansion Valve is the crap shoot. BUT on a car whose A/C hadn't been operative in perhaps two decades, I should have known better....but then I'm not a heavy AC mechanic either! I was hoping for the best.....got the worst!!!
I've heard good about Wilkinson's "improved alloy" unit, but not as it directly fits into a later car. (1974) The last thing I want, is to have to change connectors on anything.....! Or the heater valve.....again....!
Murphy's law sort of dictated that this would happen. I just filled the car with a 50/50 mix of coolant.....now I need to drain it out again, and drain the heater tubes to avoid getting coolant all over the carpets.
I've been using Dailey's (PanteraPlace) Evap' removal procedure as guidance, but it is penned for an early car, early dash. Nothing really applies exactly the same. But I have clues from this site, like "six bolts/fasteners" hold the dash in place....got them.....but getting the lower instrument cluster out of the way is not covered......sooooo, I'm drudging thru it, taking notes and will try and put together an updated procedure when I'm done.
SO, while I have the dash off, I will get at the pesky emergency flasher button with a new one, AND fix the wiper switch (what for???) as the switch puked it's contents all over the floor when I pulled it out.....
Erica strikes again!!!
Found a mystery under dash switch that switches nothing.......perhaps an old antenna? Can probably remove it or find some other reason to leave it.....
Next on the job, is dropping the steering column, and getting the speedo/tach units pulled, wires documented.....and hopefully lift the upper dash section out tomorrow! Supposed to rain buckets here, all day Monday, so good time to work on this job.
This job's uglier than a huge sale on a hot day at Walmart.....!!!
Cheers!!!
Steve
OK, upper dash section is finally out!
Jack, I think it takes an hour just to get that stupid excuse for a glove box out!!! Who designed that fastening system? What a joke!!!
I'd go search the POCA archives, but the article is probably written for an early car, and from what I have seen trying to use Dailey's procedure against a later car, is fairly useless, more like a suggestion!
What was previously reported as 6 screws or fasteners to retain a late dash is incorrect. It is actually 8. Two on each end of dash (one is hidden by the A-pillar molding) but you need to take the A-pillar moldings off, which is four tiny #1 Phillips head screws....to I guess technically we're up to 16 now.
Then there is getting the front lower console section ("flare" as some call it) loose and moved back....out of the way.... which requires the console rear section to be lifted out of the way (that is two screws at the bottom front edge, and 4 bolts holding the shifter plate in place...) now we're up to 22 fasteners. A couple of misc screws on the bottom of the flare section need to be removed, and the 4 screws retaining the dash courtesy lights need to be pulled to get the wiring disconnected so you can lift the dash out neatly.
Then let's not forget the 4 thumb nuts that hold the tach and speedo in place....Of course my car is missing one of these thumb style and they substituted and actual 7 or 8mm nut....sheesh...that was a beeeeeeeyattccchhhhh to get out of there.
So, I've lost track of the fastener count at this point....heading past 30.... Have them all "punched" into a piece of cardboard along with wiring notes (colors) and such for easier reassembly! HAH!!! Nothing easy about this....only after about the 3rd time..... CHECK ALL YOUR DASH LIGHTBULBS NOW!!!!
You really need baby arms and fingers with Conan's strength in the fingers to get some of this stuff loose! I am truly surprised that I didn't a) scratch the heck out of my arms drawing lots of blood, or b) dislodge or break something very expensive and fragile behind the dash.....but then I need to put it all back in yet!!! ....AND I'm not done with pulling the EVAP box yet.....PLENTY of time to go further down the rabbit hole...!
OH, the drawings show one piece gauge retainers for the thumb nuts to work against to hold these two large units in place. They lie!!! There are four small clampy pieces that you need to finagle back into place and then find the studs.....and then find the studs again with lock nuts....and again with the knurled finger nuts....and again and again when you drop said nuts.....and again....for good measure!
I WAS pleasantly surprised to see large connectors on the wiring for the two large gauges and the emergency flasher wiring. There are a few more of these scattered about also....
I found a jumper on what appears to be the wiring for the GEN lamp...which is missing.....and am presuming that this is due to the one wire (actually 4 wires) alternator conversion no longer needing the lamp function. Look at ammeter you dummy! The idiot light isn't working! Get it...idiot light...dummy idiot light? OK, it's late.....
Looks like I could use a "foam seal kit" for the evap housing..... Any comments on the quality of the offerings by vendors????
OK, fingers are bleeding from typing....surprised they have any skin on them from today's adventure!
Tomorrow: Drain the fresh antifreeze out of the system, disconnect heater lines and blow coolant out.... remove AC lines....and hopefully get EVAP housing on the work bench!!! No more busted parts please.
Ciao!!!
Steve
Add Reply
Sign In To Reply


