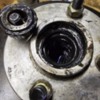
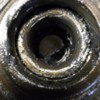
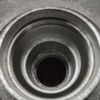
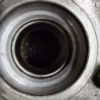
AHAH!!! FINALLY, I ran across an old folder of low res GOose pictures that I have never managed to find let alone re-file......as there are ball joint photos!!! And more!Original style ball joint. Upper plate cracks and turns stud loose on the public! Avoid this style if at all possible....or buy spares....and life insurance policy...up your collision coverage too......!
Newer style cast all in one. Mystery part number??????
Upper A-arm all ready to go back on.
Improved style A-arm with reinforcement over the ball joint cup and all the way down the length of the arm. Material is "U-shaped" and "stitch-ish" welded...not solid beads.
Proper "needle" style fitting for grease guns and UniBal joints!
I know this doesn't help find the ball joints.......keep diggin! Scour the earth for niche Fiat businesses!
Steve
Attachments
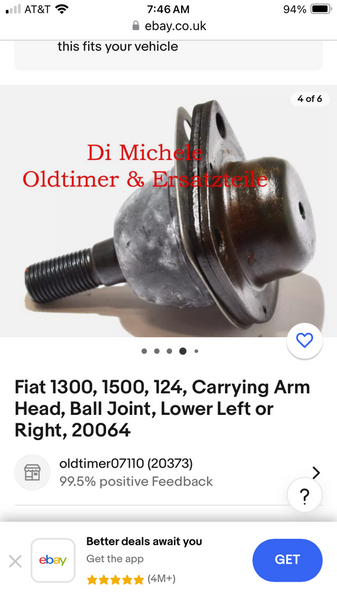
The Fiat style joint for the 1100-2300 listed in Ebay UK item #115683332101 that Lee posted looks perhaps to be the best candidate yet????
I would ping the seller to get the dimension/diameter of that lower casting piece that fits into the Goose a-arm........run to the bank from there.....if need be????
There were some other candidates.....many listed as lower for other cars.....that looked interesting. Again, I was looking only at the "one piece" castings and not the stamped multi layer steel versions.......
Steve
Ran across this picture of my car at a PCNC tech session, preparing for Vegas POCA show I believe. It sez 2006 but I wonder about that.....seems like it should have been earlier......brain fade! But figured you'd enjoy the story....
What started out as a "look see" as to why my front tires were wearing oddly....new tires......and turned into a full on "ball joint" fest...... I had to have my son dig out my 4 new ball joints from my parts stash in my garage about 15 miles up the road, THEN convince my wife that she needed to joint the party and bring them down......that was easy.....the convincing thing....! ![]()
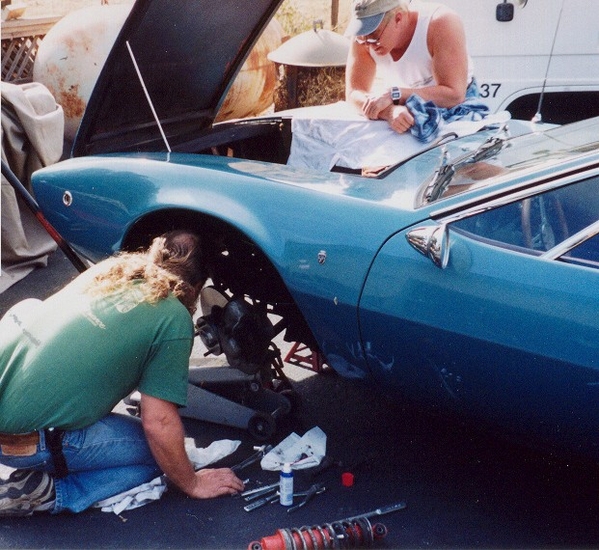
Note the old Koni and original spring. If I didn't replace all 4 front joints that day, I most certainly did the job shortly after!!! ....and got it realigned!
![SteveL[1] SteveL[1]](https://pantera.infopop.cc/fileSendAction/fcType/0/fcOid/1598208419924711/filePointer/26812249033097219/fodoid/26812249033097214/imageType/SMALL/inlineImage/true/SteveL%255B1%255D.jpg) Seems like I worked on everything on the car....at a low altitude at these tech sessions......power windows.....ZF......shocks....
Seems like I worked on everything on the car....at a low altitude at these tech sessions......power windows.....ZF......shocks....
Cheers!!!
Steve
Attachments
...maybe Lancia Fulvia is not a bad start--at least, I remember all other A-arms (for the fiats here) were stamped steel--so no critical fit....but I see the Lancia Fulvia has something of a cup on an a-arm made of tube...
Attachments
...and the miracle, he has 6 of them. As I can tell, the ones that should seem to fit come in ones or twos...looks like a winner.
If these are the "sandwich type" with the steel top piece that busts out before you have 30K miles on the car.....I'd keep looking.......!
IMHO,
Ciao!
Steve
Sorry, I was looking for a replacement that looks like the original…
I guess it may be me that is over thinking this...... Ultimately it's up to the owner to decide what and how to build his car. I forget that the looks of something can mean a lot....I should know that as I sell parts for other vehicles based on the fact that they are and look like the proper parts!
I drove my car a lot......(miss it a lot....) and when pieces fell out of the a-arm when I removed them (both sides!), I was shocked! It was literally one good bump away from who know what kind of a "hold my beer" moment. But seriously, it was bad enough that the early cars were known for simply busting the ends of the a-arms off completely! Hence the two-three different revisions as time went on! To have the ball joints self destruct doesn't give me a feeling of confidence. I guess that was the cautious safety inclined me.
But today, as the values of these cars has skyrocketed, I can understand where actual original parts have a place in a car that will likely only see road duty on and off of a truck/trailer and around the grounds of a car show. ![]()
Carry on!
Kind regards,
Steve
@mangusta posted:I guess it may be me that is over thinking this...... But today, as the values of these cars has skyrocketed, I can understand where actual original parts have a place in a car that will likely only see road duty on and off of a truck/trailer and around the grounds of a car show.
Carry on!
Kind regards,
Steve
very true… and while the owners try to preserve the value of the car - at the same time they’re killing the car by not driving it!!
my car did 80 miles in 10 years. I had to replace or overhaul everything front to rear.
you don’t use it - you lose it!
Regarding the BJ .. I had some time to kill waiting… so I thought I help searching.. getting pretty good at it if I may say so (lots of practice with weird cars)
Thanx for data on ball joints. Have first set I ordered on ebay, and am waiting for second set to arrive.
Out of curiosity, if I am actually able to get the 4 bolts out of the hub and then am able to separate the hub from disc, how hard can I expect it to be it be to get the inner/outer bearings and seals out? Will the two seals be easy to find? Looks like the bearings are available after going through forum.
Once you get those nuts off of the spindle, all will be easier than if you don't!! ![]()
Seal number: 4117608 Fiat 1300 and many many many more. This too is info found on this site! Hello Moderator! We need stickies!!!
Cheers!
Steve
Ordered the following parts from Spareto in Estonia and they fit:
Ball Joints - TRW JBJ306 (FYI...4 ball joints for total of $40.72...shipping was additional $37.81)
Tie rod end - Delphi TA650 (FYI earlier order...2 tie rod ends for total of 10.12 Euros; clutch slave for 9.26 euros; 2 of the steering rack gaiters for total of 4.30 euros; 4 of the wrong ball joints (Delphi )TC76 for 27.96 euros...shipping for all was 39.64 euros...on this order forget to select $ for payment)
Have now ordered from them three times with zero issues. I ordered the TRW ball joints from them on 21 May and then added a hard to find relay for different car on 22 May. I received this order at noon today via DHL.
wrt to hub on disc again...have been looking at this hub/disc topic online. If I can get those 4 bolts out of hub holding it to disc, online shows quite a few nightmares about getting hub off disc. Are mechanics such on the Goose that this issue will not occur between spindle, disc, and hub?
When "staking" end of spindle as discussed earlier, attached pic looks like previous folks doing wheel bearing replacement simply "squeezed nut" to fill indents on bolt end of spindle vs using a cotter pin. Not having done a wheel bearing job before, is this an acceptable approach or should a cotter pin always be used?
Attachments
MJ,
You are looking at state of the art Italian technology here!!!!! ![]()
No cotter pins required or used or have the provision for it.....only new nuts...... Use a nail to release the nuts from the spindle....watch out for the threads......
I used cotter pins only because I drilled holes in my spindles....gonna save the world......! Did not take into account how deeply hidden the holes would be in the hub!!! Had to pre-curve or arc the pins in order to get them in and out easily.........
Order extra nuts....they are cheap....... See LeeA, he's the nut dealer! ![]() )))
)))
Steve
Thanx...searched the forum and found these various numbers for the wheel bearing job so they are all in one place:
front wheel bearings Timken LM67048, LM67010, LM11949, LM11910
Front seals 4117608 (??? how many)
Front nuts 14044871 (right front), 14044171 (left front)
Since I haven't gotten the hub off yet, not sure just how the bearings and seals (or how many seals there are) are arranged in Hub. Was able to get three of four of the hub bolts out, with one being stubborn, and am soaking the last bolt longer in kroil oil. Lot of rust on those bolts, glad they didn't snap off. Was able to create a solid base to brace hub by putting for nuts on the lug bolts, turning the hub upside down in a vice tightened to the 4 nuts on the lug bolts, and then unbolted the bolts holding the hub.
Ended up drilling out fourth hub bolt and knocked off head...will address remnants left in disc on thread when I get hub and spindle/disc separated. With that in mind, for the front left spindle, does the nut turn clockwise to tighten/counterclockwise to loosen? or is it a reverse nut?
Also, given hub nut pic above, managed bend screwdrivers try to push out the crushed part to no avail. Is best way to cut the crushed part with a chisel?
NAIL!!!
No chisels, no screwdrivers....... maybe, perhaps, possibly use a skinny center punch to push out the staked material. DO NOT deform the grooves and threads.....you'll hate life....or you'll need a LH thread reforming tool!
I forget which side is LH..... look closely at any exposed threads and read them.
Also NUT may have stake marks on all 6 points indicating it is LH.....
See Lee's pic that he posted a few posts back for the difference!!!
Steve
Yes, one side of the stub axle big nut is reversed thread! Look closely at the left side stub axle threads...amazing how much easier it is to remove the nut when you think righty-loosy lefty-tighty...
As it turns out, I don't think I needed to spend the inordinate amount of time getting disc off hub unless I am missing something. Anyway, three of the four bolts came out and the fourth will require getting the rest of the drilled out bolt out and then making sure threads are still good.
Got spindle nut off using a variety of tools to push out the two crushed portions of the nut. The nut was a normal clockwise to tighten, counterclockwise to loosen.
Now that I got it off, please tell me just what I have. In the outboard pics looks like the nut attached directly to the bearing component and I could easily remove bearing by just pulling it out. Was there supposed to be some sort of seal? Inside the top was the female portion the bearing sat in. How do I remove that component? Are these components Timken LM67048, LM67010? Where is seal 4117608?
Inboard pic is back of disc. Nothing came out of the back like the front side. I assume the ring at the top must be the seal. How best to remove? Inside the inboard part of the hub, I didn't feel the same male and female Timken parts like I did on the outboard. Can I assume once the seal (4117608??) is removed I'll find the the male and female bearing components just like on the front? Are those parts Timken LM11949, LM11910.
I've scene online how to pack bearings. Got it. How about the inside of the hub? Do I fill it with bearing grease completely before reinstalling on spindle?
Have read various versions of this on the forum, but when reinstalling, the hub/disc goes back on the spindle and the nut goes tightens onto the spindle. What is the best technique for tightening and torquing the spindle nut? what are the various torques applied during tightening process and what is the final torque on the nut before putting the cap back on?
Thanks for the assistance. Never done this before.
Attachments
Knocking out the bearing races is rather easy but it takes some finesse to install the new parts without damaging… same holds true for the rear seal…
in your case, I would probably suggest to go to a Automotive shop and let them change the races, give them the inner bearing may be packed and pop the rear seal in as well..
You probably may be able to watch and wait for it…
I personally like to use a press to install… it is doable to take the old race or/and a socket and a hammer…
whatever you choose… always support the hub do NOT use the studs to support the hub!!!!!
OK you are correct about your statement of disc/hub.
Your bearings did have "no lack of grease"!! ![]() Good thing, but better to be safe than sorry! We were on a tour in France with a guy that had just bought a "fully restored" Pantera.....that suddenly locked up a front wheel.....upon some roadside mechanical work we discovered NO GREASE in the wheel bearing! Car was towed to nearby shop for further work. I suggested that they check the other side just to be safe....... Yup, NO GREASE there either!!!
Good thing, but better to be safe than sorry! We were on a tour in France with a guy that had just bought a "fully restored" Pantera.....that suddenly locked up a front wheel.....upon some roadside mechanical work we discovered NO GREASE in the wheel bearing! Car was towed to nearby shop for further work. I suggested that they check the other side just to be safe....... Yup, NO GREASE there either!!!
SO, you've got grease. There must have been a seal some where in all that grease.....clean things up a bit and look at the bearings and races for blueing or wear streaks......odd wear....... The bearings and races could actually be in very good condition!
Your bearing/race numbers will be stamped or etched on the inner races of the bearing and the outer side of the races. If you are doing it by hand, as set of bearing "pushers" comes in handy....... or a brass drift/punch of sorts..... Softer material prevents damage to the races...... You WALK them out if using a drift....a little at a time.....you don't want to damage that aluminum carrier. Otherwise a bearing puller or similar on a press to pull/push them straight out is best.
Grease on!!!
Steve
Got components (all inline with corresponding parts manual page) completely apart with the exception of the two races and inner spacer. Will use Steve's technique on races. How best to get inner spacer sitting on inner race out?
Also, although it appears to create a good seal, does rubber o-ring around hub need to be replaced?
Attachments
That rear (inner) race looks really nice as does the outer one! I don't think I would mess with trying to take them out! You risk damaging the hub.
I don't recall what I had to do to take out the spacer. It isn't much of a piece and it may have simply come out with the race when I pushed it out.
You mention o-ring....do you mean seals? (I don't recall an o-ring....but I'm old and it is excusable to do so!) ![]()
Since you have the seals (?) put the new ones in....with a little grease on the lip. Pack some extra grease in the middle of the hub but do not pack it fulllllll! It needs room to expand a little. It will level out.
I can't tell real good about that outer race from the pic, but it looks like no boogers and an even contact pattern consistent with the portion that doesn't come in contact with the bearings.....not a lot of mileage on them!
In my case, the synthetic wheel grease that I used failed me......so I only go with the Molybdenum filled "Ford wheel bearing grease" from o'Reilly's for all of my wheel bearings. I know that there are some synthetics that are really really good.....I just haven't come across them yet....
Steve
Got outer race pounded out without any problems or damage...inner race not so much...due to the shape of the hubs inside cone shape, cannot get my drift to sit on what appears to be a much smaller lip on the inner race than was available for pounding on outer race...any tricks to getting the inner race out (I am assuming the spacer will come out once the race moves it)...would this cheap 3 jaw bearing puller from amazon work?
The three jaw sounds like over kill....... A set of bearing mandrels could be in order....but a crap shoot there also to get the exact size you need! IF you have a metal lathe you could cut one to size or simply make one....... Goose tool #241......
Either a finer tipped punch (gently grind your old buggered up punch flat (if not already!) on a fine grinding wheel!)...go easy on it tapping it out..... OR just haul your two hubs down to a machine shop and see if they have a set of mandrels that will fit inside the hub directly on the small race sticking out....and they can then press them out.
It's always something......!
Steve
For 14 bucks for no fuss, home delivery tomorrow, and knowing I'm going to need the same thing on the other wheels, this puller will be part of my "frustration reduction act". And, unlike the "inflation reduction act", bet it'll work!
At least only you are frustrated… high Inflation is worldwide!!!
Absolutely correct! Hope that's true. Car rebuild, heavy mnx frustration, I wouldn't wish on anyone. However, feel fortunate to be able to have that frustration!
@muttsjet posted:Absolutely correct! Hope that's true. Car rebuild, heavy mnx frustration, I wouldn't wish on anyone. However, feel fortunate to be able to have that frustration!
I’m fighting my electric for 2 weeks now.. it’s just 😵💫🤯😳
And they call this a "hobby" !!!
Attachments
Attachments
"Frustration Reduction Act" only worked at 30% level. 3 jaw puller could not attach to bottom of inner race, amount of lip showing minimal... will use on other outer races...amazingly, the 44mm bushing driver I used from the Bearing Race and Seal Bushing Driver Install Set to install the outer race fit the top of the race perfectly but the angle of the recessed portion did not match the race...could have ground it to fit but then it would have been rough insert against race...turned it upside down centered race and pounded it in just fine.
On Monday, June 3, 2024 at 01:19:03 PM PDT, The De Tomaso Forums <alerts@crowdstack.com> wrote:
| == To reply by email, write above this line. == |
|
New Reply By muttsjetM
|
| Goose 8MA642 Refurb and RepaintMReply by muttsjet
"Frustration Reduction Act" only worked at 30% level. 3 jaw puller could not attach to bottom of inner race, amount of lip showing minimal... will use on other outer races...amazingly, the 44mm bushing driver I used from the Bearing Race and Seal Bushing Driver Install Set to install the outer race fit the top of the race perfectly but the angle of the recessed portion did not match the race...could have ground it to fit but then it would have been rough insert against race...turned it upside down centered race and pounded it in just fine.
[ View Reply ]
|
| The De Tomaso Forums
You received this based on your notification settings. You can adjust your settings or unsubscribe anytime.
|
Got a freezer you can put it in over night? Perhaps some mild thermal expansion/contraction will help...
MH
Can someone help us keep the players straight?
Muttsjet - 8MA0642 Car Done?
Lee - 8MA???? Car Done?
Mike - 8MA???? Car Done?
Maugusta - 8MA???? Car Done & Sold?
Thanks…. Hard to keep straight, but I know this thread is for you, and not me…
Rocky
8MA642 - back from paint after 9 years and totally stripped down...right now, as first part of project, replacing/rebuilding all clutch/brake/[suspension at least in the front for now] components and installing new lines...am working my way front to back...multiyear project


![SteveL[1] SteveL[1]](https://pantera.infopop.cc/fileSendAction/fcType/0/fcOid/1598208419924711/filePointer/26812249033097219/fodoid/26812249033097214/imageType/SQUARE_THUMBNAIL/inlineImage/true/SteveL%5B1%5D.jpg)
