@mangusta posted:

That is WAY more work than I remember doing on the similar looking BJ!

There is an upper and a lower for the Fiat 124...... I don't know which one.... but I bought mine from the factory a million years ago and there was no fussing.....

Others have been thru this same search....

We need the ability to "flag" or group/save posts of such significance....???? Websters??? IDeas???

STeve

I was told that the correct Fiat one was, IIRC, 40mm and had a tendency to crack...  So they fixed the problem with a 43mm replacement...  The Fiat used a collar instead of a cup for mounting and it didn't matter for them as the collar was larger and the 43mm BJ fit just fine...  But of course DT had to be different...  The gist of the story is that the 40mm BJ's are no longer made...  I suppose if you are very lucky you might find some that have been sitting on a shelf for a few decades, but failing THAT, the Delphi appears to be the closest out there...  and truth be told, it wasn't particularly difficult to get it to fit...  Just used some old school methods and it worked fine.

MH

Am stuck...three quick questions:

- one of the two front caliper pistons (other popped out immediately with compressed air) is now retracked, frozen in place, and will not budge/loosen using compressed air nor using manually trying to turn piston out...any ideas?

- side cap on front caliper also frozen and will not unscrew...a steel bar, inserted in slot with caliper in vice, bent and cap didn't move a mm...any ideas?

- will removing the four bolts (1 in pic) at the base of the wheel hub allow me to remove the brake disc, or do I need to also remove other bolts on the inside of the disc?

1000005689

Attachments

Images (1)
  • 1000005689

Spray with LPS type oil lube....maybe WD40......  Use air pressure, don't pry.  Take the bleeder valve out and check for obstructions. (That would never happen!)  Look down in the hole to see if there is anything in the caliper hole....

That is odd that it pushed in easy and is now stuck.....something simple going on.

Use more air pressure, BUTT BE SURE to put a piece of wood in the caliper to cushion the piston should it suddenly decide to eject itself!  NO FINGERS!!!!....or you'll have less fingers when done......

Use brake lube when reassembling.... DOT 4 for fluid.

I have never heard of anyone getting the giant side screw/cap loose. You'll bugger it up most likely....      No need to remove it.    Pistons "float" in the housing.  Bore can be hand sanded to remove garp but don't need to worry about resleeving them unless REALLY corroded away....(from use of DOT 3 fluid!)

If you need that sort of work.....there is a guy in LA that specializes in Girling stuff.

I believe that the four inner bolts removed will drop the rotor.  BUTT you need to remove the entire assy from the spindle anyway to get the rotor off, which will reveal the truth!

Bearing cap has an o-ring in it, so go easy on getting it out....silicon grease when reassembling!

Go baby go!!!!  Wait! STOP!!! 
Steve

Last edited by mangusta
@muttsjet posted:

Am stuck...three quick questions:

- one of the two front caliper pistons (other popped out immediately with compressed air) is now retracked, frozen in place, and will not budge/loosen using compressed air nor using manually trying to turn piston out...any ideas?

- side cap on front caliper also frozen and will not unscrew...a steel bar, inserted in slot with caliper in vice, bent and cap didn't move a mm...any ideas?

- will removing the four bolts (1 in pic) at the base of the wheel hub allow me to remove the brake disc, or do I need to also remove other bolts on the inside of the disc?

1000005689

I had a piston that wouldn't budge from the caliper no matter how much air pressure I used...  I ended up hooking the brake line back up to it and standing on the pedal...  it finally popped out...  Steve's note to put a piece of wood or something to catch it is worth noting, mine should be approaching the outer atmosphere of Saturn next Tuesday!!

I'm pretty sure those bolts will release the rotor...  BUT, as noted, there is more to to than just getting it loose...

is that a Cobra (AC) in the background?   the mortal enemy of the mongoose!!!

MH

Last edited by mkeh

Tap and die jury rig of fittings to block off fluid port and get no pressure loss from 120-140psi compressor and banging cap/sides of caliper for about 2 hrs finally got it to move and explode out.

Yep, 427 side oiler with 4 sets of IDA webers waiting its turn to be worked on. Need to replace clutch which requires engine pull based on its Contemporary Motors frame. Will probably be a while since I am focusing on the Mangusta.

With stuck pistons in calipers that disassemble, I've had good luck by tapping the piston IN a little, then using air or hydraulic force to move it back out, alternating that until the piston finally moves freely. Most sticking is from bore varnish made from water, air & old brake fluid. It removes with hand-held Scotchbrite, not motorized which will machine things and ruin precision parts.

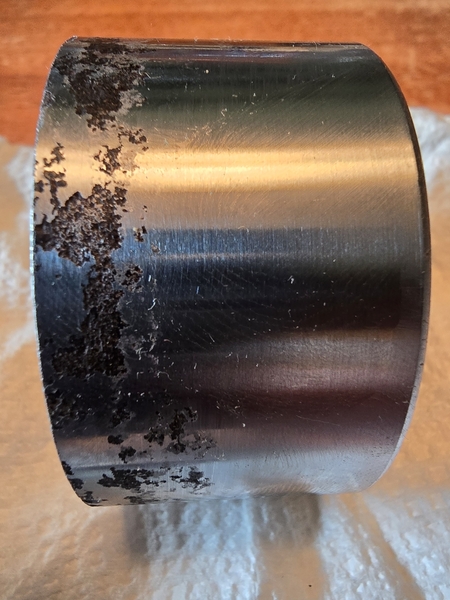
Absolute junk. Each pit below the sealing ring will leak. Pits above the seal comes from water retained in old 'protective' boots. Problem is, every known European brake caliper including aluminum Ferrari and Cobras have OEM chrome or nickel plated mild steel pistons.  Check them- they're all strongly magnetic & very hard. Water adsorbed in old brake fluid penetrates the plating and rust-pits like an old bumper.

U.S calipers- OEMS, Wildwood etc) have long used stainless steel pistons (since at least 1967) and that's what we're used to. Unless the brake fluid is decades old, one doesn't get pitting with U.S calipers.  Stripping old steel pistons, building up the pits, regrinding  and re-plating is cost prohibitive. New pistons are reportedly available for most Girlings but I don't know if they're stainless.

Unless these are super duper special calipers......no boots atall.  This is one of the worst I've seen!

I've posted the below previously:

Front brakes: Type CR: seals  White Red Blue  Piston  2-3/8" IIRC.
Rear brakes: Type ORA: seals Brown White Red White  Piston 1.75"??
Master Cylinder seals: "Fiat brake seal" #4115452  7/8"          Many places
will have them, you need 3-  Dave at GT Car Parts  623-780-2200      "Many M/C
and clutch applications....."  I think I paid about $3 per seal.  I have a
spare set.....
For the caliper seals/retractors:  Try Ray Hulbert Motorsport    Tel: (949)
362-0514  He's in LA.
If that fails, try Orphan Auto in OH, Jim- 937-554-6000  (last note I had
indicated about $20 per seal......
I have some notes on "kits" but have no idea how accurate the info is:
Fronts  SP2502  (this will also come with totally useless dust boots.....)
Rear  SP2524  (This could be for the three piston caliper that I have.....)
        SP 2557  is another kit I have noted.....
Steve

If it was me, I'd replace it only because there are a couple of scratches seen.  You would need to measure from the bottom of the caliper bore to the top of the rubber retracter  area and compare how that sits on the piston...how much if any damage is covered. If the damage gets into this area, then safer to simply replace.

WHOA NELLY!!!!

Steve

Thanx everyone for inputs. Tempted to just replace all the cylinders and seals as well as wheel bearings all around since I am there.

Steve, my internet search coughed up the same two sites. Don't have the rear wheels off yet, but looks like I have Girling "ORA" calipers on the rear given they look like the fronts, but measures smaller dimensions.

...no cylinders(!) but not a bad thought.

The rear cylinders should be 1.75" pistons, similar in execution....no dust shields!     Soooooo, I wouldn't order anything until you get the rears popped apart too.

I had the "other" rear cast iron 3 pot calipers on my car.  In 1996 or so, it cost me about $300 for a tiny bag of retractors/seals, 4 small pistons (2 sizes used in each) some ebrake pads..... Needless to say I was GLAD to get them for any price!

You should also look closely at your flexible lines/hoses.    With likely use of DOT3 fluid, the portion of the hose fitting that fits inside the hose can get rusted and clogged up.   Before I could find hoses or have them made, I simply cheated and cleaned out the garp with a drill bit......there was MUCHO plugging going on!

If you live anywhere near a tractor dealer...farm country, most of these shops can custom make hoses to fit.   SAE/British threads etc on the calipers and hoses in my experience.  I had a "hose shop" here in Silicon Valley make them up in minutes for around $35-40 per hose....pressure tested to boot!

I REALLY appreciated the security of knowing all was good and new in the braking system!

One last piece......yah right(!!!!)....the proportioning valve (By Bonaldi) that you may have on your chassis RH of the oil pan.  I forget the actual name of the thing....prop valve, pressure amplifier....glorified splitter.....   I could not get my original apart....no matter how much I messed with it. Thankfully, I had purchased the last piece that DeTomaso had in stock, again in 1996-7.     I have since seen these things offered up new on the internet!!!    

Internally there is a spring and piston....(to modulate pressure???)....mine was more like a solid piece of metal....surprised it even worked......   Some cars did not use this but rather a simple "T" to direct flow to R and L side of car.

I believe Porterfield can get you good "street" pads for these calipers.  Now parking pads are available all over the place.   Similar brake mechanism used in Fiat/Alpha and other Italian steeds!  British cars.......... You may need to exchange the parking pad bases.....so don't trash them!

I'm guessing about $800-900 for your brake job in total (providing you don't need M/C, or booster, or compensator replacements!).  For these cars, that's pretty cheap IMHO!!!! Gotta love it!!!!

Bearings:   Cheapest parts you will almost ever replace on the Mangusta!!!!   Standard Ford items from around 1968-1970.  Maybe earlier..... You'll find numbers on the races.....easy peasy!!!

Cheers!!! Steve

Only pic I could find in short order of the brake "valve" thingy....new one...had to splice the inlet line for some reason......
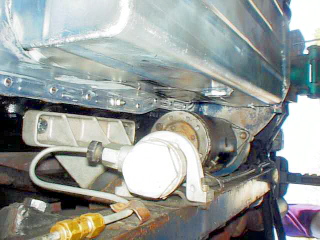
aviaidleft2

Attachments

Images (1)
  • aviaidleft2
Last edited by mangusta

"Compensator" is the term used for this thing....

MPN: 67226  New search on this number (or the other from below) and from Lee A in 2016 (AND some brake M/C replacement info!).

LeeA wrote: But also, still available, even new part 003204375 ("compensator"). Available at Euro spares for $1k but also available (for the moment, on Ebay france) for half that.

- Brake Master cylinder appears to be from a Fiat 130...but priced for the Dino (Fiat and Ferrari) 246...actually, not crazy expensive, about $300 from several sources (I ordered from OKP, hope it works).


Steve

deal of the day on 60mm pistons, good news is also that stainless versions are so available  https://www.ebay.com/itm/14358...c:g:soMAAOSwpEBc0Igt

see March 16, 2022 update on "the compensator"   https://pantera.infopop.cc/top...ngine-rebuild?page=2


(ok, if you are bargain hunting, here is even cheaper...crazy, giveaway, please take them cheap... https://www.etypeparts.com/643...ston-gb48668-19-1150 )

Last edited by leea

For Heim nut and bolt.....try soaking with PB Blaster (rust loosener....) and then the longest 6 point wrenches you have or sockets and ratchet handles/breaker bars.   Watch the knuckles!!!!

For the tie rod end, soak with some PB Blaster, or I guess the suggested diesel fuel, then use tried and trued double hammer thing.....   LARGE hammer held on one side (or large mass of steel something or other) and BIG hammer on other side to apply sharp blows to the tie rod end.....  Shock should loosen this tapered fitting.....sometimes it takes several hammer strikes.

But it is important to back up the spindle with another large hammer or maul.....just wailing on it with a single hammer won't likely do any good.....other than deforming metal....!

Hammer on!!!!
Steve

Lee!  BAD NEWS.....is that the steering arm that you'd be wanging on and heating is NOT readily available.   IIRC, it is a common part......but uncommonly modified by DeT dudes.........rebent to fit car.

Somewhere in a post(?), the 1300 arm (or whatever it is) as stock is shown next to the Goose modified piece...... Not the same!

Just watch out for good paint!!!
Cheers!
Steve

FWIW, I tried everything to remove the tie rod from one of my spindles and eventually gave up using the normal processes--puller, PB Blaster, heat, BIG hammer, more heat, combination of all the above, etc. So, I cut off the tie rod (that metal is HARD) close to the spindle and started drilling and grinding as centered and as carefully as I could, using only the hand tools I had available. I worked on it a little at a time that winter until there was only a thin layer of tie rod left that I could finally remove. You can see the galling that took place before my time and probably kept the tie rod from being easily removed, I'm guessing. I don't think those hammer marks are mine, but they could be. It's been a while...

Tie Rod Removal 1Galling Tie Rod Removal

Attachments

Images (2)
  • Tie Rod Removal 1
  • Galling Tie Rod Removal
Those marks were not from a hammer. Most likely they are from some kind of pry-bar or remover jaws digging in. They are in a non-critical area so just run a file over them to take off finger-slicers on the edges. After nearly 60 years, the thing was really set in there! Congratulations!
On Tuesday, May 7, 2024 at 03:58:25 AM PDT, The De Tomaso Forums <alerts@crowdstack.com> wrote:


| == To reply by email, write above this line. == |
|
New Reply By rlee63a4
|
| Goose 8MA642 Refurb and RepaintReply by rlee63a4
FWIW, I tried everything to remove the tie rod from one of my spindles and eventually gave up using the normal processes--puller, PB Blaster, heat, BIG hammer, more heat, combination of all the above, etc. So, I cut off the tie rod (that metal is HARD) close to the spindle and started drilling and grinding as centered and as carefully as I could, using only the hand tools I had available. I worked on it a little at a time that winter until there was only a thin layer of tie rod left that I could finally remove. You can see the galling that took place before my time and probably kept the tie rod from being easily removed, I'm guessing. I don't think those hammer marks are mine, but they could be. It's been a while...


This post contains 2 images.
[ View Reply ]
|
| The De Tomaso Forums
You received this based on your notification settings. You can adjust your settings or unsubscribe anytime.
|

WOW!!!  There is nothing on this car that should be "that tight" except for a big nut or two inside of the ZF!!!  That's some serious metal bonding!   I think the thing to do is hit anything you are looking at taking apart, and hitting it with PB Blaster a few times and work on something else for a week!!!

That upper a-arm nut is tricky.   Isn't that where the long shaft goes from side to side?  ....or am I thinking rear upright....... Are there holes in foot wells????   CRS today....been working on insulating shop and it's 80 degrees+ up there....can you say sweatball!!!?

I have very few pictures of this stuff to share....pre-digital camera for me! ...still trying to develop the practice of taking pictures with my iCamera......!  Crazy!

One bolt at a time!!!
Steve 

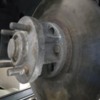
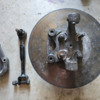
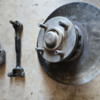
Living and learning...probably would have been a lot easier to get right front apart if I'd done it while still attached to car. However, given where I am, the wheel hub/steering knuckle/assembly in picture spins freely with no grinding, no noise, and no 'wooblyness'...should I still pull apart and change bearing? If so, should I just wait until after I reassemble until right front? The two nuts on the inside of wheel hub are being pretty stubborn as are the 4 bolts on the outside of the hub.

Have gone thru parts in parts manual and on forum. Does this look about right?

Tie rod ends - 2x4117875 (an easy $10 replacement appears to be a Delphi TA650...anybody used this?)

Ball joints - 4x5882118 (best suitable sub?)

sway bar bushing - 2x4084841 (best suitable sub?)

rubber stabilizer support bushings drv/pass (60020036/60020037) - ???

rubber mounting for shocks 60000020) - ???

rubber buffer for shocks (60020033) - ???

Attachments

Images (2)
  • inside-of-hub-reduced
  • outside-of-hub-reduced

Since you have it this far, I'd at least pop the bearings out and see what they look like for wear. Could be just fine!   Clean, add new grease and reassemble.

As for taking the rest of the bits off.....unless you are replacing the rotor, it would seem like your fasteners are still doing their job!   Impact tools are likely in order................gently!!!!   Machinist on standby!!

Ball joints: Do a search on this site for references of good "no mod's required" pieces. I know I've seen the posts.....and guys have found the good ones....and they reference the "where" they go on the other cars that use them.  I just can't recall and didn't write it in my parts book! Duh!    Goose uses same joint upper and lower according to my notes.

Sway bar bushings....    Try search also.   But I think whatever you can find in the aftermarket for the size bar you have may need to do..... Could be a Fiat/Alpha part......??   (Book page 7 lists it as FIat 1300 pieces)

Sway bar end link bushings: Sleeved rubber bushings similar to shock bushings. If what you have is still good.....be happy!!!   Hunt for steel sleeved bushings could be unicorns....but I know guys have found such bushings......in the size you need???  Your mileage may vary.   Slim chance the vendors like Wilkensen and perhaps Stock at PCC could have them...

Shock bushings: There are some new ones floating around out there but they are crap. Soft gummy rubber that the steel insert pushes right thru and in 6 months they look as bad as what you probably already have!    These are steel sleeved versions.....    Again, search on this item as a topic as guys have cut new ones out of more modern stiffer rubber and pushed them into place.

Shock damper:   Carello sells some....I cut in half...used small section...other shock providers likely do as well.

I was lucky as  my car didn't need everything here.....shock bushings were worst...had metal on metal!  Of course shocks were toast also! Different subject.....

Search on grasshopper!!!   You're getting there!
Steve

Behind the BIG snap ring and aluminum dust cover you will find wheel bearings and retention nut(s).

it is special!!!!!     Similar to Pantera in that the nut is swedged in place and you will need to unswedge it with nail or small punch!    Could even be a LH THREAD on one side…..CRS here!   FIAT nuts…..

once nut is off rotor and hub slide right off!

be careful of the hub and area around dust cap!    It is aluminum and can get forked up very easily….so exercise more patience and caution!!!!!

Steve

I can only say to search this website for the info on BJ's that fit properly.  You do not want to be turning down castings or hogging out cavities that are already thin to begin with!    They have got to be out there somewhere......!

Those nuts shouldn't be tight, but because they are staked (they are staked right?) you need to unstake them before they will come loose easily. So what you have is a lock nut on the tapered(?) outside of the nut......holding it in position.  Post pictures! 

When you tighten the nut the first time, you only putting perhaps 10ftlbs of torque on them IF even that much. I'd need to dig up the torque specs for a 68-69 Mustang/Cougar to see what this needs to be.   It isn't much!!!!

Steve

PS I drilled my spindles for cotter pins and immediately discovered that getting to the pins in the recess of the hubs, was a big PITA!   Putting a slight curve in the pins helped installation.......but that's about it! Sorry no pic's.....dark ages before digital.......!

Add Reply

Post
×
×
×
×
Link copied to your clipboard.
×