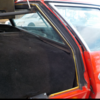
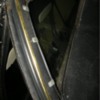
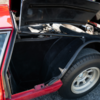
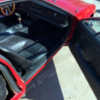
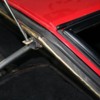
I think this forum could use a post JUST for weatherstripping!    I looked and can't find the pictures I  want to see.....oh wait....maybe I didn't take them!!!  Wish I would have filled about 50 thumb drives with every inch of every component on the car before it went away!   Especially weather strips!

Perhaps a few larger area pics of the "where" you need, and then people can fill in with pic's of their cars.    All my weatherstrip was fairly original, but squished to the point of "what was it originally" remains unknown!  

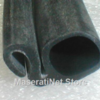
There was "omega" shaped bulbous type,... sideways bulb...... the little plastic edging already spoken of......regular door opening........

I do know that JC Whitney (Warshawski) has a bunch of sizes of various shapes..... and they were good about sending out samples!

LOOKIN GOOD AT HOME!!!!
Steve

https://pantera.infopop.cc/top...for-sale-in-michigan

See this thread, it shows 4 of the 6 weatherstripping I can think of in the engine bay...Esp;

  • The wheelwells (March 8 post). see also 8ma1046 pic below.
  • across the B header (see march 21, 2019 post), this is what Nate mentions with the stack.
  • bulb seal on the edges of the engine covers, see picture below
  • on the top edges of the vertical walls (see March 8, 2019 post)
  • lower edge of the gullwing doors (see March/10/19 post and 8ma1046 pic)
  • on the inner front engine lid (see picture here, 8ma1074)


Let me look thru posts before, for the wheelwells I went with something Maseratinet offers for Ghibli door seals...

(Btw, I'm interested if there is someone who is NOT surprised on the bulb seal on the engine covers!).

Now is also the time to get the blackout paint over the B header and on top of the hinges, see the far-less-beatiful-than-yours gold painted car, that appears to be fully original paint.

And Yes, Nate, the question is not whether you must install the faux chrome trim--its instead whether you want to instead install gold trim (that matches the aged version...). After seeing 8ma1074 with the red/gold, geez, it looks so damn good that I may try it

Attachments

Images (6)
  • detail of end on wheelwell
  • 8ma1046 showing 3 weatherstrips
  • ghibli door pinch weld weatherstrip
  • 8ma1046 gull wing gasket
  • fragments of bulb seal on the engine cover
  • 8ma1074 bulb seal on interior front pulley cover
Last edited by leea

Hi Lee, great shots!  I could TOTALLY believe 1046's bulkhead seal (shown in pic 2) is the same exact material shown in pic 4.

And assuming the bulb diameter is ~16mm, the same stuff was on 1010...not on the bottom edge of the engine cover - either missing or never fitted there - but running along either side of the engine bay.  Seems like a logical choice for the bulkhead seal too.  Curious what you think?!

So, if folks believe 8MA1074 is/was original in this discussion (and others from the past...2014..."Seeking advice regarding the weatherstripping for the Mangusta engine compartment")

-Has anyone installed/updated that faux chrome (weathered to gold) trim on the edges in the engine compartment? I am curious just how that would look.

-The weatherstripping glued to the wings on the sides, where they close on the four latches, makes sense.

-The faux chrome fits on the vertical ridge around the front of the bulkhead where the wings close, and the horizontal ridge around the bulkhead has no weatherstripping attached to it (again makes sense because you'd see when the wings are closed).

-The weatherstripping that best fits the well around the bulkhead where the front of the wings settle is the 16mm (.6") bulb type Nate/Lee discuss above. And like the same weather stripping on the wing edges, this weatherstripping would be glued to the well.

(Nate, yeah, you have those right for 1074 and 1046. I hadn't seen the 982 and 1144 pics) Here are some more detailed pics from 1046, showing especially rivets to pin down the vinyl--underneath that fracture on 982 is a rivet, I'll bet. But surprising to me, also that its not a single piece across B (see where the piece terminates where it runs into the spin mounting in the center).

I remember M!ke's advice, use a heat gun on the vinyl bends.

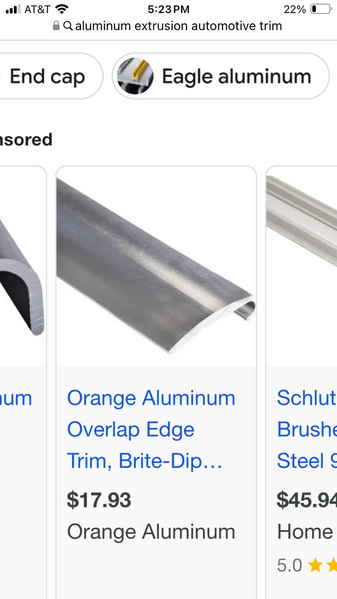
I looked for a long time to see if there was any of this trim wider than ~10mm available--but 10mm is right (forgot I deliberately took a picture of this on 8ma1074 when I had the chance). I've only seen some suggestions that Alfa Giulia may have used such a trim, somwhere...but finally just bought generic Chinese stuff on ebay. I think the original Chrome look would fit better on the gold car, but gold colored vinyl edging is available and looks pretty darn close to aged...even, I'm pretty sure you will not find a 50 year old car with "chrome"....!

https://www.ebay.com/itm/19317...pname%3Avlp_homepage

Attachments

Images (5)
  • termination at spine center
  • rivet at the bends
  • and rivets at the ends
  • and strange place for overspray on this end
  • closeup on 8ma1074
Last edited by leea

Car is on a 4 post lift and will remain there until I get ready to install the engine (that will be awhile).  Clearly, I need the wheels off for a lot of the work. I have a couple 4500lb rated moveable center trays on the lift. Does it make most sense to have the car resting on the center lower frame cross bar in the rear, and at the base of each of the two vertical frame components in the center front between the wheels? Or, are there better places to have it resting on for an extended period?

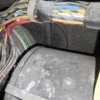
Things being what they are, it turns out the instrument panel needed to be pulled to start all the work I want to perform. Lee was most helpful in providing guidance. Some rust needs to be cleaned up as you can see so will probably use por-15 paste.

The brake master has 9M 23 1405995 on the end plate and is connected to a Bonaldi booster. As best I can tell this master cylinder was used on a number of older Ferrari's and appears to have a rebuild kit number 95696966. Anyone familiar with this brake master?

Attachments

Images (3)
  • brakemaster number
  • 1000004222
  • wiring

(...good news, with fresh paint, I assume that the rust here is merely a flesh wound   ). But I'm curious, do the reservoir connections on the master cylinder look correct for early cars? If the "9M" on the MC is a date code, it could be that the arrangement I expected for a Goose MC (using the same MC as Fiat Dino/Fiat130 with inlet and brake outputs all lined on the top).

  Btw, thanks for the pic under the dash--esp interesting to me is the Carello relay (to the right of the Fiamm horn relay). This shows on the wiring diagram and I think is used for "flashing," but it wasn't clear whether this was a US vs. Euro thing--and since '642 appears as a US model (esp, marker lights on the rear) I think the distinction is a 2 vs. 4 headlight thing...)--Lee

OK, if memory serves me properly at the moment...... the M/C 9M is 1969 December assembly.   The 23 means it has a 23mm bore.

(The late date also means that this was likely replaced at some point in time as #642 would have been assembled late 1968 or very early 1969.  Check your window dates.....cast iron dates.... brake caliper dates.....)

Being a 23mm bore, the following will NOT apply!

On 878 the M/C was I believe.... a 21mm bore (unmarked on the end nut!) and used Fiat wheel cylinder "donut seals" for the basic internal seals.    Thankfully my rear wiper seal was in great shape and was able to reuse it.....as it is unknown as to number and where to find?

For 23mm pieces and parts, look to Pantera M/C's and parts sources.   DOT 3 brake fluid causes bad bad things to happen in these cylinders......

The Ferrari thing is true, as is it's usage in other Italian large vehicles of the day.... Maserati comes to mind........

Cheers!
Steve

Thanx for inputs. The painters did take the entire exterior of the car down to bare metal, and repaired numerous rust spots and structural rust. However, they did not pull the instrument panel hence the rust you see in pic behind inst panel. I will figure out how best to address that rust. The POR-15 option has worked for me before, but it will be hard to get to both sides of the rusted locations behind the inst panel and the space below the wipers.

As I mentioned, found a place selling the rebuild kit for the 1405995 brake master. Also found a place that sells a rebuild kit for the "large" bonaldi booster. Will check numbers on bonaldi when I pull it to see if this is a match. There must be more to it than just large or small bonaldi boosters. Will probably just replace clutch master and slave. Based on Steve's comment, what is thinking on best fluid to use these days for brakes and clutch?

The real question I have here is...do I replace all the brake and clutch lines as I will never have as easy access to them as I do now? I have never replaced them since I've owned the car (Spring 2007), and the fluid didn't move much in the lines over the last 9 yrs.

If the thought is to replace the lines, is 3/16" nickel copper the way to go?

CASTROL LMA brake fluid, DOT 4 "For GIRLING" .    Not always at your local AP store....and when I buy it, I get a case of 4-6 gallons, donate the extras to the club raffle....use it in ALL of my vehicles except for M/C!

YES REPLACE ALL OF THE FLEX LINES!   I found my steel "end" fittings clogged with rust because PO's used DOT3 fluids......    If you live in tractor country, it should be no sweat to have new ones made up, in cloth finish, or whippy dippy clear vinyl or colors!   The fittings are SAE being Girling brakes!!!   So most "hose" businesses should have new ones avail.   Match as best you can....fitting lengths could vary slightly.   Some AP stores will make hoses too.......  Amazing how cheap it is to get tractor parts made like this vs "imported sports car" hoses!!!

If you pull  your booster apart, inspect the rubber bits.  They  may be just find to continue using!   Not like they live in an engine compartment subject to all sorts of nasty vapors!!!

Keep on!!!
Steve

I believe that they are fairly standard M/C's  supply comes in top and exits side. Top feed pipes were copper.   VW "green" brake hose for connectors to reservoirs.   Steel lines out........

Wow!   Ever have one of them moments where 3 decades goes WHOOSH past the backs of your eyeballs!!!? Feels creepy to say that.....!   I thought I had pictures of my M/C when I sent it out for sleeve job.... blow out pic's and new seals!   ( I have pics of the rear balance valve thingy....that that was WAY after getting the M/C and clutch cyl's back in the car!!!

Well, that was nearly 30 years ago, pre-ish digital cameras! (for my budget anyway!)   I have pic's.....they are just in analog form.....and NO IDEA which pile of pictures they are in.....OK I can actually get within a few feet of them......file cabinet....desk drawer files.....ugh!

Seems like yesterday I was blowing that M/C apart on my work bench!!!  It was one of the first jobs I ever did on my car, other than pouring fresh gas in the tank to start it up for the first time in 13-15 years.....only to see gas running out from under the car across the pavement!!! NO do not turn the switch.........! I guess replacing that rotted out fuel line was first job......ish!

If I run across the photos....will SCAN them in and post....  sheesh!

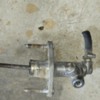
Got all the reservoirs/hoses, clutch, and brake master/booster removed. No fluid coming from booster so master brake did not leak into it. Will probably go with rebuilding brake master (found a kit), new clutch master (since I don't know what was installed), and new clutch slave. Whatever was used as the clutch master required different spacing on holes in dash. Hard lines look ok...a little blue corrosion to clean off clutch line.

Attachments

Images (3)
  • 20240227_161219
  • 20240227_161316
  • 20240227_161553

WOW! That's one mess and a half for a clutch master!

See if you can dig up Jim at Orphan Auto (OH?) for a new assy.   He sells these to roundy rounders as clutch and brake cylinders!

EDIT:

HERE IS INFO FOR ORPHAN AUTO- JIM    1-937- 554 - 6 000

This cylinder is described as: " 3/4" Bore, Center Valve, Remote Reservoir"

You will likely need to reuse your original pushrod.   Aprox $75-85 Feb/24

Advise if you need a pic' of what the original should be.......or search the forum.

Original markings on #878 Clutch master: EHEB-7707 and #310680 CC3

Rebuild Kits: Raybestos CMK1936 (1983-88 Jeep Eagle, 84-86 Jeep Truck & Wagon applications)       Girling SP1995/2        MANY Triumph TR2 TR3 TR4.

Specific Seal# 64673407  First replacement part I ever found for my Goose! Popped out of the 3rd box of seals I was looking thru in the auto parts store!  BINGO!!! I'll take it! 1996 or 1997!

JUST IN!!!   While looking for the above seal, which is usually all that needs replacing I found this exact seal in a LUCAS SP1967 kit on eBay for about $15!!!   It has extra parts, like reservoir cap and washer, but barring the ability to get the SP1995/2 kit, this would do the trick for you and it's cheaper and new!

Gotta run!
Steve

PS: I wouldn't mess with the booster, unless your car has over 100k miles on it!      It is a Bendix copy and IIRC it is a bugger job to do for that style.  The "other" Ford style "banded" version is easier to rebuild....but not used in our cars!

Last edited by mangusta

...you know, its just great to be halfway there (!) And also good news that the old holes are hard to fill in , replacing with an original clutch master will be easy enough... Good luck on the booster rebuild, the one in 1076 was new, decades ago at least (!) On my Ferrari 400i, I used some guy in Oregon who was pretty affordable...Lee

Got new clutch master coming and slave soon thereafter.

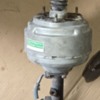
Have Bonaldi Brake Master (#1405996 in casting, and #140595 23mm on large end nut) detached from booster. No fluid in booster so apparently seal was good to master.

Got circlip off end with piston, however, piston didn't want to come out pulling with hand. Does it make sense to put cloth on piston and pull on barrel with pliers to get it out (one plier blade in piston barrel and one outside)? I did have lock bolt in rear input loosened.

Large nut on opposite end from piston wouldn't budge.

Attachments

Images (2)
  • 20240228_151134
  • 20240228_151147

Hmmmm!   Now I don't remember!!!   I am thinking that this all comes out the end with the nut!!!!!

Give me some time to dig up old pictures........

DON'T PULL ON ANYTHING YET!

Look for pic's of blown out Pantera cylinder for clues.  Same or darn similar!!!! 23mm also!

Edit:

OK after thinking about this some more, and unable to locate my old M/C hard copy prints on the computer....ugh.... I believe that the snap ring on the plunger end comes out, and then the large washer which simply exposes the end of the piston. Normally there was a large black rubber seal over the plunger shaft and fit into the recess also, covering the snap ring and big washer....but not retained by anything....but friction.  I don't believe that these seals are available anywhere....

The large nut will be an issue.   You may need to walk it into a machine shop where they can clamp the M/C securely in a proper precision vice, then using a 6 point socket of the proper size and a breaker bar to try and pop it loose.  I don't think there is a rubber o-ring on it....but rather a brass-ish washer......to seal it up.

Heat may be required to heat up the casting to cause it to expand a tad.  You might try that.  A ship may use an inductive heater to warm up only the area you need warmed......   anti-sieze on threads upon assembly!

If your outside temp is in the single digits, you may want to bring the master cylinder indoors and set it next to the fire.......!  Work on it on a warmer day?!

Steve

Last edited by mangusta

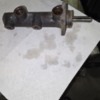
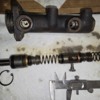
Well, nut on end would not budge even in vice with breaker bar, so, banged on washer on piston end and it finally broke loose. This brake master is a Bonaldi Benditalia 1405996 (found on casting)/140595 23mm (found on end nut). It was apparently used on 208’s and some 308’s. You can see from the pic it consists of 3-23mm and 1-29mm seals. Found these seals as well as the seal plugs for reservoir lines at Dino Parts in GE.

Attachments

Images (1)
  • 20240229_131521

Switched to suspension/brakes/steering after pulling brake and clutch masters from interior.

Any suggestions for sequence for removing entire front drivers suspension?

Attached pic is of drivers front brake caliper. Has #1266 embossed on it and it consists of 2 large 60+mm/2 3/8" pistons...CR type. At least one of the two pistons appears to be rusted in place (soaking in Kroll oil now). May be able to blow the other out with compressed air.

Once you get the shock/spring out, it doesn't make much difference how you do it.....no tension.   Pop the ball joints loose from the spindle and remove it first, then the a-arms are easy peasy.  Unless of course something is rusted in place.......!

Easy does it!!!

Lower nylon-ish bushings will likely have some play in them.  Even in new ones.......grease with some sort of synthetic grease...

Upper bushings are Heim joints....and should be tight...... Grease them with a tapered needle bit on your grease gun,  and install new dust booties....

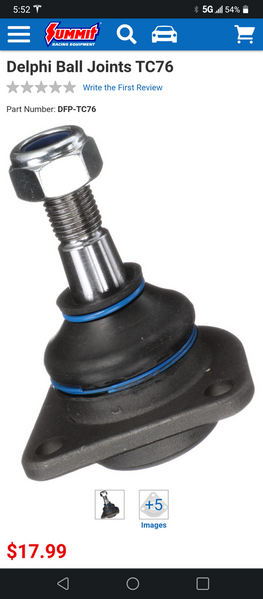
Ball joints should be replaced with more modern cast pieces vs multi-layer steel pieces which were designed to fail.....!

Gettin' there!!!!
Steve

...all the suspension, is, well, pretty much how it looks. I was able to get replacement Nylon bushings for the front from Hall Pantera, the poly bushings in the rear are probably something you will have to make or have made. The heims and their boots are easier than they first look, the instruction to start by threading the Heim via the small hole seems counter-intuitive (but it works! Stick the threads thru the small hole, screw into the insert, and like childbirth somehow the bootie magically stretches as you pull the heim joint into place).

Getting the right ball joints is a long battle, M!ke is the last guy who found a solution...

(btw, fascinating to see the text on the inside of the caliper?!)

Last edited by leea

That is WAY more work than I remember doing on the similar looking BJ!

There is an upper and a lower for the Fiat 124...... I don't know which one.... but I bought mine from the factory a million years ago and there was no fussing.....

Others have been thru this same search....

We need the ability to "flag" or group/save posts of such significance....???? Websters??? IDeas???

STeve

Add Reply

Post
×
×
×
×
Link copied to your clipboard.
×