
Hi guys,
I'm just getting started on my Pantera restoration, and thought I'd introduce myself. I have had my car since 2008, when I picked it up in it's current state/condition. It has been waiting patiently ever since. At the time I bought it, I was in the first stages of an RCR GT40 build, then a custom 69 Mustang Mach...then a...then a... long story short, it's finally time for the cat to get her attention. To date, the only mileage I have put on the car is a half mile at a time for runs around the block to keep all the goodies lubed. So, I'm really looking forward to getting to finally drive her after completion.

Here she is at arrival in my driveway in 2008. Delta wing was the first step in the process..I removed in on day two (long since sold ;-).


A few weeks ago we rolled her into the shop and got the ball rolling...


We power washed the engine bay and were quite pleased with the general condition. Really no rust issues to speak of (yahooooo).


Today I pulled the rear suspension and fuel tank before the family woke up. Getting ready to head to Germany for the week, so unfortunately I'm done for the day. But, before I left...thought I'd start a post to say "Hi" and introduce myself. Big Grin

Thanks,
Original Post

Replies sorted oldest to newest

OK, so managed to get about 5 hours in on Sat and another 5 on Sunday. Made some good headway, resulting in a lot of parts now on the floor. The bad news....I broke the original windshield pulling it out. Damn..damn...damn... Mad I was pulling it like I have so many others, by flipping the lip back while someone applies steady pressure, but the gasket was being stubborn. I should have stopped and cut the gasket, but instead I asked my daughter to push a little harder. Those dance legs of hers are a bit stronger than anticipated. Really a shame as it was in nice shape. Anyone have a windshield....??

Anyway...once I stopped crying I got back to it. The interior is now just about gutted, and the front trunk/radiator area are stripped. I think the toughest part of the job so far was pulling the wire harness. The casing was about as flexible as petrified wood. I think I'll have to cut it all off and tape wrap when it's time for reassembly. At this point, all that's left is the front suspension, headliner, and door window mechanisms.


Hopefully will be fully disassembled and heading for media blasting next Sat.

Can anyone give guidance on how to get the side windows and mechanisms apart. I was looking them over and don't see an obvious method. Thanks...
Perhaps you can be more specific. Based on what you have accomplished, it would seem that you have the acumen to extract the main side window apparatus. Glass removal is two nuts and rubber protected bolts and it pulls up and exit the rail toward the inside of the car. Start with it 3/4 down. Pretty easy.

The front side windows are held in by the vertical trim that is removable after finding the screw, in the upper door trim behind the seal, that holds that piece of trim in place. The fastener is right behind where the vertical trim meets the upper horizontal trim. With the trim gone, slide the 1/4 window back and out.

The question that you should be asking is "Do I remove the trim?" I have removed the trim on every restoration except the last when it was attached so tightly, it was on the threshold of damaging it in removal. I managed on piece off and it had a minor warp after the exercise. That scared me. I surrendered and left the remaining trim in place. Fortunately, the piece I removed went back on looking perfect. But, the experience gave me religion.

Kirk Evans informed me that he never removes the trim. I never appreciated that until now.

Let me know if I missed your question

John Taphorn
HI guys,
Thanks for the info. I'll poke at it a little more. My reason for wanting to remove the trim is that I am bringing the chassis in for media blasting. I was considering leaving the trim on and protecting with duct tape, but that just feels wrong. I feel like to "do it right" it needs to be fully disassembled. Am I being too anal?

One big question I have... is about Ron's avatar.... That's a funny lookin Pantera man. Is that a left over pic from some other forum...just spit ballin of course... Big Grin roll on floor
Rob, my preference is to remove the trim as well. I suppose that I should have qualified my previous remarks. All the trim attached to the chassis comes off very easy as it is attached by rivets. Also, the lower door outside window trim adjacent to the door skin is a definite removal as it is held on by screws that also hold the cat wiskers.

The challenging trim surrounds the rest of the door window frame and is pressed on both the
inside and outside. This is the delicate stuff that can be stretched and damaged when removing it.

As I mentioned before, my experiences, prior to last, was that I was able to carefully work it off w/o issue. Frankly, others had told me what a bear it is to remove and that had never been my experience. That is until my last project - it did not want to come off. I ended up taping it over. It would present a problem if your intention is to powder coat them. Then, I have my fingers crossed that the pressed on door trim removes easily. Let us know how it works out.
Rob; This is Pantera 3639 where we have both posted our vehicles in the tear down/rebuild stages. I, too, wanted to remove the window trim; however, as you will notice in my picture of "ready for paint" the windows are taped over with tape and cardboard for the very reason JTpantera points out - the trim is press fitted and the experienced fabrication shop doing the work on my car forewarned me that more damage could be done attempting to take the trim off vs. cutting a fine line where the trim meets the paint. Therefore, the trim remains intact. The car was bead blasted with the doors off and double taped, being careful not to "blast" the window trim area. Everything seems to be OK.
Hi guys,
Thanks for the insights. I was looking it over and considering the windshield "incident", simply decided not to make my life more difficult just for the principle of wanting to "fully" disassemble the car. The car is so rust free, that I'm really not worried about any hidden nastiness lurking under the trim.

On Friday night I finished the dis assembly. Sat morning I dropped it off at the media blaster. I should be picking it up this coming Sat morning. I'll post pics when I pick her up.

Thanks again for the help.
Hi guys,
Quick status update...
Picked the car up from the media blaster. Very pleased with the job and not too much ugly uncovered. Did find some light body damage left front corner and some corrosion at the radiator support (known) and lower rear corners of door jams. They will need some surgery to get them right, as the previous repair work was beyond crappy.

Decided to build a temporary wall in the shop to keep the heat, dust, paint stink in the shop. Seems to work great so far...we'll see if I can make it through the winter w/o poking a hole in it while moving stuff around... Big Grin


First task now is to get the chassis cleaned up. I've spent about 4 hours so far trying to get the insides of the frame sections cleaned out. I've collected about 3 gallons of media in the shop vac so far.
Hi Rob,

Car looks good---congrats! If you need any tec support or restoration suggestions, feel free to drop me a note off line to my amerisport@gmail.com account or call. I have a fair amount of hands on experience and pass it on when needed. Also have many small bits and pieces if you're looking for original parts and I'm fairly close in NW Ohio. Good luck.

Kirk Evans --- AmeriSport ---

http://amerisportindustries.com/
Hi guys,
Sorry...was off the grid for a bit...up north skiing with the family. Enough of that family stuff... Big Grin .... back to the garage...

Yep, I'm quite pleased with the condition of the chassis. I have a small hand full areas of corrosion and two spots of damage to repair. I consider myself very lucky. I haven't yet determined repair methods for all yet, but I'll show what I do. The lower radiator support will likely get cut out and replaced. The other areas I will likely cut out the rust and fabricate patches to weld in place...let's see.

My garage has proven to be very functional. It's my third, so really put a lot of planning into it with lessons learned from the previous. I've restored/built quite a few cars in there over the past decade and can really say I'm quite pleased with it. Only a few things I'd change... for example I didn't plan any venting of the area...this was a BIG mistake. I'm considering the plastic wall a trial...If I really like it, I may built a real one to close off the shop.

I love having my girls work in the shop with me. Frankly...it slows me down A LOT, but it's totally worth it. My older daughter isn't really interested. She'll drop in every now and again. The younger one really seems to appreciate cars and likes working on them. So...luvin that! Not so sure about her taking it to school.... however she has "claimed" it as hers. In her words "when you get old and decrepit...it's mine" Smiler She always reminds me..I didn't say when you're dead..I'm not waiting that long... She's a real character!

Thanks for the offer Kirk, actually thanks to all you guys for your insights. Greatly appreciated.

Heading out to the shop. Let's see what I can get done this afternoon.....
quote:
I love having my girls work in the shop with me. Frankly...it slows me down A LOT, but it's totally worth it. My older daughter isn't really interested. She'll drop in every now and again. The younger one really seems to appreciate cars and likes working on them. So...luvin that! Not so sure about her taking it to school.... however she has "claimed" it as hers. In her words "when you get old and decrepit...it's mine" She always reminds me..I didn't say when you're dead..I'm not waiting that long... She's a real character!

Right on Rob! That's totally awesome! Surprisingly, of my 3 kids it's my youngest daughter who has taken the most interest in cars. My 66 Mustang (GT350 clone) was laid up on jackstands for 11 years and she kept telling me I had better get to work on "her" car. I told her if she helped me turn a few wrenches, she might get to drive it occasionally. We completed the mechanical restoration and got it back on the road and she loves driving it (occasionally). She wanted to learn how to do a burn out, so I took her to a nice large parking lot with no light posts or planter boxes and taught her how to properly do a burnout without breaking or abusing the car. Had her do a few donuts too! She had a perma-grin the rest of the evening. She also got to drive my Pantera the first day I got it back on the road after a 5 year engine rebuild - more big grins!

Anyway, great progress, and keep those girls busy in the garage.
OK, so got to spend a few hours in the shop yesterday. First task was to get her up on some teeny jack stands, so I can work more easily on the underside. In a total brain fart....I built the wall with the portable hoist on the wrong side of the wall. Doh..!!! So, had to string her up from the ceiling.


So, started looking hard at all the ugly areas, and determined the only way to really know was to dig in...found quite a bit of really ugly underneath.


There are many areas of the frame that are damaged. Looks like the car was pulled from ditches a few times.... Many frame holes are torn open or damaged. The one under the passenger seat is absolutely shredded.

I'm gonna cut this section out and fabricate a new section.

The parking brake reaction bracket appears to have come loose from the frame at some point, and has been cobbled back on. Unfortunately, I can't tell what angle this is supposed to be mounted at. Does anyone have access to a clean photo of theirs so I can reference what angle this bracket should at? It would be greatly appreciated.


Tomorrow I'll sand blast inside the rockers and see what I come up with....
Chris is correct- that was a factory mod after Ford pulled out. The sump drops down, then moves forward about a foot for removal and the brake is in the way as is the crossmember. There's a decent illustration of the removable factory parts in the black factory illustrated parts manual, or you can easily make your current bracket removeable by welding an angle iron to it and screwing the angle to the frame so the assembly is horizontal and approx. level with the subframe.
The crossmember is more complicated to convert but is actually held in by the front lower a-arm attach nuts. I made one from scratch- it looked easier than modding the stock crossmember.
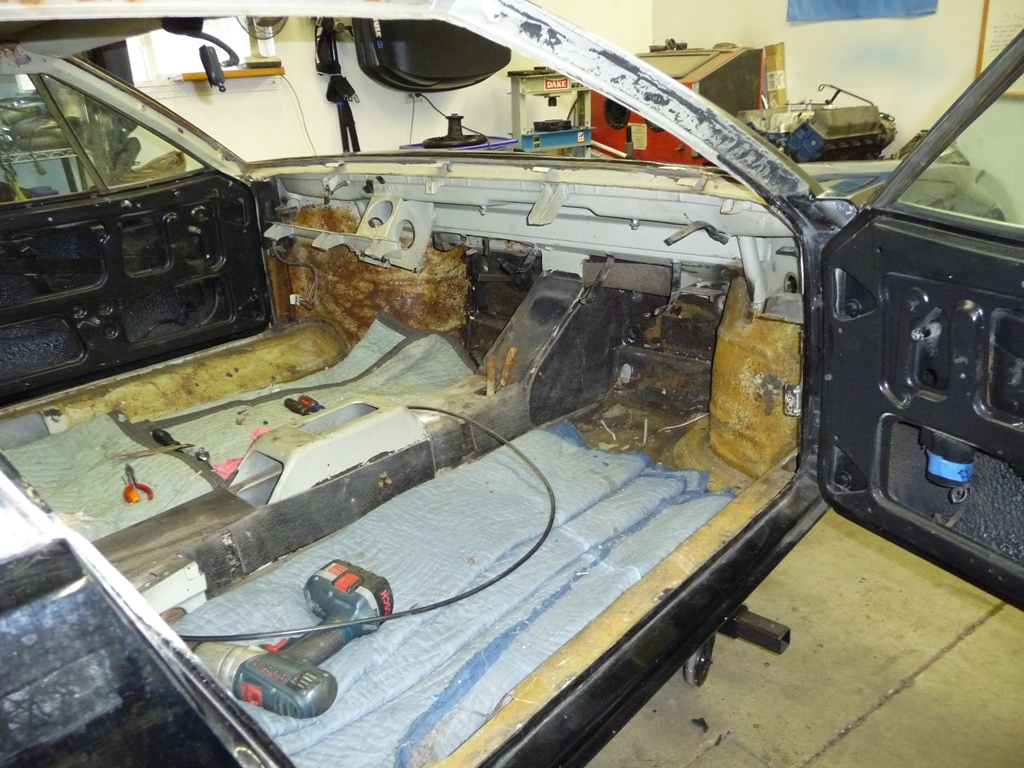
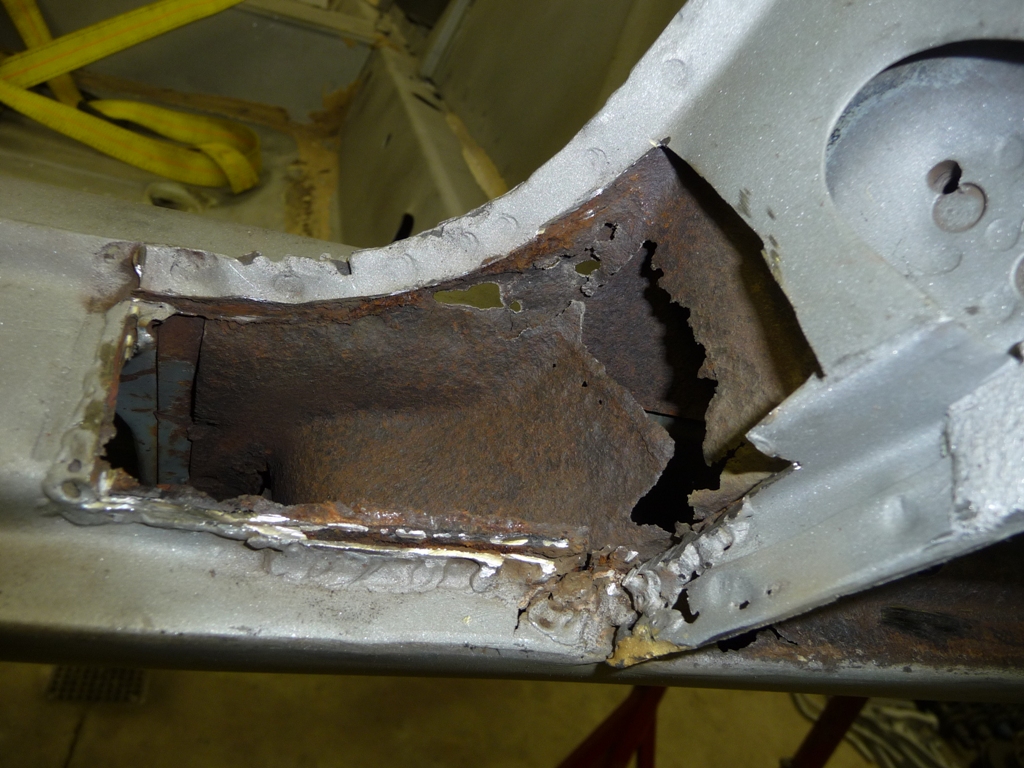
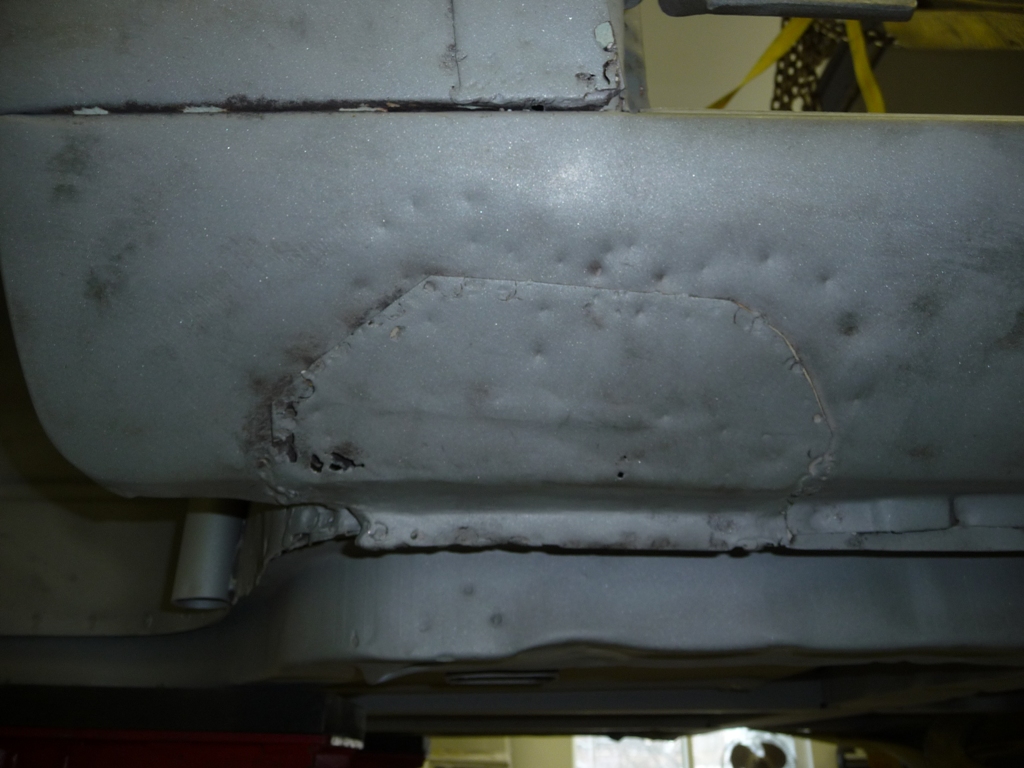
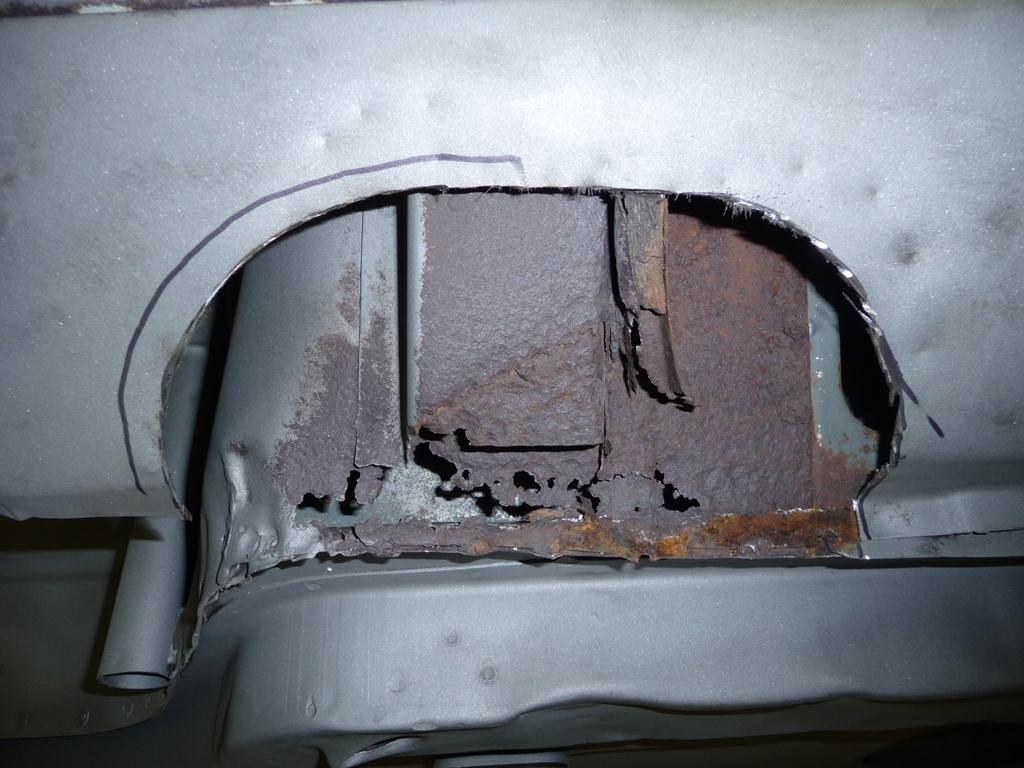
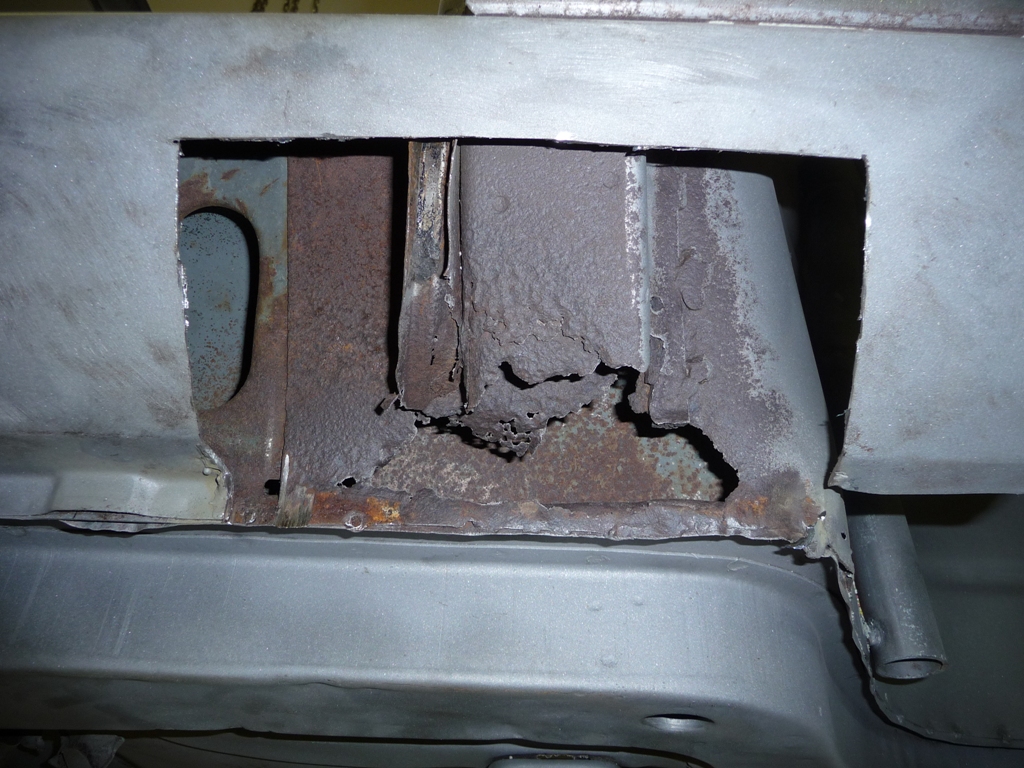
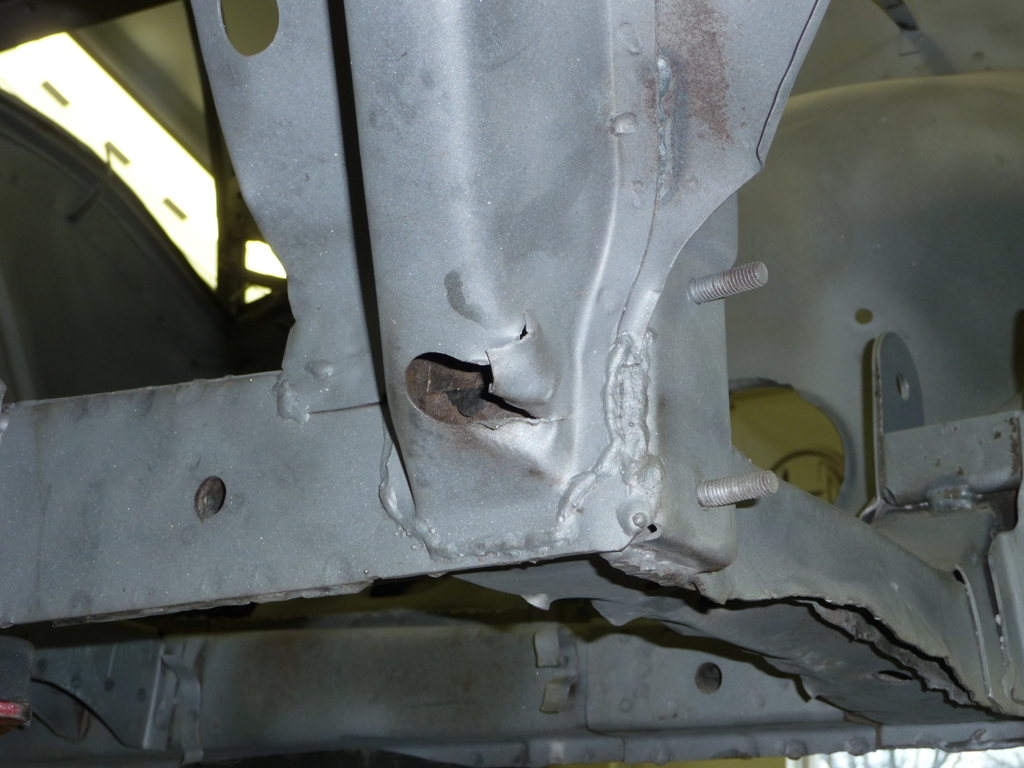
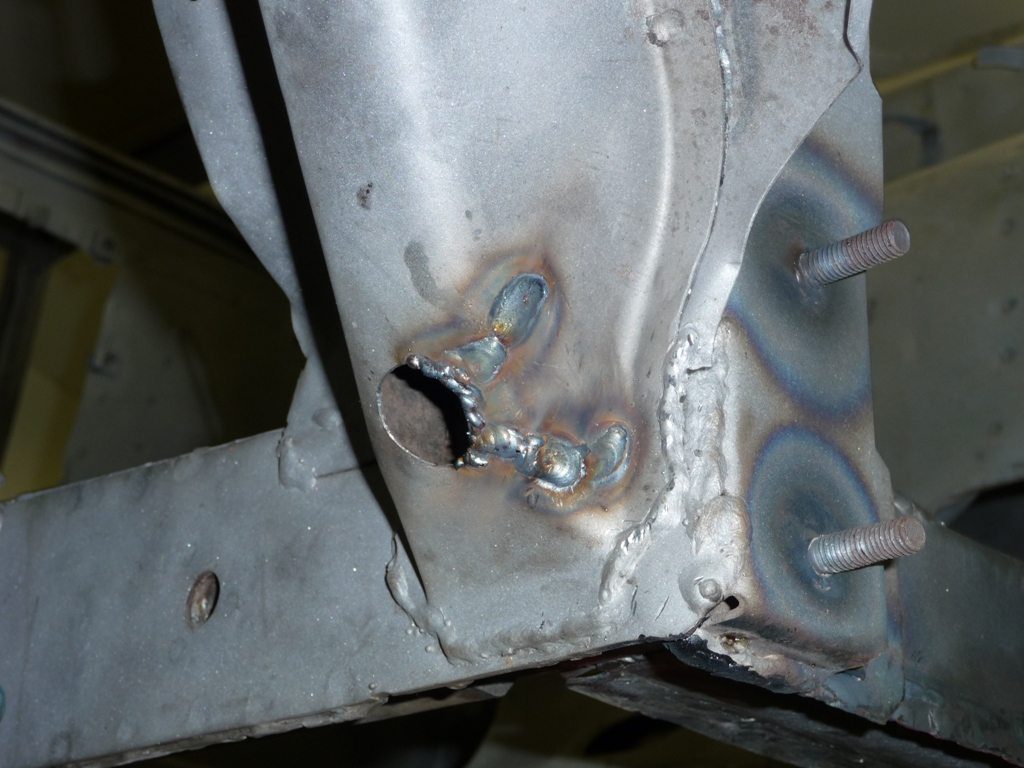
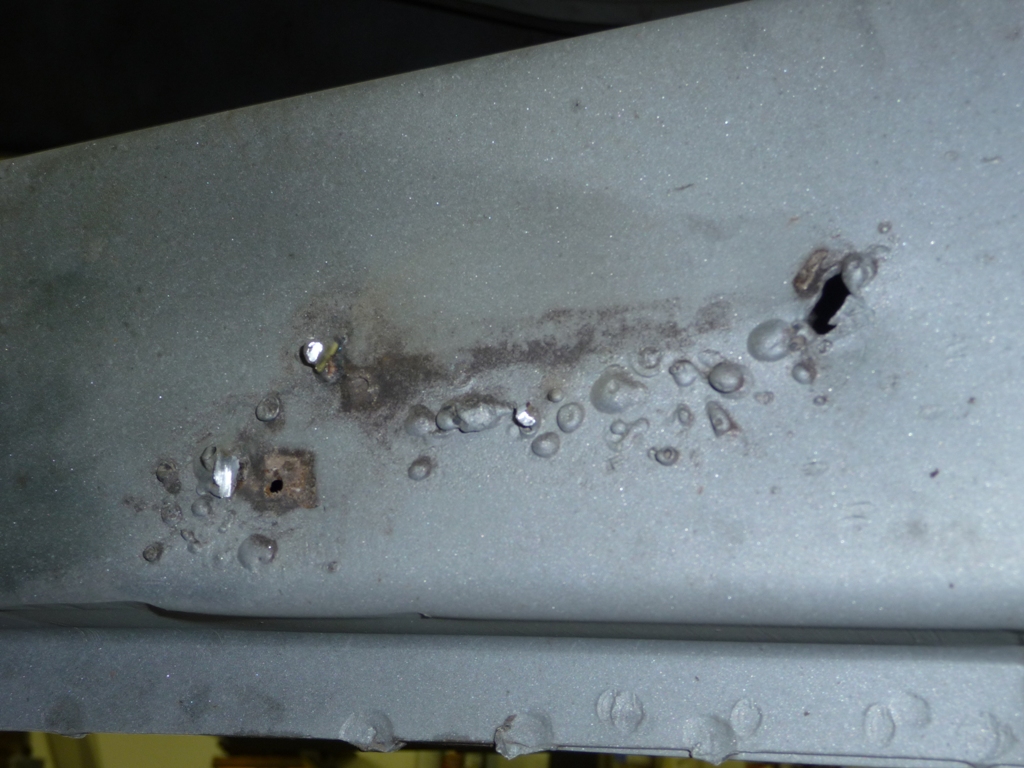
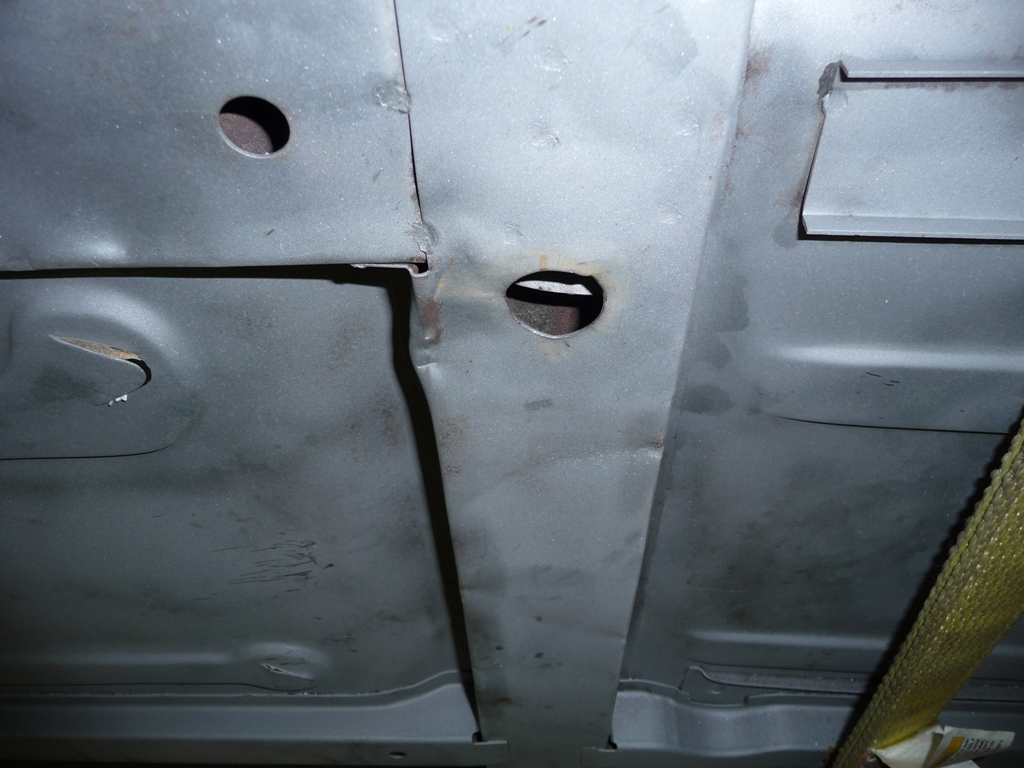
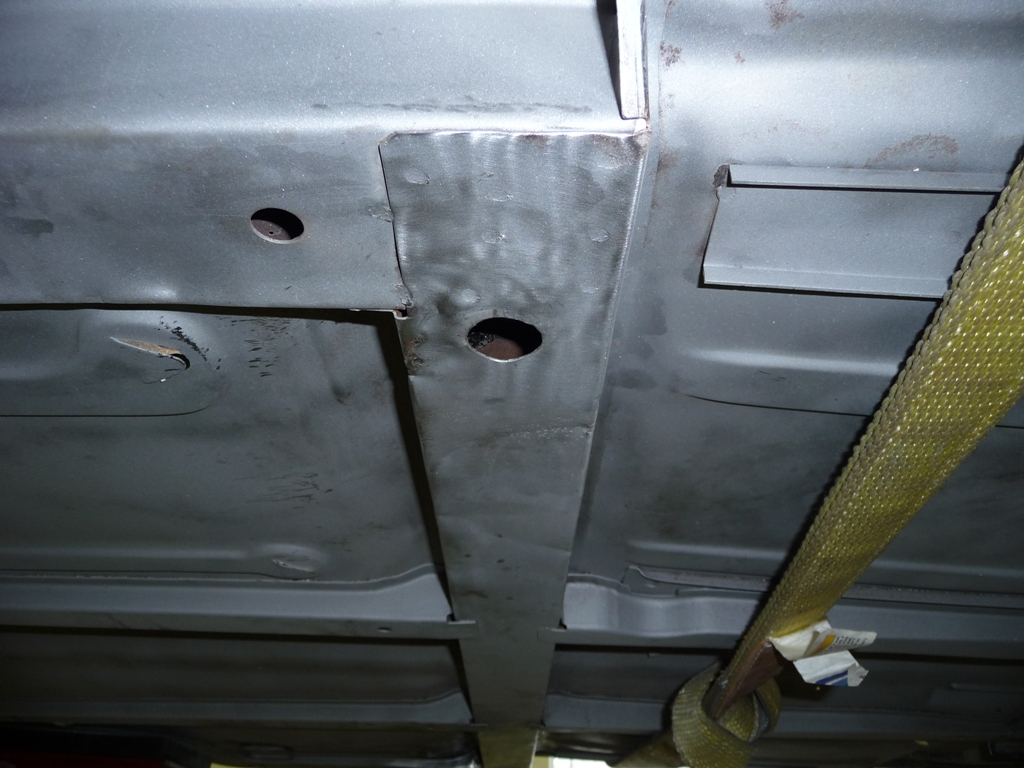
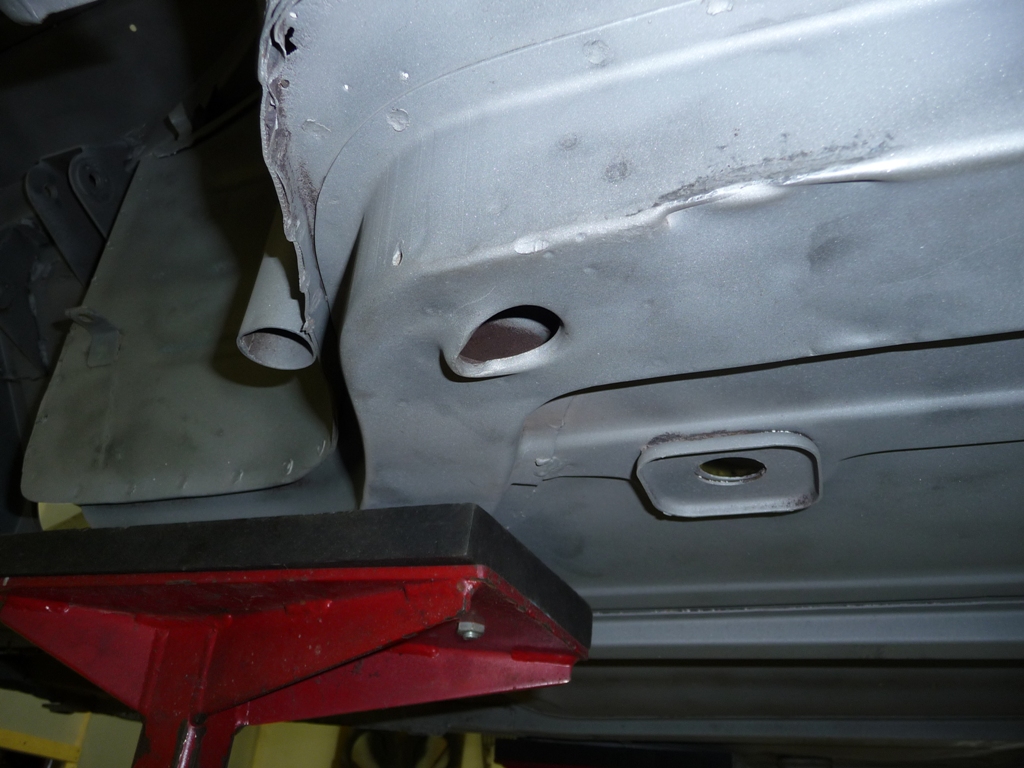
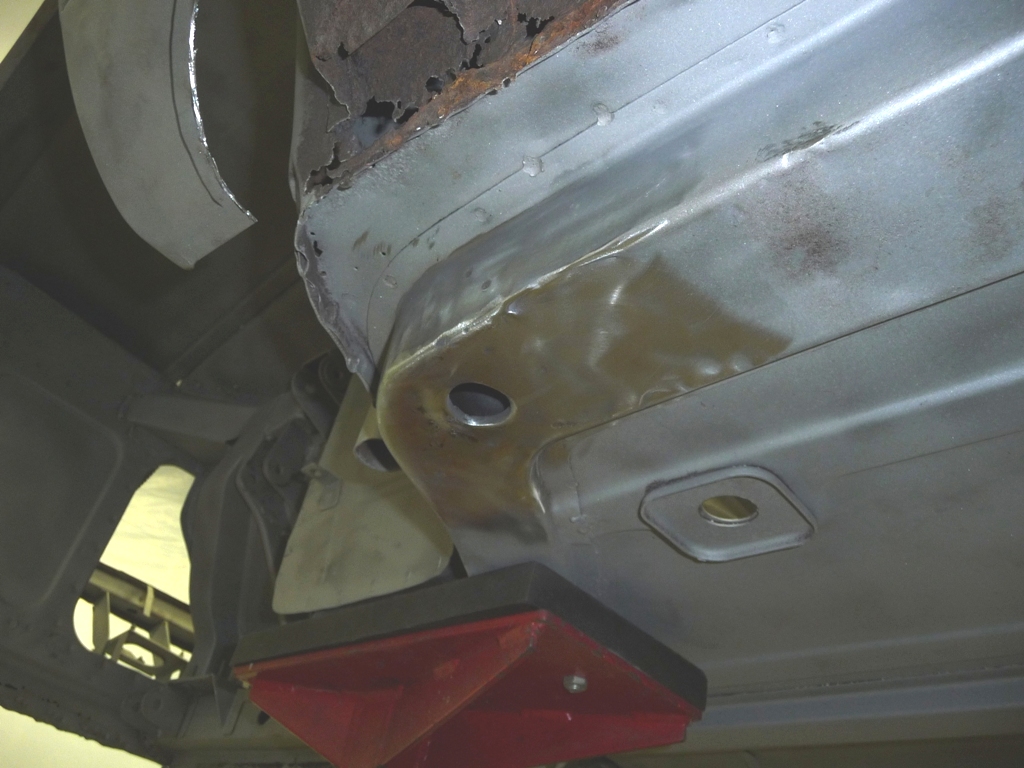
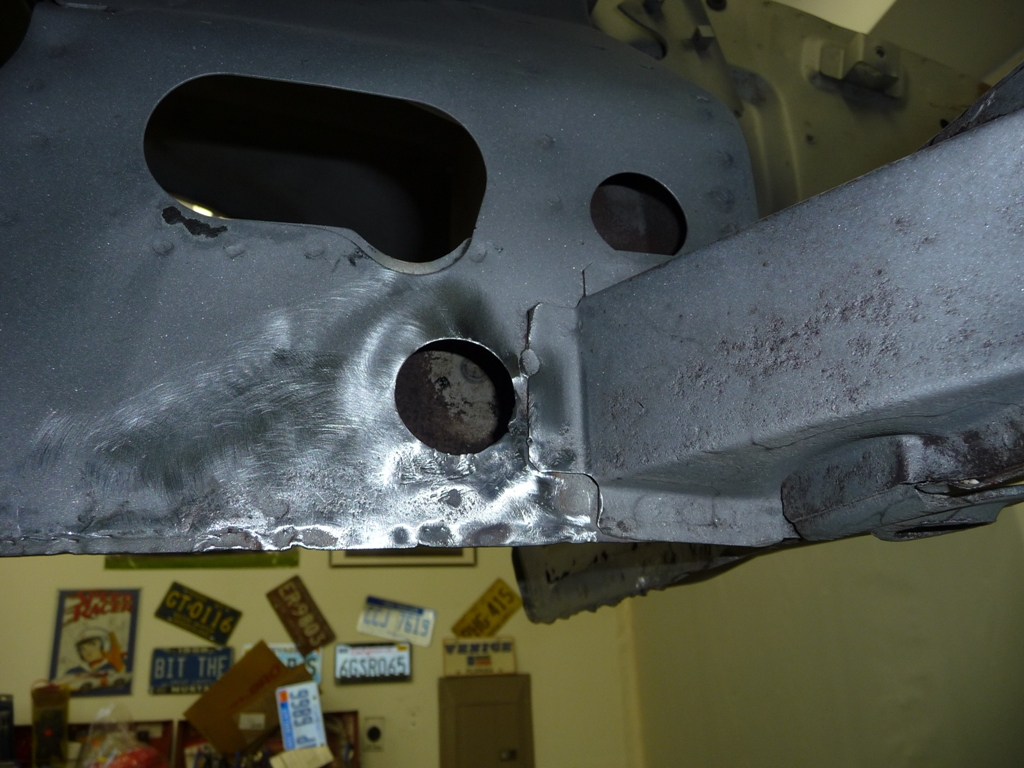
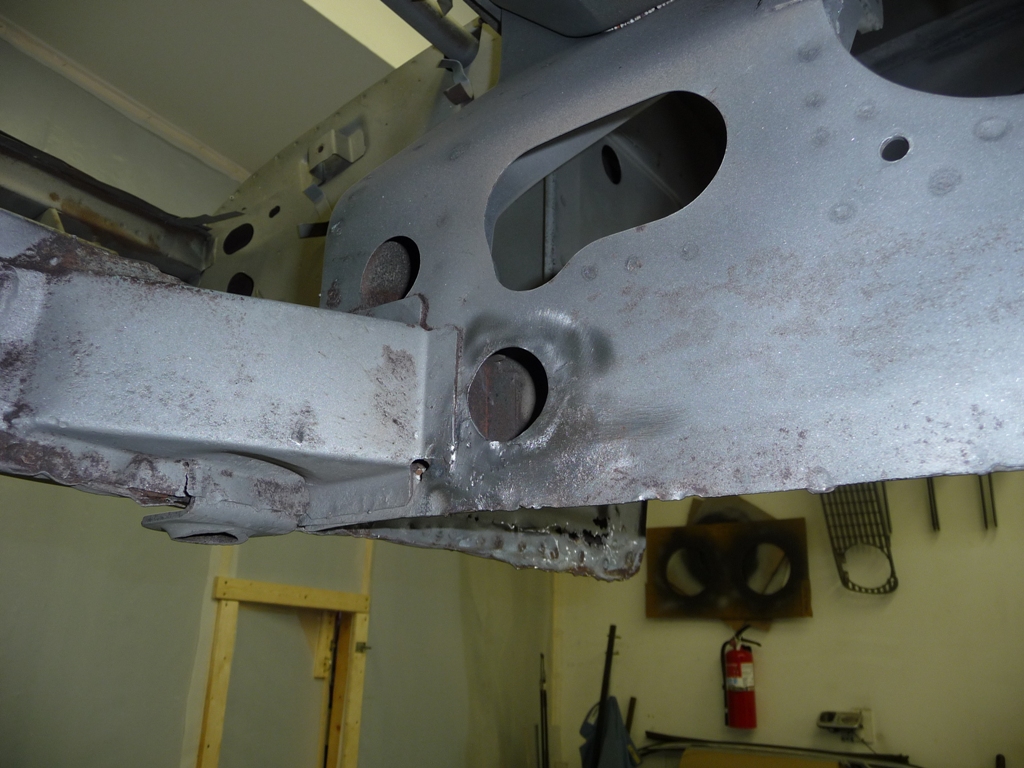
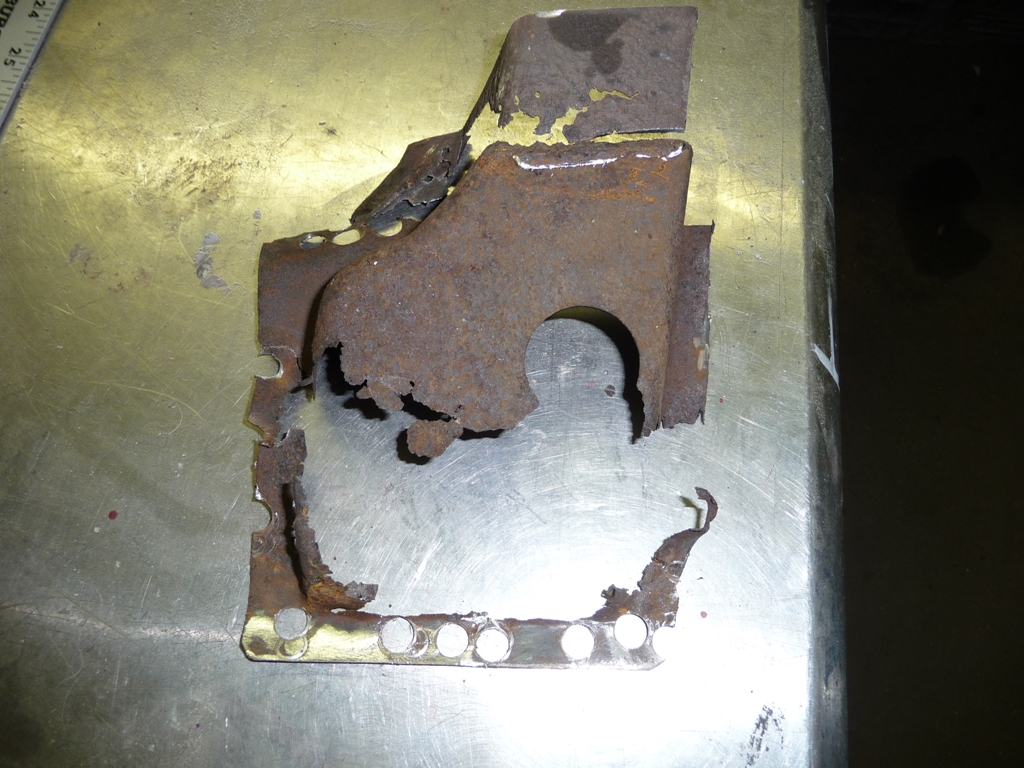
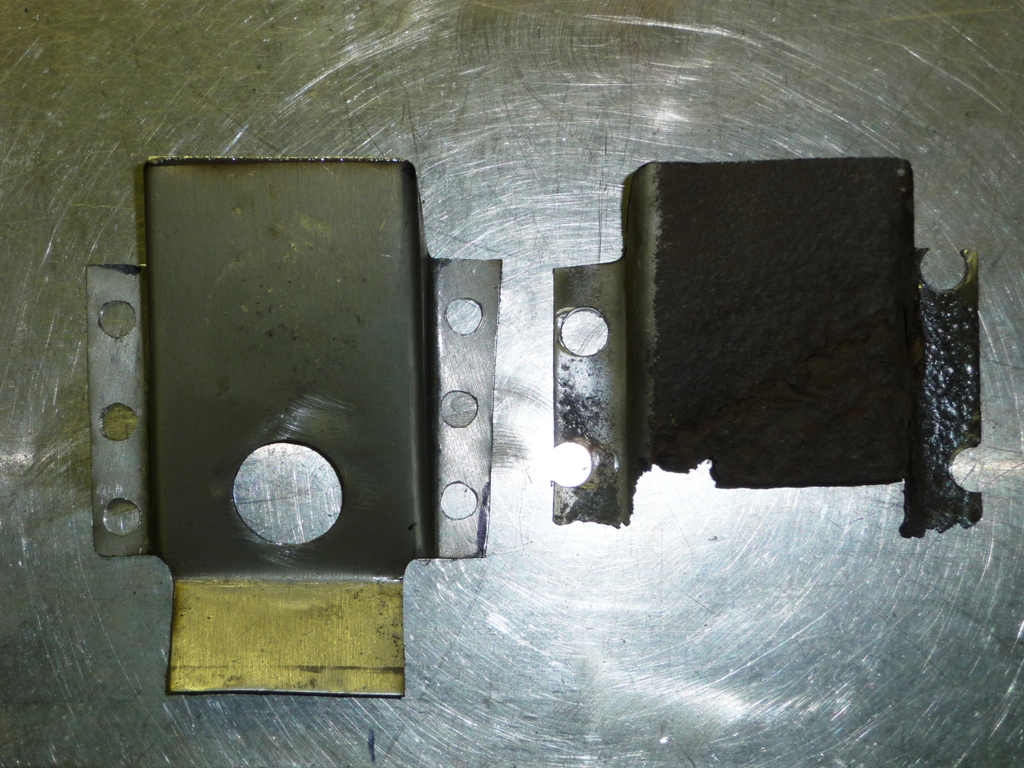
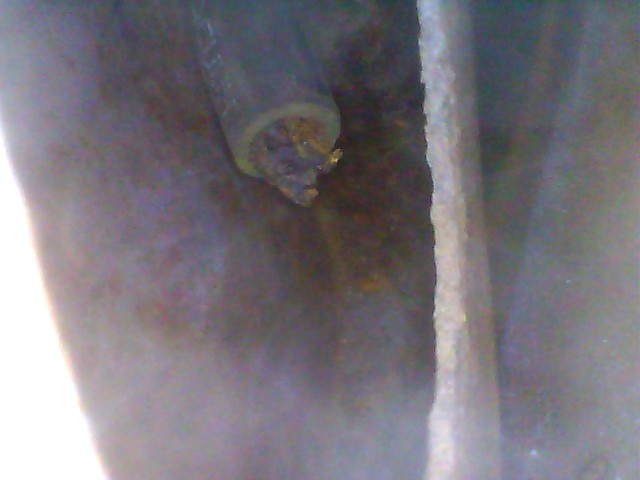
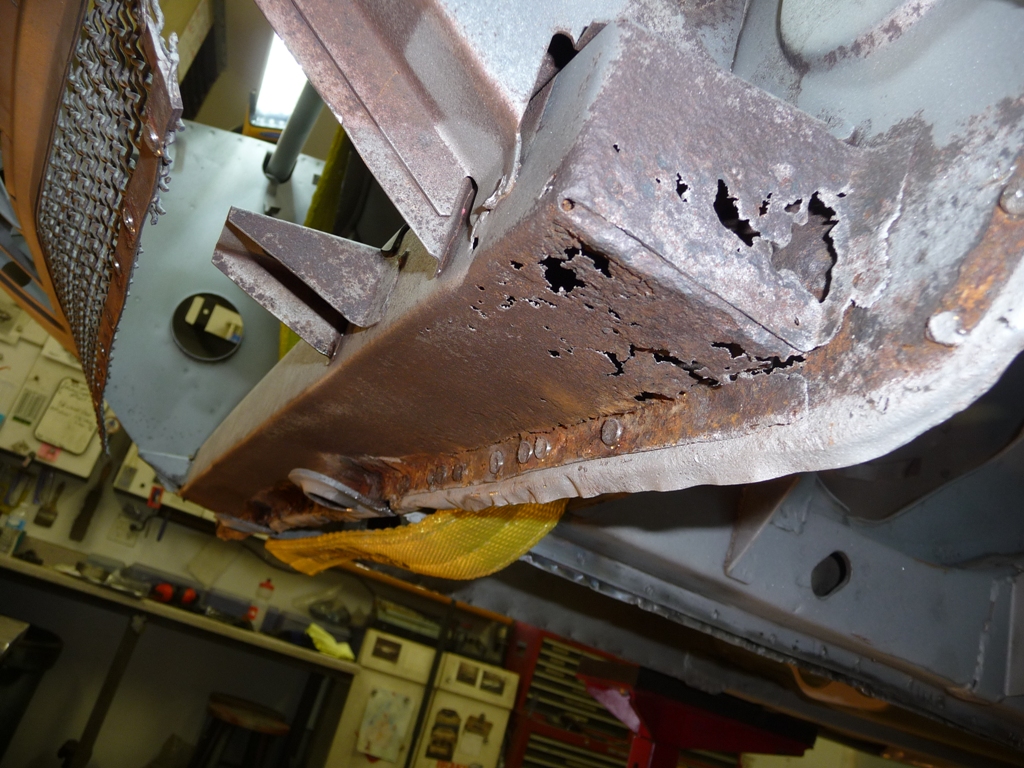
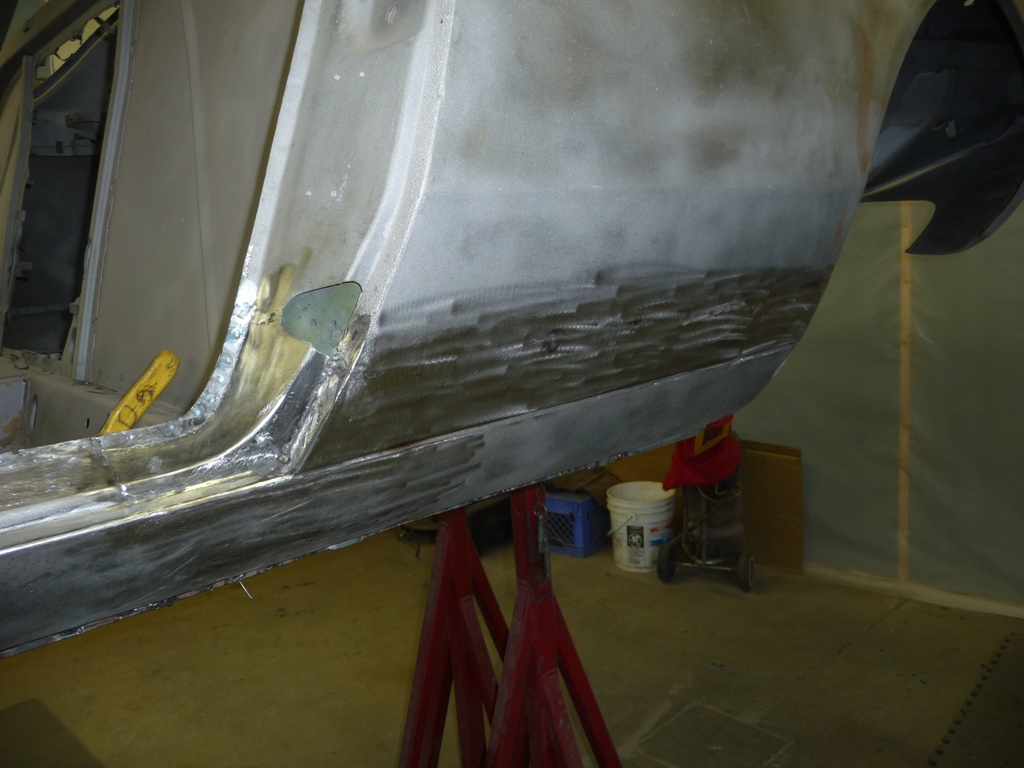
I'm not surprised on the rust. These cars were just driven new.

Seemingly all European cars of the era had little or no consideration for protecting the tub for anything really past 5 years. Porsche is included in that list.

Anti-corrosion ideas in my opinion are actually something coming out of US cars. Laugh at that if you want to.

Japanese cars are also incredible rust buckets as well from the times.

The Japanese ironically called the solution, the "not invented here" solution.

What they mean by that is that eventually they accepted the idea that they would have to use others ideas and proven procedures even though they did not invent it. WITHOUT CONSCIOUS of stealing the idea.


We here in the US for a long time felt that the Japanese success was because they took our ideas, stole them as it were, and improved and applied them to their products.

All of the Europeans positively refused to do that. Ever try telling the Italians, or any other European what or how it should be done?

You shouldn't if you value your physical well being, your families safety or a general tar and feathering. I guess that's an American thing though? Maybe being pelted with empty Cinzano wine bottles filled with gasolene? LOL!

That I used to see from the "University students" on the "left bank" in Paris around 1970. The US Embassy was often a target of that, but I digress.


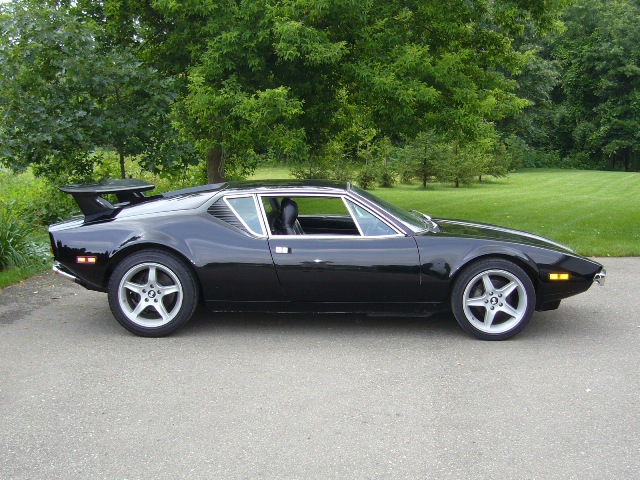
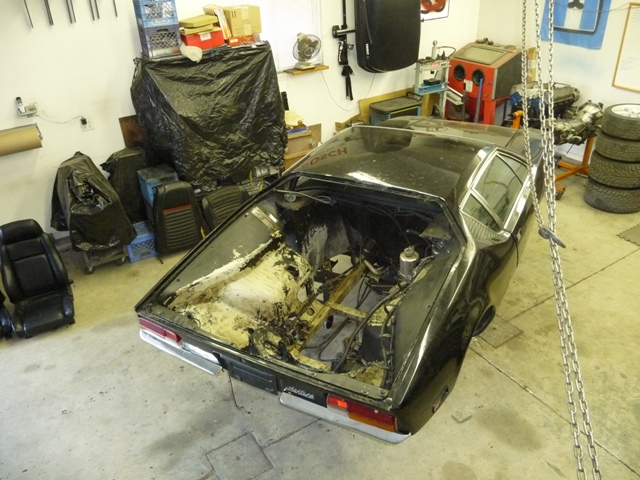
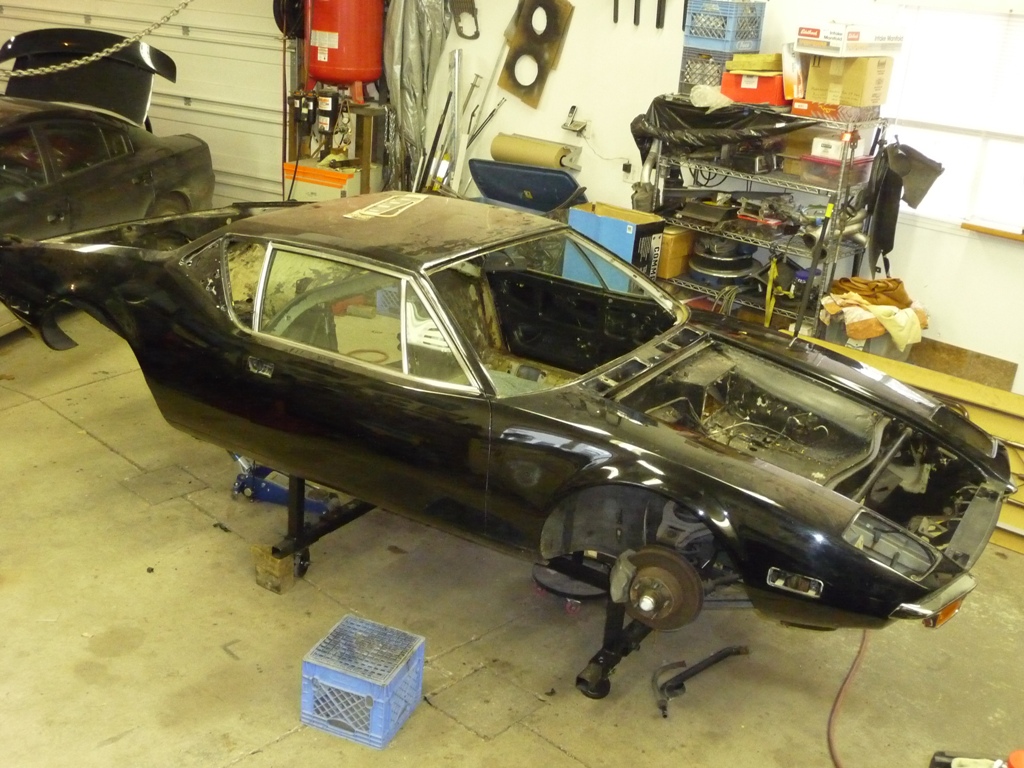
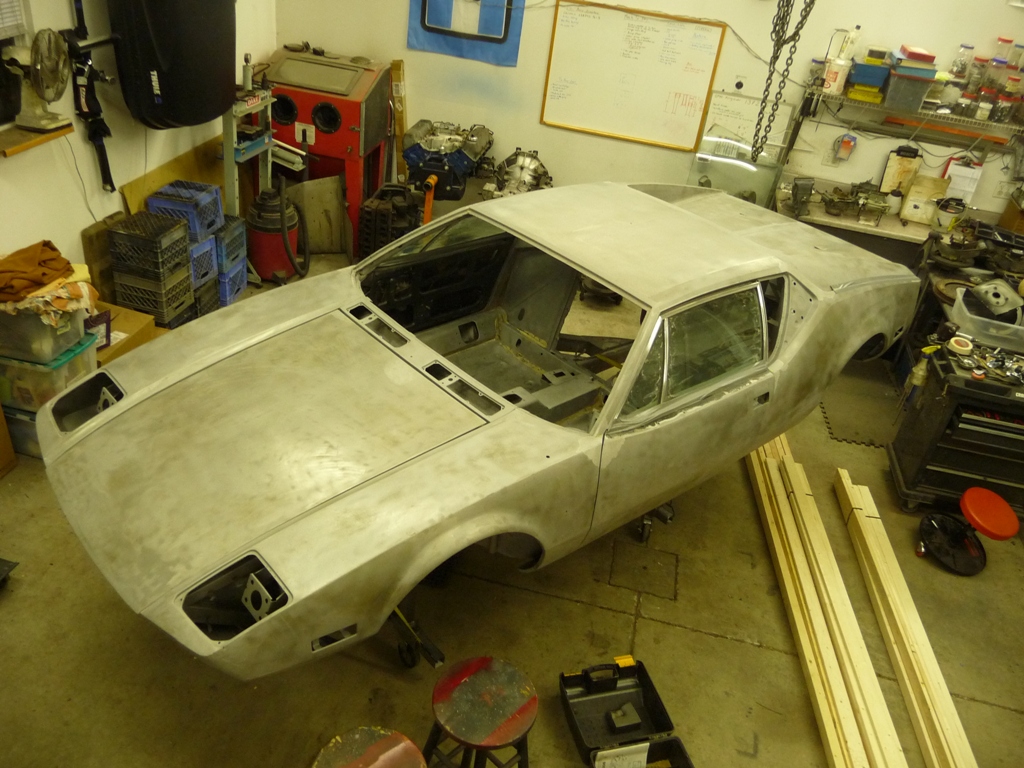
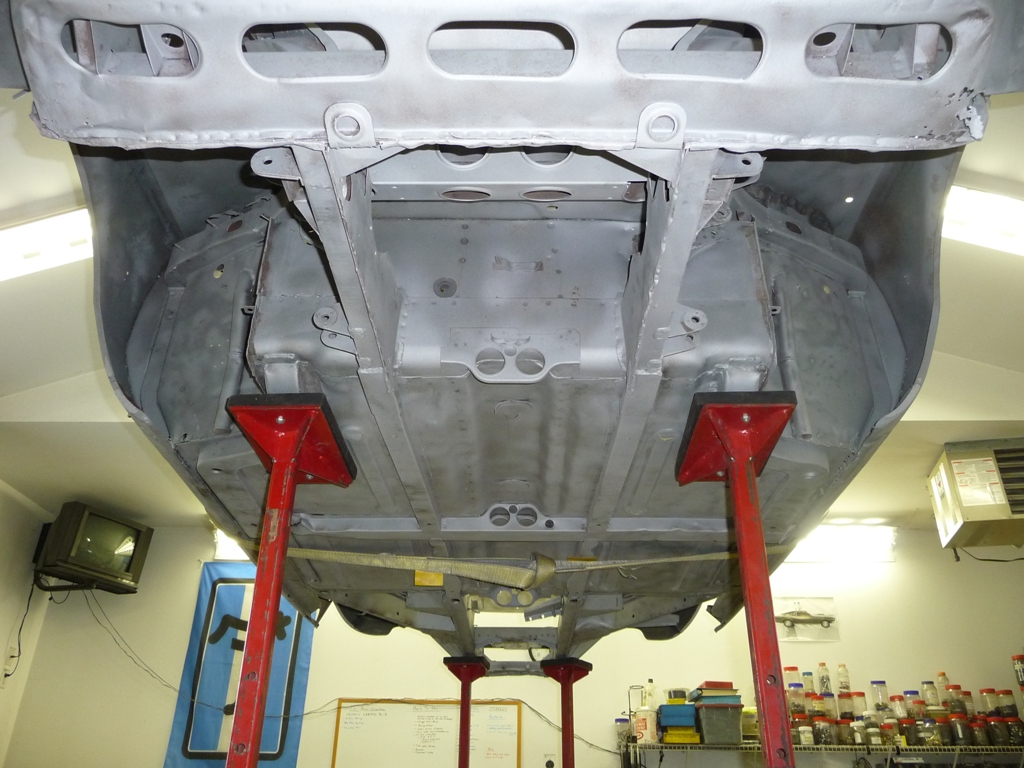
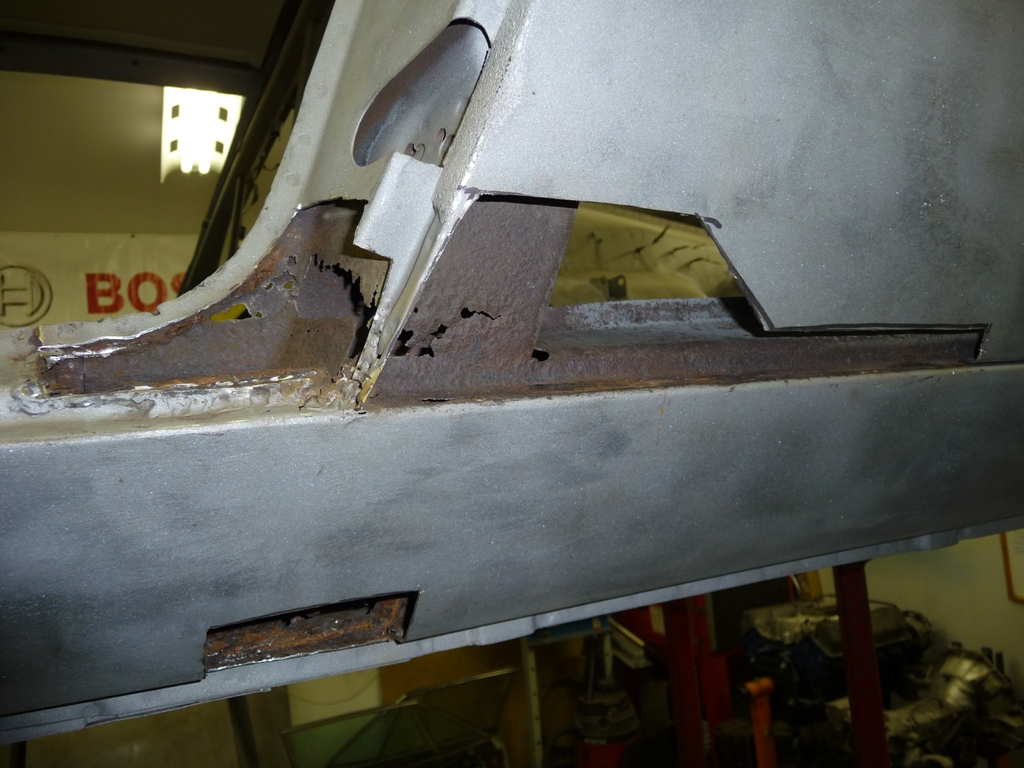
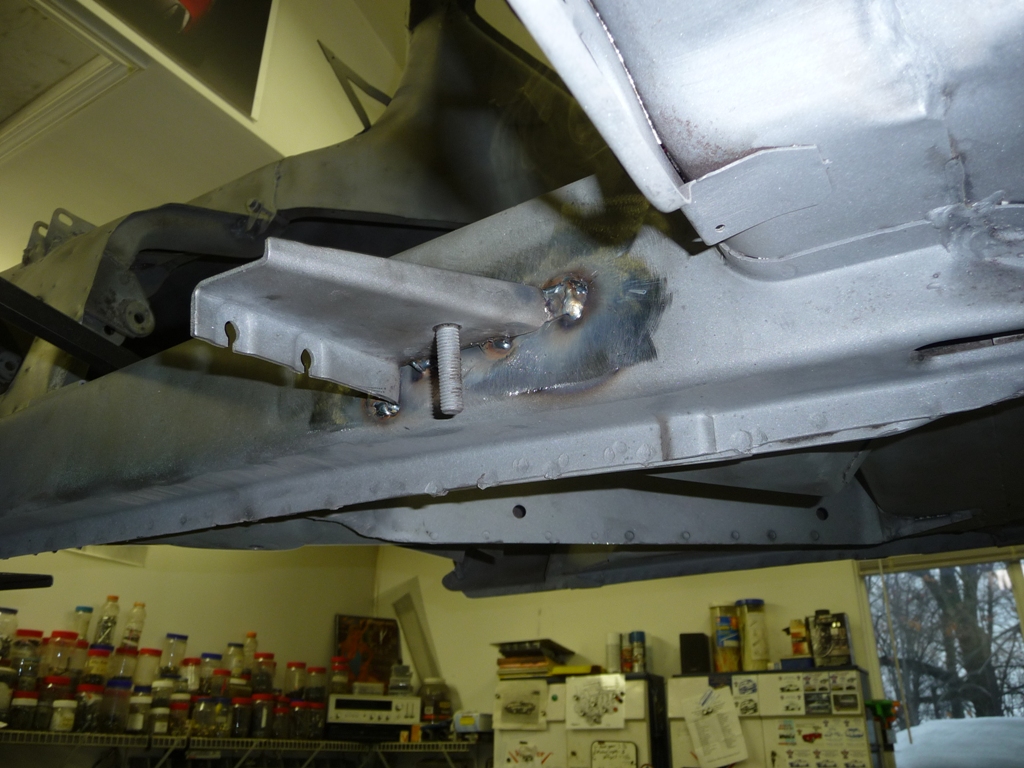
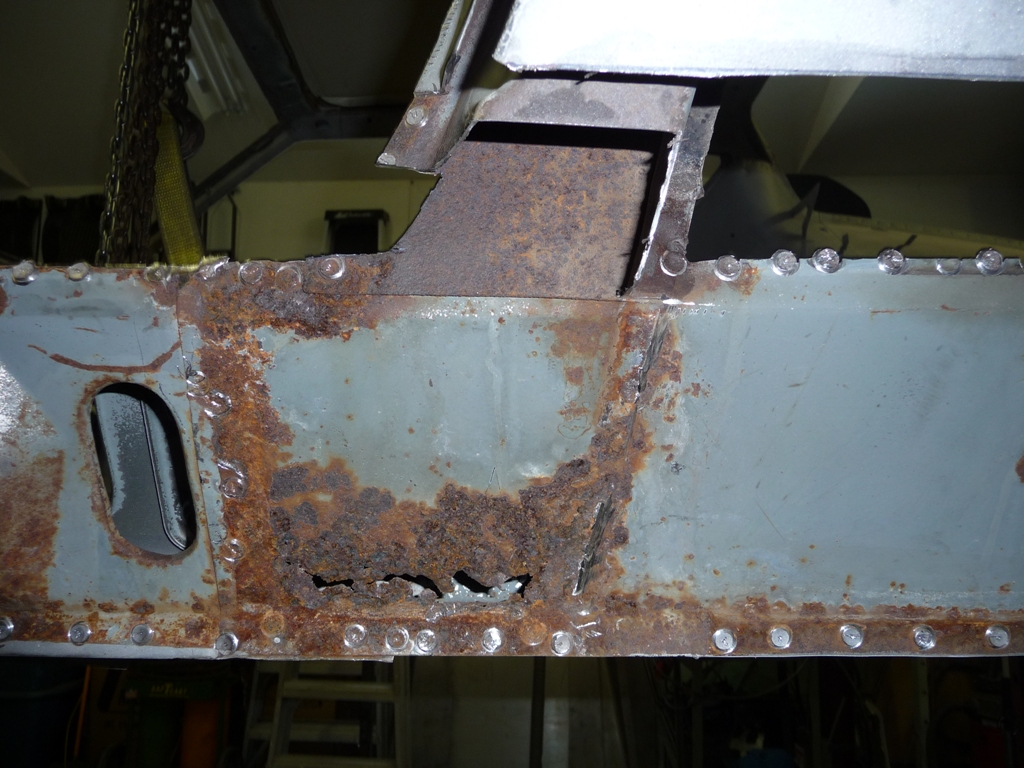
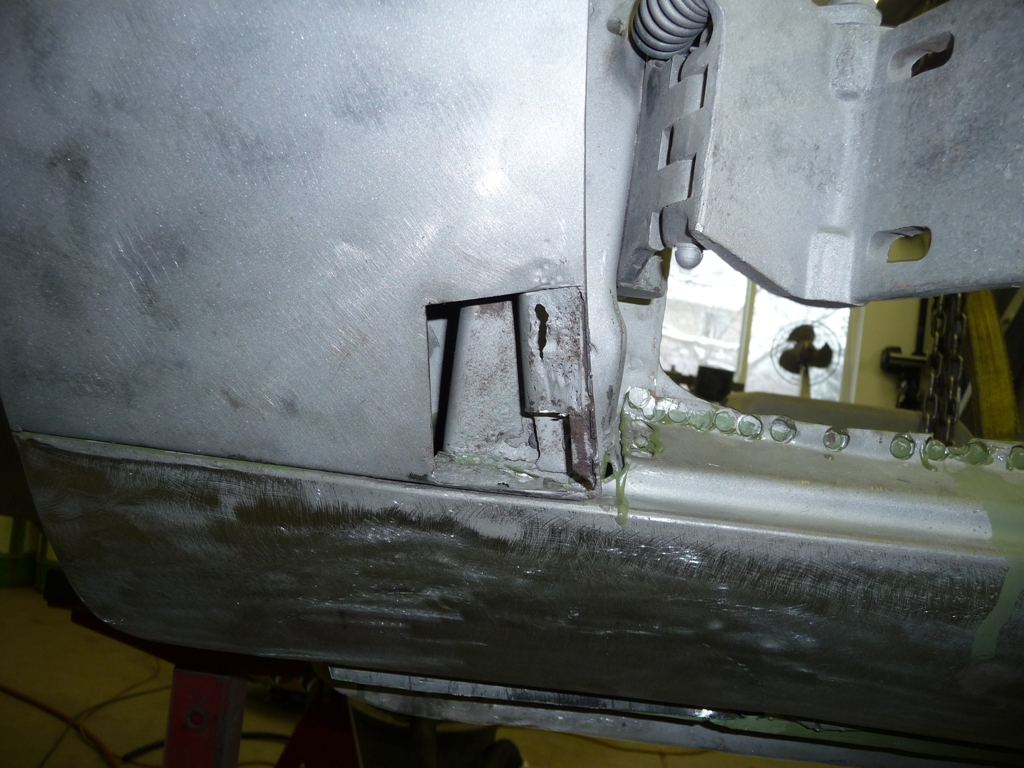
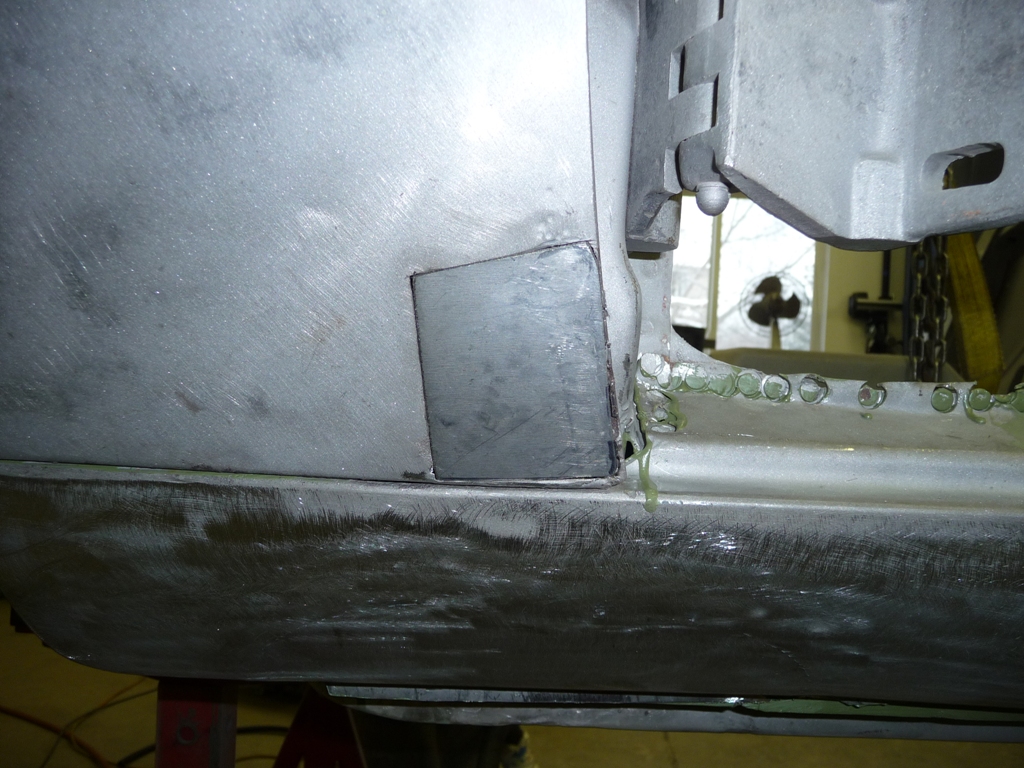
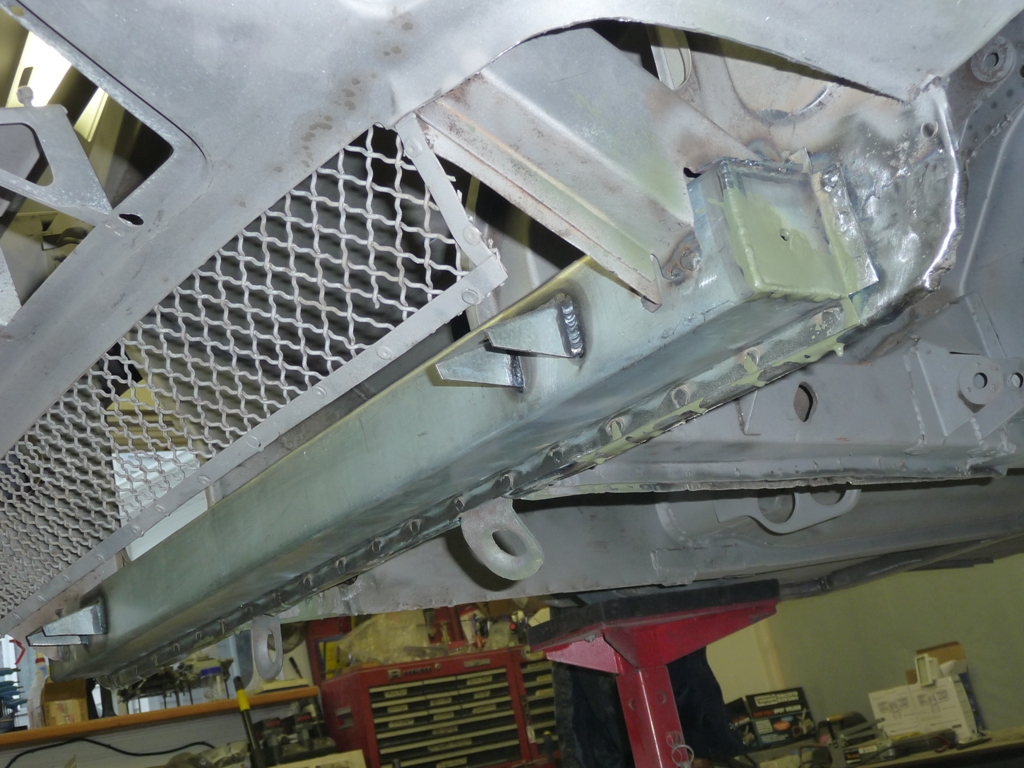
Looking at Detomaso cars. He actually really tried really hard to protect these things with about a hundred pounds of tar based undercoating. Unfortunately the concept of vat dipping the tub in electrostatic primer never caught on there at all. It is what it is though.


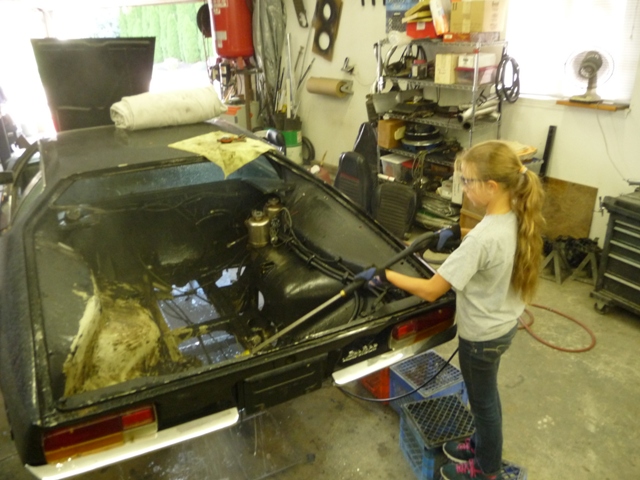
I personally have found that it is best to leave the windshield in place.

They are really touchy and crack very easily.

There are actually aftermarket windshields available here in the US, or at least recently were, by two different glass companies, cheap.

Try $275 each.

Problem is 1) they are aftermarket glass 2) they are thinner than the originals.

LAST time I looked, originals were about $1,200 each new. That was a while ago. I'm afraid to look now.

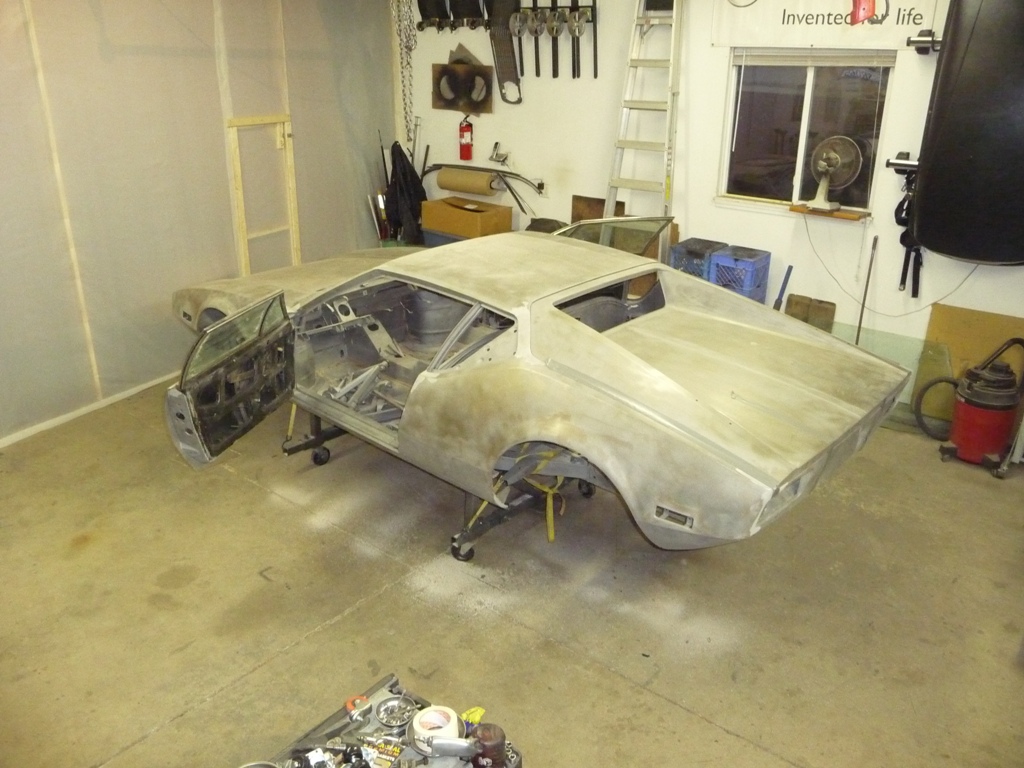
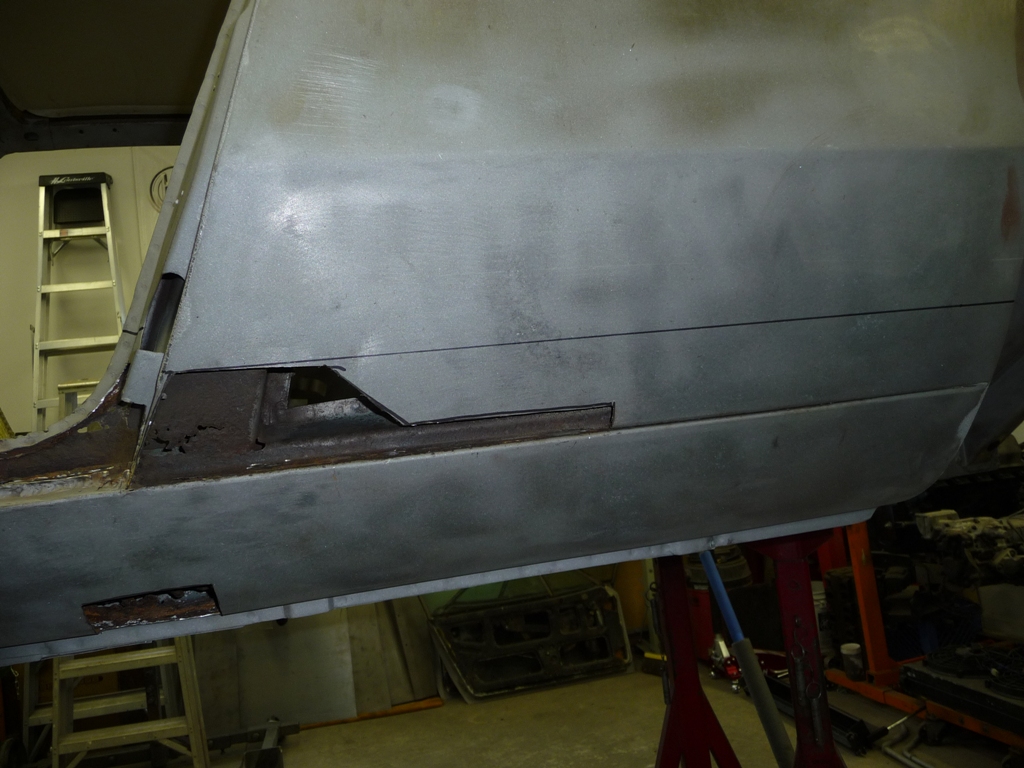
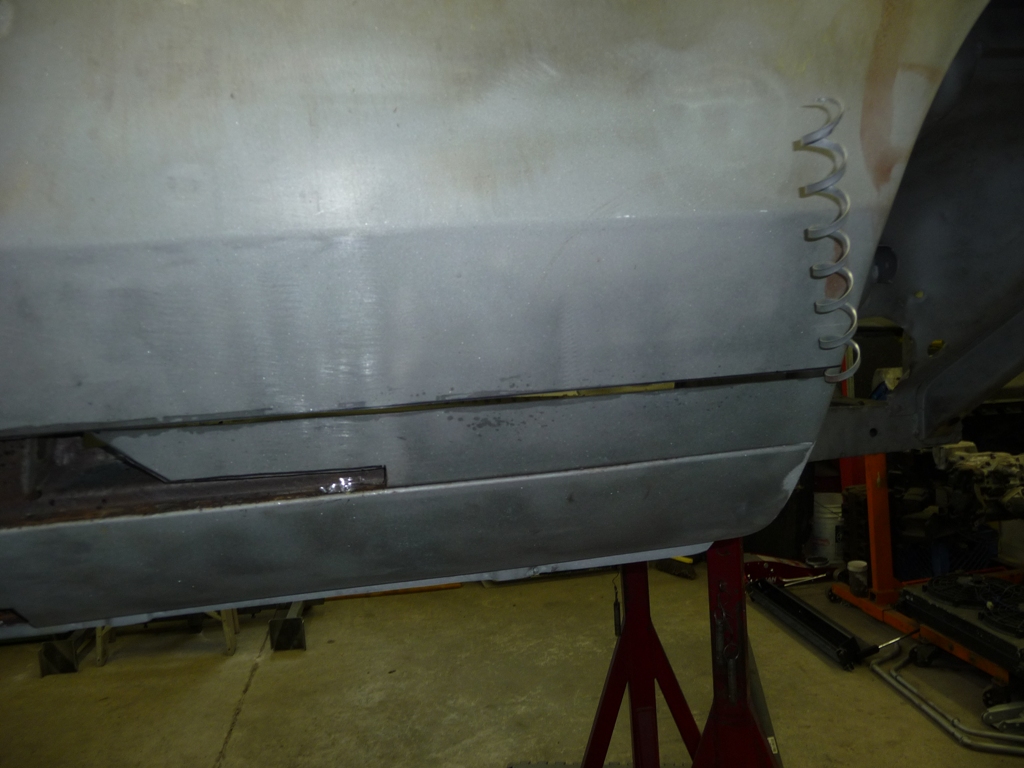
In an perfect Universe it would be best to remove the glass, strip off all of the paint and reprime, reseal and repaint.

In reality, you can leave it in place and run the new paint right up to the gasket and have it virtually undetectable.


When working on any of these cars it is difficult to know when to end your own personal degree of perfectionism and just learn to compromise?

In my case I have often found out this can be the cause of why what was supposed to be a 10 day project turned into three months or more.

I've been doing this stuff for over 40 years and you would have thought I would have learned better by now? That can't be considered a personality attribute on me? Roll Eyes


It's like worrying about your own personal possible medical issues, or developing them. You have to stop the paranoia for something that you can't control and just deal with everything the best you can when it is staring you in the face.

As James Bond was quoted, "you only live twice. Once when you are born, and once when you stare death in the face". (<...and survive it I presume?)


Maybe for me looking at rust and/or seriously twisted metal is the same thing? People like Johnny Woods are offering new injections of faith and hope? Wink


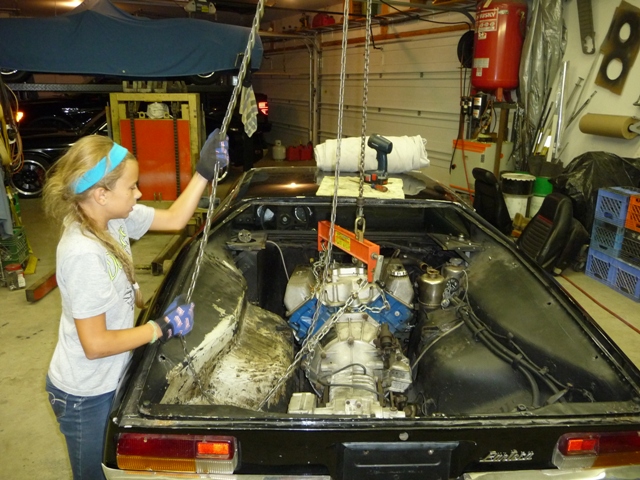
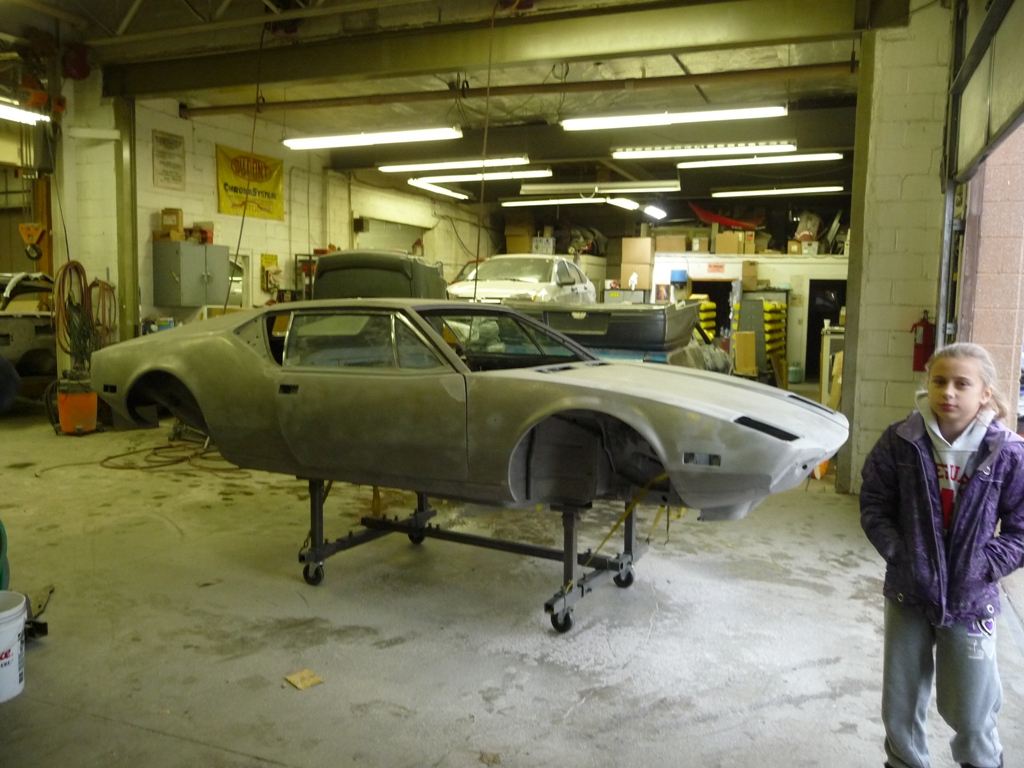
Best of luck on your project...and keeping it away from your daughter who is already claiming it as her's! roll on floor
Rob; Enclosing picture of my rear tub area and brake bracket. JAG13CAT here, #3639 restoration.
Envious of your work area.
Appears, like mine, bead blasting revealed more than what was expected.
Your post to me was we are near the same in the restoration process. With your aggressive approach, I'll still be afoot admiring your finished product. KEEP UP THE GOOD WORK - Enjoying the progress pics. Unfortunately, I'm stalled momentarily.
quote:
Originally posted by Bosswrench:
Chris is correct- that was a factory mod after Ford pulled out. The sump drops down, then moves forward about a foot for removal and the brake is in the way as is the crossmember. There's a decent illustration of the removable factory parts in the black factory illustrated parts manual, or you can easily make your current bracket removeable by welding an angle iron to it and screwing the angle to the frame so the assembly is horizontal and approx. level with the subframe.
The crossmember is more complicated to convert but is actually held in by the front lower a-arm attach nuts. I made one from scratch- it looked easier than modding the stock crossmember.


Have never seen a picture of that with the drive line out of the car. Anyone have one that they can post?
Hi Guys,
Thanks a lot for the pics and feedback. Very helpful. Now..one big question...based on the comments about sump removal...to be clear, are we talking about the oil pan, or some aftermarket deep sump something or another? If I can't get the oil pan off w/o lifting the engine...I might just consider such modifications.

OK, so hit the shop early this morning...knocked out the frame section replacement.


I'm pleased with outcome, other than a couple of the "spot welds" don't look like spot welds... I had the wire feed up a bit too high at first. I slowly dialed it back until I got the right rate. I was concerned not to bring it back too fast and burn through the floor.

Next project will be likely be removing a rocker panel...
Beautiful sheet metal work, Rob. I'm impressed by your progress. Yes- we're talking about oil pan access- the first of two access problems in a stock Pantera is the complete inability to remove the oil pan without raising it up a foot or two; most pull the engine/ZF. Rookie mechanics that assemble a 351-C engine for the first time sometimes install the oil pump driveshaft with the limiting star-washer missing or improperly positioned. Then someone else pulls the distributor, which lifts the little driveshaft up. Then it drops into the pan. And you cannot retrieve or reinstall it correctly without pulling the engine because the pan cannot be removed.

The other is, the fuel tank cannot practically be removed without pulling the engine. Moisture-holding crud builds up behind the tank, causing rust and sometimes structural damage.
Thanks, appreciated.
Hmm...interesting tid bits. I'll consider during assembly. I'm struggling with which/what mods to make, as I want to car to present as OE config.

OK, so decided to tackle the rear cross member next rather than the rocker, as I want to hit all the items that need the car so high in the air first.

Drilled out the spot welds and removed the badly bent bottom metal.


Straightened the structure...


Was talking with Kirk Evans last weekend and he mentioned the idea of incorporating jacking points into the car, I thought this sounded like a great idea since it doesn't really seem there are good locations to safely jack (i.e. w/o damaging sheet metal). So, while doing the straightening work, I came up with the idea to fill the rear cross member with plate steel with a split pipe for structure inside of the sheet metal. The idea is that the modification would be absolutely invisible (OE appearing) and would provide a rock solid jacking point. Here is the piece I created..


Here it is sitting in place (held up in place by the interference fitment).


Welding started. I will grind the welds clean and flush when done, then make a new bottom sheet metal section to finish it off. Thanks for the thought Kirk..great idea.
Rob love the solution for the rear support below the ZF...I did something very similar, but actually laid a 3/8" section of plate all the way across and it actually crossed over the frame section running the length of the car. Your idea of the half round tube welded to the underside of the plate is pretty sneaky to strengthen the plate!!!

I noticed there are heat marks around the sway bar mounting studs. Did you do anything to those? I cut the bottom of the mount channel off and slid a 1/4" piece of plating up inside that frame area and it is threaded where the two old bolts were...that way you can thread in new higher quality studs for the sway bars.

Also for the emergency brake, you can cut the old one off and there is a bolt on bracket that I purchased from one of the vendors that I'm sure you can make with your skills. It spans between the two frame rails and fits flush to the frame with the brake cables running on top. I'll try and find you a picture and post it.

While you are at the rear sway bar mounts on the rear A-arms tend to flex and bend...so I added a piece of 1/4" steel on the underside of the bracket and it is also threaded so you still thread the bolts into the existing nuts, but the holes in the 1/4' steel are bigger so the bolt threads through. Might be overkill but it's strong. I attached a picture.

You are making some incredible progress!!! Keep posting the pictures.

Attachments

Images (1)
  • rear_upper_arm_005
Rob,

When I did my door jamb repair I did it as I fit the doors. That is an area as you can see which has a lot of lead in it:

http://www.rc-tech.net/pantera1/door/door.htm

When I did some of my frame repair I also added support in some areas with notches and drain holes to ensure the areas still drain:


I also welded in some panels which helped clean up the look of the rear trunk:

http://www.rc-tech.net/pantera1/paint2/well.jpg
http://www.rc-tech.net/pantera1/paint2/wc2.jpg
http://www.rc-tech.net/pantera1/paint2/well6.jpg
http://www.rc-tech.net/pantera1/paint1/tub2.jpg

On the rear tail I added a plate to make sure it is a solid area which would not be damaged if I wanted to jack there:


Just some ideas

Gary
Hi Tom,
Thanks. No, I didn't make any such mods to the sway bar mounts. I only heated them to square up the studs, as they were going all directions. The bolt on e-brake bracket sounds like a good idea.

Hi Gary,
Thanks for posting the pics/ideas. The trunk upgrades look fantastic, nice finished off look. I love the clean look.

Side frame rails mods are a great idea, and I like the gussets you have added. I was talking with Kirk about ideas in this area too. While I like them all in principle, not sure I'm going to cut open the frame only for this. I may include some mods inside the front radiator support when I have that open.

I checked out other pages on your site. Nice metal work!

Thanks again.
OK, so I've been able to spend about an hour each night over the past few days in the shop. I finished welding and grinding the jacking pad, and made the tin cover. I'm going to hold off on welding it on, as I'm thinking I'm going to pick up a cheapo spot welder considering the pending rocker panel work.


Next was to repair the torn hole by the cross member.


Then I hammered out a dent in the frame rail just above the hole repair. I drilled a hole on the front side, and used a punch as a dolly and took my time with the hammer.


Next project will be to fill in the hole of unknown purpose above the dent repair.

Ta ta for now...
Hi Rob,

Looking great! Really enjoyed my trip up last week even though the drive was a bit snow-nasty. I loved your shop location with drive time to hobby cars less than 50 steps---yes a beautiful home with the garage/shop combo attached---can't beat it.


To all---Rob has allot of history in Mustangs with numerous restorations under his belt and a successful parts development background he may wish to explain in the future.

Keep up the good work my friend.

Kirk
Thanks guys...

Kirk, It was great meeting and chatting with you. You have a wealth of knowledge trapped in your grey matter... Big Grin I'm glad you made it home OK. For those that don't know, we had a couple weeks of wicked "real" winter weather in the region. Kirk decided to test his driving skills and come up at the front end of that stuff. I'd be happy to share whatever info is of interest to anyone. I've restored quite a few vintage stangs, mostly 69s. My personal 69 Mach was a 3yr journey of extensive modifications. If interested, you can view the build here: Rob's Mach I I'd be happy to share any nuggets of "wisdom" I've accumulated if anyone is doing one.

Mark...are you implying that I might be neglecting my family responsibilities.... Eeker um...well...

Regarding progress:
I managed to get up early both sat and sun and get a few hours in each day prior to the family emerging from their tombs. Got a few more small projects hammered out. Even tried out the new spot welder. I'll try and get an update posted tonight.
OK, so here's what I got done over the weekend.

Made filler patches for the holes of unknown purpose. My method in this type of situation is to make my patch an exact duplicate of the hole. Weld them and ground them clean. The wire is just a handle so I could hold them in place to shape and weld them. (both sides were the same project, so only showing the one)


Then a knocked out the E-brake reaction bracket. Cut the crappy welds off, ground it clean, welded up the holes and dents and remounted.


Then took on the frame under the driver's side engine mount. It was badly bent. Looks like a large rock was hit or something like that. I think this car spent more time in ditches...than on the road.. Big Grin I hammered the lip back, separated the joint, hammered the bottom panel down with a slide hammer, then shaped the bottom by using a punch through a drilled hole again.


Then, I tried my first project with the new spot welder and hot glued the bottom panel on the rear cross member.


As a refresher...here was the before...


Next projects will be continuing to straighten all the "off road" damage... A few more, then I'll likely pull the front valence. Ciao for now...
Thanks Rocky, appreciate that.

OK, so I was out of commission last weekend due to a minor eye surgery. No biggy, but had to sit on the couch all weekend. Managed to sneak in about two hours yesterday, and today the house was empty...so I got to rock a roll a little bit before the girls showed back up at about 4pm. I spent quite a bit of time finishing up repairs on the torn/damaged frame holes...


Both front frame holes looked like this...


These repairs concluded the underbody work, so I lowered the car down on the stands to get started on the rocker repairs.
After contemplating it for a while...I made the tough decision to cut off more 1/4 panel in order to get to the spot welds.


Oh crap....no turning back now.....


With all the welds cut or ground off, the rocker was removed to expose the ugliness in full light.


Here is what's left of the bottom of the "B" pillar.... Eeker


The inner rocker isn't all too bad. The section under the nastiness had to be removed though.


Then did basically the same procedure on bottom of the "A" pillar.


So...here's the total damage at the end of the day.


Unfortunately I will need to break out the sand blaster next weekend to clean up all the rust before I can proceed. Then, it's time to start fabricating some panels.
Nice work and very timely. I am doing almost the exact same work on my car right now, and seeing much of the same damage.
Looking at the first 4 pics of your last post - how did you get the jacking dents & crushing out of those underbody stiffeners? Mine has this damage too, and I have to decide should I straighten them out or cut off the damaged sections and make new. Rodney
Thanks Rodney. Great..glad I could be your ginny pig..uh.. I mean help out. Big Grin

Regarding the frame rail damage, I use a combination of slide hammer with a variety of different head attachments, hand hammering to keep areas of distortion in check, and some heat applied in specific areas to assist with making a specific area more ductile during shaping. i.e. if I'm slide hammering here and it's distorting over there (in a way I can't control different with hand hammer)then I'll warm up the area here a little where I want to movement, and hopefully to overall distortion is reduced.

I did the same assessment as you. Ultimately, I decided to try and straighten...worst case...I'd then cut it out and rebuilt it if I failed.

Hopefully I've adequately answered your question.... Rob
Thanks. That is helpful. I hadn't used heat yet so I will try that. I also drilled a hole opposite the damage and used an air hammer with a blunt tool, which worked Ok. In some places that is not possible. I'm a novice when it comes to body / sheet metal work, so I learn as I go. Just trying to learn in the less visible spots. Razzer
UFO, keep in mind if heat is used the metal oxidizes very easily after and must be coated. The air hammer works, but I find it a bit uncontrollable, so usually do it by hand. Takes longer, but I personally get a smoother result with less stretched metal.

So... I managed a couple hrs this past Saturday and had an empty house for about 5 hrs on Sunday. Being the procrastinator that I am...I tackled the easy one first. Big Grin

Cardboard template


Final fitment of patch


Tack welded, then I work around from each tack weld and add one more with each pass. I do this to try and avoid getting too much heat in the panel.


With all the gaps between the initial tack welds filled, I grind it clean.


Here is what it looks like from the inside of the rocker


Then the front piece....
same process...


Then...the hard one...
I decided the best approach would be to make a form, so I screwed a couple of 4x4s together and hogged out a form to hammer the metal into to try and get a near net piece to work with. It took the better part of Sunday...with OK/acceptable result for a sub structure.


Rob,

You may want to consider not closing off the bottoms of the A and B posts you repaired. They fill with dirt that filters through the construction holes from the upper structure, get moist just from the humidity and will rot the bottoms again. I am sure you're protecting the inside and the car will most likely never see weather again---I just prefer to have any dirt filter out through the rocker drain divots rather than get trapped.

Looking great!

Kirk
Feb 9th weekend progress... got the driver's rocker hammered out...
Started with addressing the drain holes mentioned by Kirk above. Decided to make holes both at corners and center. What the heck...belt and suspenders...

Then tackled the bottom sub structure of the A pillar.


On this one, I planned ahead and incorporate the holes into the form.


Then I tackled the rocker repair at the B pillar.


This line was kicking my butt.... Ultimately I had to call on my shop helper for another set of hands in order to get it. I figured with the door closed, this line runs parallel to the door bottom, so it had better be right.


Then filled the bottom B pillar hole.


Then the A pillar hole.


Then coated it all in the Eastwood "Internal Frame Coating".


Here is the "before" again...


The driver's side is now ready for re-assembly.
I must say these pictures are an inspiration. I can weld, and I can do work like shown (almost), but I rarely have the patience to do it that great in a place where it can't be seen. I remember fixing a floor pan on my orig Camaro, spent more than one day bending to get the right profiles, and nobody will ever see it. Is it worth it? Not if you do it for a living, but if you have time to do it on your own pride and joy, that's great. applause

One question. Some pictures indicate that you haven't fully welded on mating surfaces, only spot welded, or was it just WIP? I always weld fully, is there a reason not to, can it get too solid so it'll twist other things?
BTW, here is a door hanger which made things much easier for me to put doors on and pull them off multiple times:

http://www.rc-tech.net/pantera1/dh/dh.htm


Great for painting too. The doors should be on the car for the paint color to flow correctly. I did the next best thing. I had them next to the car and ran the paint gun form one panel to the door to the next panel. It's a little ahead of you but just showing more value in the door hangers:

http://www.rc-tech.net/pantera1/paint3/done2b.jpg
Well thanks Mikael. I've been called many things, but never inspirational.. roll on floor
Believe me... when it's taking 4 hours to bend up a single piece, I'm questioning it.... But if I do anything less, then I wouldn't feel proud of it. For me, that seems to be the main motivator. Just how my head works...no sense getting into an argument with myself about it... hell I always get confused about which side wins anyway...

No, I have not fully welded the sections I have worked on. In fact, I am trying to replicate the approximate spot weld count from original assembly also, as I don't know what I'm gonna have to do on the other side. This leads into a theory of mine that I'll share...My theory is that the chassis is a system, like many others in the complete vehicle. The chassis components/pieces as they are assembled must work in a balanced way (symmetrically). So, if I ever make a modification to one side, I make the same modification to the other side. In this case, I have no idea what's on the other side yet. I believe this philosophy ensures the foundation of a well balanced car. That blah blah blah said, I am restoring this car to be original (expect for some bolt on goodies of course...), so have no intention of doing any seem welding. My 69 mustang on the other hand, did receive a fairly comprehensive seem welding treatment. So I'm with you regarding the performance advantages.

Comp2...not a bad idea..! Especially when it comes to filling the quarter panel piece I cut out. That could save some heartache later.
Those door hangers look slick. They look like real back savers. I may just have to fab some of those up. You're not gonna ask for any royalties now....are you...?
Excellent comp..I'm gonna have to fab some of those babies up.

Thanks Tom. I'm just north of Pontiac.

Thanks Rapid. Heck.....I'm faking my way through it.. Wink

OK, so didn't manage to get too much done this weekend, my back was acting up...so had to take it a little easy...

Decided to use a flexible shaft bore scope and inspect the passenger side rocker to see if dis-assembly to work on the bottom of the B pillar would be necessary. Upon inspection, I found a whole lot more left over sand blast media than I had anticipated. So, used some different sizes of rubber tubing on the vacuum and cleaned it out. Then used an old antenna shaft to slide down in the rocker with the scope to "flick" out any left over rocks that were jammed in. It was a cool task. It was like doing arthroscopic surgery on my car. The good news...the B pillar looks fine. It will survive. It has surface rust, but I'll coat it with the frame coating and it will pull through w/o surgery being needed.


inside of B pillar...before..


inside of B pillar...after.


After all cleaning, scraping..vacuuming... The upper piece is the B pillar, the lower is the out rocker skin (the camera rotated)


Then tackled the hole in the drivers front fender.


Then got started on the tedious task of welding the rocker back on. Got started...but long way from finished.
Thanks Steve.
Regarding your request.....here's how I do it. Of course this is just one guys approach /opinion....

I use this guy to cut my holes. This way I get nice clean edges. Symmetrical /squared off shapes are always easiest.


Then, as shown in many pics, I "ONLY" do tack/spot welds. This is so that you don't burn through (as much...;-) and so you don't get the panel too hot, as it can distort if it does. Then I go around filling in gaps..around and around, one spot with each pass until all gaps are filled and it's fully welded. If I see some spots that need a little extra I go back and hit them again. It's always easier to grind once, rather than grind a small area a second time.

Then, to grind, I use this guy. I only use 3M grinding discs (as shown). They are bloody expensive, but I think worth it. For each fresh repair I use a new disc. This sucks because of the cost, but it is necessary. This is because it is nice and stiff when new. With it being stiff, I can grind the high points with reducing how much the grinder runs on the body panels. I try my absolute best to only have the grinder running on the welds, as any running on the body panel thins it. This is also why I don't like going back and adding more weld later. It's really tough to grind a little spot w/o touching the surroundings.


Then I do a quick run across with this guy to give the surface a uniform texture. Really no "need" to do this, it just blends the appearance. Which is totally irrelevant since they will get a skim coat of body filler...but I just like how it looks more in the mean time... Big Grin


And that's that...not rocket science...just patience and care/attention. Hope this helped and answered your questions adequately. Rob
Rob, thanks for posting all the great info....all of a sudden after seeing the pictures of your work and reading the tutorials it's not that daunting of a task to tackle some of the common problems we all seem to have. Do you buy any special metals when replacing rocker panels or doing body repair? Just curious if any special metal works better?
quote:
Then, to grind, I use this guy. I only use 3M grinding discs (as shown). They are bloody expensive, but I think worth it.

Rob, if I may make a suggestion, just like the 3M grinding discs work great, so do the 3M green cutoff wheels. I use nothing else but those. More expensive, but worth it. Please give them a try and tell me how they compare to the Chicago ones. Thanks.
Rob, thanks for the very detailed description of the restoration process. I am about to start restoring my # 1685 and see what you find under the paint, gave me panic. (considering my Pantera is older and the base looks worse than what you had from the start) My idea is to make a sandblasting and correct whatever is necessary. I have some doubts: some of the blogs recommend do not remove the windshield. As I see in your photos, you don't remove the side windows, why? What do you recommend?
Please follow posting, for me will be an insuperable guide. thanks

Attachments

Images (1)
  • 1685
Hi guys,
My pleasure...

Tom, no special metals. I match the gauge of the metal, but that's it. Only plain untreated steel though.

Firstpantera, yes..I can't disagree. Didn't mean to imply I had a preference with the wheels. I should probably have flipped it over so no brand showed. I find the 3M last longer, however Harbor Freight carries these Chicago ones in a really thin width, so the cut line is narrow and clean. I do like that aspect. Haven't found the 3M in such a narrow thickness. But again...I'm a big 3M fan when it comes to abrasives.

Banzai, One word of caution with sand blasting, it can warp your panels. I had my body panels chemically stripped first, then lightly blasted with plastic media. The rest of it was only media blasted. I would remove the windshield and the side glass. I only left mine in because I ran out of time to get them out before my scheduled date/time at the media blaster.

Ciao, Rob
When I stripped our '72L to bare metal, I used Aircraft Stripper (sold in a gallon can). And I only chemically stripped to within 1" of all edges. Reason was, the chemical stripper can creep around corners and under panel overlaps. Then weeks or months later, after a repaint it bleeds back out.... I used a sanding disc much like was shown to remove the unstripped edges of old paint. There were three different colors in there.

Also found what looked like 'factory-bondo'; a light blue blob covered a huge oil-can dent on the front fender tops near the windshield. By legend, Panteras were shipped in the holds of freighters and stevedores routinely WALKED on the cars to get to the other side of the hold. The distributors in CA fixed things as fast & cheaply as possible so the brand new cars could be sold. Aircraft Stripper slowly removed the filler-blob, and a really hard punch with my fist popped the dent up into its original position with no filler at all needed. My knuckles healed up in a few days.

I was told by a pro that much the same thing happens with wholesale sandblasting of cars. If you escape panel-warping, the residual dust from blasting NEVER completely comes out of the nooks and crannies during cleaning. But some will come out during subsequent spray-painting and screw things up.
All good points Bosswrench!
I'm currently trying to figure out a way to vibrate the chassis to shake out the sand. I need a paint shaker or something to mount to it....

Here's this weekend's progress...

Tackled the passenger side "A" pillar and rocker repair.


Designed in drainage...I like this one better than the others from the driver's side...


Gave a squirt of the frame coating before closing it up.


Disassembled the front valence...found some more ugliness to take care of... Frowner


Time to call Johnny... Big Grin
Hi guys,
OK, so here's what I got done this past weekend.
Started with straightening the left front corner, which had a mild cave in at some point in it's life. It was surprisingly difficult to take pics that showed the benefit of 4 hours of hammering Big Grin


Then, I straightened the grill section. Added red lines for reference.


Then I tackled the front cross member...man that was ugliness.


To address the rust in the radiator support behind the cross member, I decided to cut the bottom half off and rebuild it.


Now I just need to get my parts from Johnny at Woods Automotive, so I can start gluing it all back together again.
Last edited by robborruso
Hi K, Thanks.
Honestly, I don't want to do any modifications from OE config other than bolt-ons. So, I don't want to cut them off. The down side...they will be visible through the grill. The car did have electric fans when I got it which I will reuse (or replace if deemed necessary after closer inspection). What do you mean by air plenum though? Is there some sort of plenum that it is suggested that I fabricate?

Thanks, Rob
quote:
Originally posted by Rob Borruso: What do you mean by air plenum though? Is there some sort of plenum that it is suggested that I fabricate? Thanks, Rob


It's just a shroud (plenum) mounted on the backside of the radiator core that the two sucker fans are mounted on so air is drawn more evenly through the core. Like below.

K

Attachments

Images (1)
  • newrad2
Last Sunday I tackled the fabrication of the lower radiator support/header panel and started "hot gluing" stuff back together.


Here's a video of how I'm trying to shake the sand out of the chassis: de-sanding the chassis

I'm using an pneumatic eccentric motor clamped to the chassis. I can't believe how much sand is still coming out of the nooks and crannies... unreal. I've already spent about a half hour with the blow gun when I first brought it home. If this doesn't cut it, I'm going to get a paint shaker and mount that to the chassis. That should do it... Big Grin
Rob,

Awesome and inspiring work. You are making great progress. I like to think you spend as much time as I do staring blankly at the car letting your brain determine the logical next step, but I'm beginning to think you just go ahead and do it.

The "Force" is strong in you! Big Grin

Mark
Hi Steve,
No, I can't take credit for the rad support. I simply didn't think I could make one as nice as Johnny Woods in the UK, so... called on him to fab one up, along with the lower valence. Thanks for the positive remarks.

Hi Mark,
Thanks to you too. I always wonder if anyone is interested in what I've got going on... Smiler And....yes...I do spend time staring. But frankly spoken it pisses me off when it happens, as I feel I'm "wasting" precious garage time and I consciously try and push through it as fast as possible. When it happens I try and turn it productive as quick as I can, by using that "thinking" time to clean up/straighten up the shop while I'm pondering the situation at hand. I appreciate hearing that it happens to others.

Won't get any garage time today due to "girl" things going on... but should be able to spend some quality garage time tomorrow morning before I'm sucked back into the abyss that is teenage competitive dance. Hoping to get the valence glued on. Then I'll feel I'm really rounding the home stretch for metal work. Once done, I'll really only have the door jam corners to tackle. Oddly...really looking forward to starting body filler work....
Y A H O O .... metal replacement work is done! I got up early on Sunday (yep...Easter Sun :-)... before the house woke up and rocked out the final project. Specifically, the passenger door jam.

Before:


During:


Afta:


I'll take a quite hiatus from her to get the wife's stang ready for the season, then get crackin on the bump and body filler work. Heck...down hill roll from here... ha..! roll on floor
Rob thanks for posting all the great work and progress you're making on your car....it really does help with our own cars road map and if nothing else a "Just Do It", "Jump In" attitude! And yes as several others have acknowledged, I too sit pondering projects and frankly that constantly slows my progress a lot. Especially when you see some of the amazing cars that some of the other owners on this forum have...I want the amazing car, but then it means a full chassis/body blast and that just isn't in the cards. Congrats on your progress and energy!
Thanks David. Sucks getting out of bed early on the weekends, but then once I'm out in the shop...I'm happy I dragged my butt outa bed, and wishing I had been strong willed enough to have gotten up earlier.

Comp.... tons 'O' lead man. Whoever did the lead work on this chassis was an artist. It really all was done very well. It's a bitch to remove though. Clogs up my grinder discs...which as we've discussed before..aint cheap. Found the easiest way is to melt it out of the way.

Thanks Tom. I'm really glad that it's all found of value to others. Nice to know I'm contributing to the team. Yep...the analysis paralysis is frustrating. Sometimes I push through it a bit too aggressively and regret a move which has to be undone/redone...sometimes it's just hard to know when it's time to stop pondering and start doing. Hoping I'm on my way to my amazing "bucket list" Pantera. Been waiting since ~ 1983. Big Grin
Rocky,

Rather than add an attachment to the post you use the tools at the top to add images that are stored on another site, I use photobucket. You want the icon that looks like a picture next to the envelope icon. Resize your photos to 800x600 or 1024x768 and upload them to photobucket. Then you can click on the picture you want to add and then click on one of the options to copy the link URL. Paste that into the tool box you have selected to use. Once you accept the selection in the tool box it will place the correct code into the body of your post that will in turn display the image in your post. This allows you as you asked to place multiple pictures in the body of the post and have text between them.

Steve

Add Reply

Post
×
×
×
×
Link copied to your clipboard.
×